


 Рейтинг: 4.2/5.0 (1612 проголосовавших)
Категория: Android: другое
Автоматом скачалась новая прошивка, написала, что ПО успешно обновлено,
дальше вот так и пишет, сделал data/factory reset стандартным методом,
взял с 4pda:
Как перезагрузить аппарат, и как сделать хард ресет (hard reset), как зайти в Рекавери меню?
Простая перезагрузка: держать кнопку вкл (power) 6-8 секунд.
Как сделать хард ресет (hard reset)?
Внимание. Процедура удалит ВСЕ ваши данные.
При этом данные некоторых программ могут остаться.
Хард ресет через Настройки: Настройки - Конфиденциальность - Сброс данных.
Хард ресет через рекавери (wipe data/ factory reset): Зайти в меню Рекавери выбираем пункт: wipe data/factory reset, далее - Yes
Мастер ресет через сервис-код:
Внимание. При этом варианте сброс происходит сразу после ввода кода + очищается внутренняя флеш-карта \sdcard!
Android 2.3.x: *2767*3855#
Android 4.x.x: также через сервис-код *#87976633#
Хард-ресет не очистит внутреннюю карту карту памяти (за исключением сервис-кода). Для того, чтобы очистить ее выберите:
Настройки - Память - Отключить карту памяти (для Внутренняя карта памяти), и далее здесь же Форматировать карту памяти.
Как зайти в Рекавери меню?
На ВЫКЛ телефоне - нажимаем одновременно кнопку Громкость вверх + Хоум (средняя кнопка под экраном) и затем кнопка Вкл, держим до появления первой надписи. Кнопками громкости выбираем нужный пункт(например): wipe data/factory reset и тп, потом нажимаем Хоум. Выйти из данного режима - выбрать пункт меню reboot. или долго держать кнопку включения.
Не помогло.


If you're getting apps from other sources, not just from SlideME or Google Play (who have their own market apps), then this app may be of help to you.
App Installer will scan your internal storage and/or SD card for apk files and show you a single unified list of all the apps you can install.
You'll get the following information :
You will also see the installation status for each app, as follows:
Note that after installing apps or uninstalling apps, a rescan is needed for the statuses to be refreshed.
Then, it will only take one touch of the finger to either install the app, or delete the apk file.
Also, you can share your favorite apps with your friends by sending them an app via email.
Note that for email sharing to work, an email app (built-in or third party) needs to already be installed and set up on your device.
The app has an Update Notification feature. If an update is available, the app will let you know.
The app works on all devices (not just phones) running Android OS, with internet access via WiFi or your mobile carrier.
Although it started as an ad supported app, starting with version 2.4 the ads were removed and the app became 100% freeware.
Permissions
INTERNET - required by the Update Notification feature
WRITE_EXTERNAL_STORAGE - required for deleting the apk files from the internal storage and/or SD Card
READ_EXTERNAL_STORAGE - required for accessing the internal storage and/or SD Card
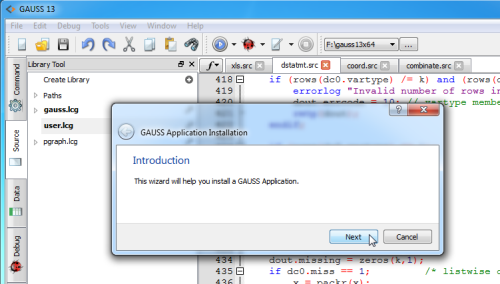
We will install by default a new Application Installer. The existing gnome-packagekit frontends (gpk-update-viewer and gpk-application) will still be available, but not installed by default.
gnome-software is available in git.gnome.org. A first release of gnome-software has been made on September 2 and it has been built for f20 on the same day.
gnome-software can already list installed applications, install and remove applications and trigger offline updates. gnome-settings-daemon, gnome-shell and gnome-session have been updated in 3.9.91 to integrate with gnome-software (when available) for offline updates.
Detailed DescriptionThe current PackageKit frontends are focused on (surprise!) packages.
The new tool, named gnome-software, is designed from the beginning for installing applications. It will present applications with information that is relevant to users (icons, screenshots, reviews, descriptions, ratings. ) instead of information that is relevant for packagers (dependencies, package size, file lists. ).
It will be possible to search and browse for available applications.
gnome-software will also be used to present information about available and installed updates. Notifications about available updates will launch gnome-software if the user chooses to see details. gnome-software will be fully integrated with 'offline updates' - updates will all be offline updates, regardless whether they are initiated from the gnome-shell menu, a notification, or the gnome-software UI, which will finally address bug 863592.
Not all of the listed features will be available in F20.
For F20, we will focus on completing the offline update experience and use gnome-software for it instead of gpk-update-viewer. Basic application installation and removal will also work. We are planning to show icons and descriptions for application, but most of the needed metadata for uninstalled applications (icons, descriptions, categories) will be provided statically for a limited set of applications. Screenshots, ratings, popularity and interactive features like reviews will have to wait until F21.
For F21, we will focus on adding more application metadata (screenshots, ratings, popularity, etc) and interactive features like reviews. We will also work with the Fedora infrastructure team to obtain the metadata online for all applications instead of shipping it statically for a limited set. To obtain this data in a decentralized an scalable way, we will be adopting a subset of the appstream data format to describe applications in a simple, translatable XML file that can be included upstream with the applications.
Benefit to FedoraFedora gets an improved application installation experience. Having a proper way to present available applications to users will open the door to making more rational decisions about what needs to be included in the spin, and what can be presented as a featured application in the installer.
Beginning with API Level 8, you can allow your application to be installed on the external storage (for example, the device's SD card). This is an optional feature you can declare for your application with the android:installLocation manifest attribute. If you do not declare this attribute, your application will be installed on the internal storage only and it cannot be moved to the external storage.
To allow the system to install your application on the external storage, modify your manifest file to include the android:installLocation attribute in the <manifest> element, with a value of either " preferExternal " or " auto ". For example:
If you declare " preferExternal ", you request that your application be installed on the external storage, but the system does not guarantee that your application will be installed on the external storage. If the external storage is full, the system will install it on the internal storage. The user can also move your application between the two locations.
If you declare " auto ", you indicate that your application may be installed on the external storage, but you don't have a preference of install location. The system will decide where to install your application based on several factors. The user can also move your application between the two locations.
When your application is installed on the external storage:
Warning: When the user enables USB mass storage to share files with a computer or unmounts the SD card via the system settings, the external storage is unmounted from the device and all applications running on the external storage are immediately killed.
Backward CompatibilityThe ability for your application to install on the external storage is a feature available only on devices running API Level 8 (Android 2.2) or greater. Existing applications that were built prior to API Level 8 will always install on the internal storage and cannot be moved to the external storage (even on devices with API Level 8). However, if your application is designed to support an API Level lower than 8, you can choose to support this feature for devices with API Level 8 or greater and still be compatible with devices using an API Level lower than 8.
To allow installation on external storage and remain compatible with versions lower than API Level 8:
When your application is installed on a device with an API Level lower than 8, the android:installLocation attribute is ignored and the application is installed on the internal storage.
Caution: Although XML markup such as this will be ignored by older platforms, you must be careful not to use programming APIs introduced in API Level 8 while your minSdkVersion is less than "8", unless you perform the work necessary to provide backward compatibility in your code.
Applications That Should NOT Install on External StorageWhen the user enables USB mass storage to share files with their computer (or otherwise unmounts or removes the external storage), any application installed on the external storage and currently running is killed. The system effectively becomes unaware of the application until mass storage is disabled and the external storage is remounted on the device. Besides killing the application and making it unavailable to the user, this can break some types of applications in a more serious way. In order for your application to consistently behave as expected, you should not allow your application to be installed on the external storage if it uses any of the following features, due to the cited consequences when the external storage is unmounted:
Services Your running Service will be killed and will not be restarted when external storage is remounted. You can, however, register for the ACTION_EXTERNAL_APPLICATIONS_AVAILABLE broadcast Intent, which will notify your application when applications installed on external storage have become available to the system again. At which time, you can restart your Service. Alarm Services Your alarms registered with AlarmManager will be cancelled. You must manually re-register any alarms when external storage is remounted. Input Method Engines Your IME will be replaced by the default IME. When external storage is remounted, the user can open system settings to enable your IME again. Live Wallpapers Your running Live Wallpaper will be replaced by the default Live Wallpaper. When external storage is remounted, the user can select your Live Wallpaper again. App Widgets Your App Widget will be removed from the home screen. When external storage is remounted, your App Widget will not be available for the user to select until the system resets the home application (usually not until a system reboot). Account Managers Your accounts created with AccountManager will disappear until external storage is remounted. Sync Adapters Your AbstractThreadedSyncAdapter and all its sync functionality will not work until external storage is remounted. Device Administrators Your DeviceAdminReceiver and all its admin capabilities will be disabled, which can have unforeseeable consequences for the device functionality, which may persist after external storage is remounted. Broadcast Receivers listening for "boot completed" The system delivers the ACTION_BOOT_COMPLETED broadcast before the external storage is mounted to the device. If your application is installed on the external storage, it can never receive this broadcast.
If your application uses any of the features listed above, you should not allow your application to install on external storage. By default, the system will not allow your application to install on the external storage, so you don't need to worry about your existing applications. However, if you're certain that your application should never be installed on the external storage, then you should make this clear by declaring android:installLocation with a value of " internalOnly ". Though this does not change the default behavior, it explicitly states that your application should only be installed on the internal storage and serves as a reminder to you and other developers that this decision has been made.
Applications That Should Install on External StorageIn simple terms, anything that does not use the features listed in the previous section are safe when installed on external storage. Large games are more commonly the types of applications that should allow installation on external storage, because games don't typically provide additional services when inactive. When external storage becomes unavailable and a game process is killed, there should be no visible effect when the storage becomes available again and the user restarts the game (assuming that the game properly saved its state during the normal Activity lifecycle ).
If your application requires several megabytes for the APK file, you should carefully consider whether to enable the application to install on the external storage so that users can preserve space on their internal storage.
© 1996-2016 Roedy Green of Canadian Mind Products
DisclaimerThis essay does not describe an existing computer program, just one that should exist. This essay is about a suggested student project in Java programming. This essay gives a rough overview of how it might work. I have no source, object, specifications, file layouts or anything else useful to implementing this project. Everything I have prepared to help you is right here.
This project outline is not like the artificial, tidy little problems you are spoon-fed in school, when all the facts you need are included, nothing extraneous is mentioned, the answer is fully specified, along with hints to nudge you toward a single expected canonical solution. This project is much more like the real world of messy problems where it is up to you to fully the define the end point, or a series of ever more difficult versions of this project and research the information yourself to solve them.
Everything I have to say to help you with this project is written below. I am not prepared to help you implement it; or give you any additional materials. I have too many other projects of my own.
Though I am a programmer by profession, I don’t do people’s homework for them. That just robs them of an education.
You have my full permission to implement this project in any way you please and to keep all the profits from your endeavour.
Please do not email me about this project without reading the disclaimer above.
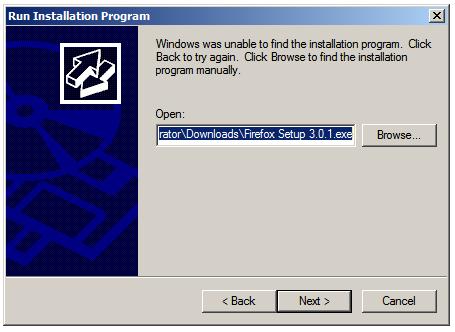
There are commercial tools like InstallShield, Wise and InstallAnywhere to wrap your MASM ( M icrosoft As se m bler ). C++ and Java applications up to make them easy to install on Windows. These schemes have the following drawbacks:The classes would handle such things as:
Alternatively, you insist that a JVM and your installer be preinstalled. It then unpacks and installs compact download application packages.
Unfortunately the installer will likely be fatter than the app you are trying to install. Perhaps some advanced Java compilers or optimisers could help put the installer on a diet.
The first version would focus on Windows 95/98/NT. Later you might add classes for other platforms. Ideally your mainline program install would be more or less platform-independent.
Start with a very simple installer and gradually add features. This will keep you from being overwhelmed by detail. At each stage you will have something useful other can test. They will provide you feedback on which features are most important to add next.
The other half of installing is maintaining an application with automatic updates. See the Automatic File Updater project.
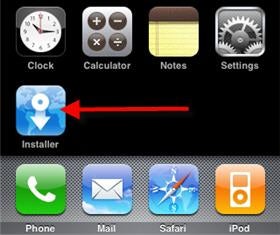
Installer.app (aka AppTapp) downloads packages over WiFi (wireless networking) or EDGE for installing, updating and uninstalling 3rd party native applications on your iPhone. Warning! use at your own risk. There are both a version for Mac with OSX and one for Windows. There is currently also a catalogue of available apps available maintained by a couple of repository and listings websites.
Hint: Once you have installed Installer.app be sure to install the app called “Community Sources”. This app adds a few of the popular 3rd party application lists (Conceited Software and Ste Packaging) to your sources section, which has the affect of dramatically increasing the number of apps you can install. Here is a full list of all Installer.app sources .
 Update. A brand new version of Installer has been released under the name Installer 4.0 which now supports the new 2.0 iPhone software and 3G iPhones. The 4.0 version delivers a brand new user interface and added functionality similar to that of Cydia. This verion of installer is in beta mode but you can install it manually at this time using these steps.
1. Jailbreak your iPhone 2.0 software if you have not already using either redsn0w (for Windows & Mac), GreenPois0n (for Windows & Mac), QuickPwn for Windows or PwnageTool for Mac.
2. Download Installer 4.0 here and unzip it
3. SCP the Installer.app folder into your /Applications folder.
4. Change Permissions by running these 2 commands:
chmod -R 777 /Applications/Installer.app
chmod a+srx /Applications/Installer.app/Installer
5. Turn off your iPhone or iPod Touch and turn it back on and should now see the new Installer 4.0 app on your home screen.
Once you have Installer 4.0 installed, you can add some new apps using the following Installer 4.0 source URLs .
More details on Installer 4.0 to come.
The fastest and easiest way to install Installer on your iPhone is using QuickPwn. Also take a look at this entertaining video by by David Pogue from the The New York Times. He takes you on a tour of using Installer.app to get third-party programs running on the iPhone.
There is another similar Mac OSX software called independence which can also be used to jailbreak your iPhone. The Windows PC equivalent of Installer.app is iBrickr.
Note: As of now Installer.app does not work on iPod touch, or iPhone updated with 1.1.1.
Update: To jailbreak your iPod touch you can use iJailBreak (Mac) or touchFree (Win).
Update:  Installer.app version 3.1 has been released which includes a fully redesigned user interface to match the iPhone look and feel, collapsible groups, and firmware auto-sensing. Now you can also add/remove sources easily and easily install all available updates. This version still does not work if you have already upgraded to iPhone v1.1.1. before jail breaking. Also this version requires that you upgrade to 1.1.1 after you get it installed on your 1.0.2, for it to work smoothly.
Update: If you have a virgin iPhone with the 1.1.1 updates you can use iNdependence (Mac) or iDemocracy (Win).
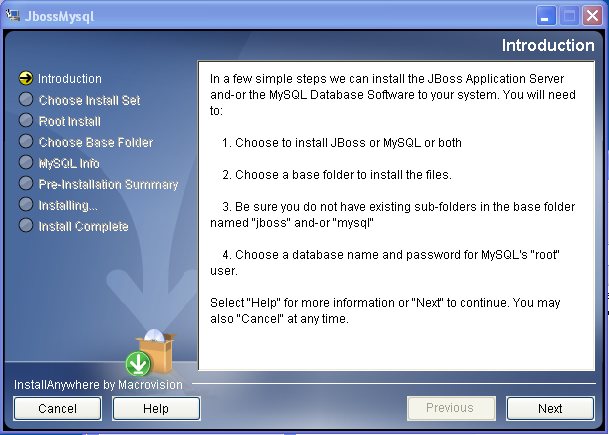
The Microsoft Web Application Installer will allow you to quickly and easily deploy the most widely used web applications available for free to your Windows Server. If you have seen some of my other articles on installing the open source software out there on IIS, you will notice that while it can be done, it does take a bit of time and know how.
This this release, the IIS team has greatly decreased the amount of time and effort it will take to deploy these applications, which is a big step forward to a greater acceptance of IIS as a leading web server. As of this writing the Web Application Installer will work with the following open source programs:
Those cover pretty much everything you might want to do on the web, except maybe a Wiki application.
Since I wrote an article on Installing WordPress for IIS7 before this application was released, I am going to go through the WordPress install to see how different it really is.
Install Microsoft Web Application InstallerFirst things first, we need to install the installer. For this demo I am using the same server I used for my article on Microsoft Web Platform Installer with no additional changes.
The requirements are similar to the Web Platform Installer:
You can find the installer at the following web location:
1. Go ahead and click the Install Now button.
2. Click on Save for the file popup.
3. I am going to use the default location to save the installer file, once you choose the location click on Save .
4. After downloading you will see Download Complete. go ahead and click on Run .
5. You will get a security warning now, go ahead and click Run one more time (Thanks for keeping us safe MS!)
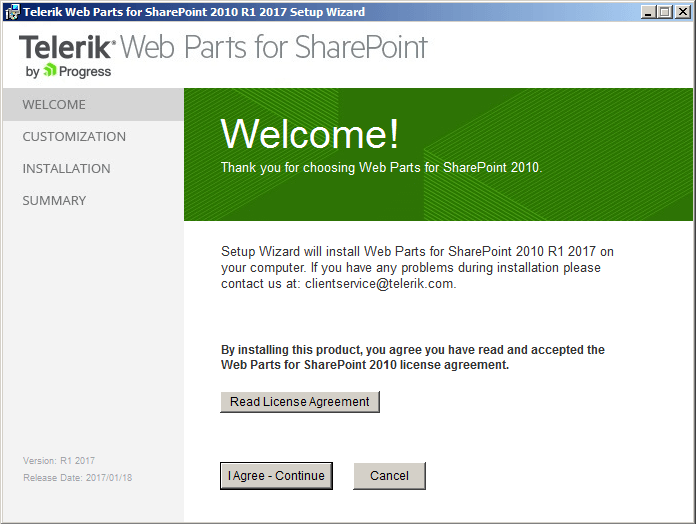
6. The welcome screen will nicely explain what the Web Application Installer does, which is mainly to make your life a little easier.
Once you read through everything, it asks you to agree to the license terms by clicking Agree .
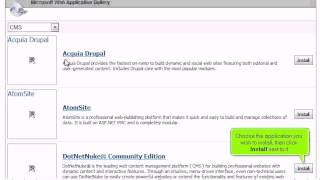
7. On the next page you will see the list of available applications to install and the location they are installing from.
As I mentioned before, I’m going to test the WordPress install since we can compare it to the article I wrote on doing it manually. Select WordPress and then click Next .
8. Reality Check! Ok this installer application while helpful, will not do everything for you. You still need to install PHP on your system for this to work.
Luckily for you I wrote an article that covers just that; take a quick look at Install FastCGI & PHP on Server 2008 to install FastCGI & PHP.
When you’re done, come on back and we’ll continue!
9. Ok, now that PHP is up and running, let’s move on and install MySQL. Again as luck would have it I have an article written on how to Install MySQL on IIS7 Server 2008 .
Go ahead and follow that article and when you’re done come on back to continue with the installer.
10. Now that you have installed both PHP and MySQL let’s take a look at the installer again.
Click on the Recheck button and you should see now that most of the prerequisites have been taken care of, but there are still some showing in my installer.
I have double checked my PHP installation and found those extensions enabled, so I take it that this is just an error with the installer.
The Next button is now enabled so I am going to move forward with the install.
11. Now we get to do some configuration for the site. For this demo I am going to use the default website, but you would also be able to create a new site from this page.
If you were creating a new site you can also specify host name and IP address/port on this page. Since we are using the default information just click on Next .
12. On this screen we are going to do configuration for WordPress itself, such as creating the MySQL database.
You can leave the defaults in for most of the fields that are pre-filled, but if you want to use less obvious names you can easily change them also.
There are several passwords that have to be entered so be careful. They are as follows:
The rest of the information is self explanatory, fill it out to your own liking.
13. You will see the application downloading and the status of the install while it is happening.
14. The next screen will be the installation summary, you can use the following information on this screen to:
Download copy of the source file used to install
Click through to the installed site
Visit Application Gallery for more information on the default configuration
View the Installation Log
When done click Finish .
15. Now if I go to the installed url I can see the default WordPress template and the demo post.
As you can see it was fairly straightforward to use the web application installer and it’s obviously a time saver as well. While at the moment it’s good, I think it will still get better over time as the installer matures.
The majority of the open source apps require MySQL and PHP, so it is a tad annoying not having the ability to install these applications through either the Platform or Application installer. Hopefully this isn’t some kind of licensing issue, and can be incorporated at a later date.
The other drawback is the installer wouldn’t move forward without detecting a local MySQL installation, so if you use a remote DB server you won’t be able to push through this error. This is also hopefully something that can be addressed with future versions.
Even with these drawbacks I believe this is a step in the right direction for IIS7 to close the gap on Apache, as it embraces open source software.
I am setting up a new build machine, and I had a couple of nightmarish android build issues that I thought I would share with everyone. Maybe it will help somebody else.
My first problem was that when I would try to compile for android, I would get this error in the console:
Setting console level to "trace" gave me a little more:
It turns out that the "KeyError: 15" was pretty important. It meant that the build scripts couldn't find android SDK for API 15.
When I first added the ti.admob module months ago, I added a uses-sdk directive to tiapp.xml (per this post :
When I set up the new build machine, I downloaded the latest android SDK (API 16) as well as API 8 (android 2.2). But I didn't grab the SDK files for API 15 (android 2.2).
Installing API 15 SDK files fixed the problem for me. But it took me about 4 hours to find what seems like a fairly obvious solution now.
— asked 3 years ago by Jason Priebe
2 Comments— commented 3 years ago by Ashish Nigam
how to get the following. am also having the same problem
Traceback (most recent call last):
File "/Users/priebe/Library/Application Support/Titanium/mobilesdk/osx/2.1.0.GA/android/builder.py", line 2157, in <module>
s = Builder(project_name,sdk_dir,project_dir,template_dir,app_id)
File "/Users/priebe/Library/Application Support/Titanium/mobilesdk/osx/2.1.0.GA/android/builder.py", line 234, in init
self.sdk = AndroidSDK(sdk, self.tool_api_level)
File "/Users/priebe/Library/Application Support/Titanium/mobilesdk/osx/2.1.0.GA/android/androidsdk.py", line 50, in init
self.find_platform_dir()
File "/Users/priebe/Library/Application Support/Titanium/mobilesdk/osx/2.1.0.GA/android/androidsdk.py", line 86, in find_platform_dir
old_style_dir = os.path.join(self.android_sdk, 'platforms', android_api_levels[self.api_level])
KeyError: 15
— commented 3 years ago by lakshmi ddk