

 Рейтинг: 5.0/5.0 (1886 проголосовавших)
Категория: Windows: другое
Contributor, PCWorld
If you have multiple PCs in your home or small office, you can save time and look professional by storing your documents and media on one PC and using network sharing to access them across all your computers and devices. This prevents you from having to store duplicate copies of files and reduces confusion when trying to find which PC a file is stored on. Additionally, you only really need to worry about backing up one PC (though for safety's sake you should always back up everything on a regular basis.)
Setting up your own Windows server is pretty simple: Microsoft actually created a Windows edition designed specifically for centralized storage and backup called Windows Home Server, but it was discontinued in 2011. Thankfully, Windows 8 sports new storage and backup features that make it uniquely suitable as an impromptu file server, and I'll walk you through the setup process in this article. Along the way we'll learn about the new Storage Spaces feature, file sharing with HomeGroups, streaming media via the network, backing up your files, and remotely accessing your storage when you’re away.
Creating Storage SpacesWindows 8 includes a new file storage feature called Storage Spaces, and it's designed to protect against hard drive failures by making copies of your data and spreading it across multiple drives. It's a more cost effective, user-friendly solution than RAID drives and works much like the beloved Drive Extender feature in early editions of Windows Home Server.
To get started, you should attach one or more internal or external drives to your Windows 8 PC and run Storage Spaces (the simplest way is to access your Start screen and type storage spaces). From there, create a storage pool and divide it up into one or more Storage Spaces, which will then appear and work just like any other drives in Windows. If you have two or more physical drives in the pool, you won’t lose your data if one (or even two) drives fail. You can also add more drives to the pool to expand its size at any time, making this a great way make use of any old storage drives you have laying around. If you need further help or step-by-step directions, refer to a past article on Storage Spaces.
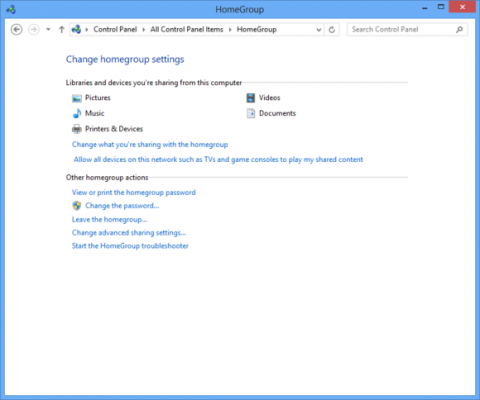
Share your files on the networkNext you likely want to share your files, any printers you have attached, and any Storage Spaces you’ve created on the network so you can access them from other PCs and devices. If all your PCs are running Windows 7 or 8 consider using the HomeGroup feature, which lets you share your Libraries (Documents, Music, Pictures, and Videos) and printers. And since the HomeGroup is password-protected, you don’t have to worry about guests and visitors accessing your files. If you need help creating your HomeGroup refer to a past article. which is written for Windows 7 but details a process that works roughly the same for Windows 8 users.
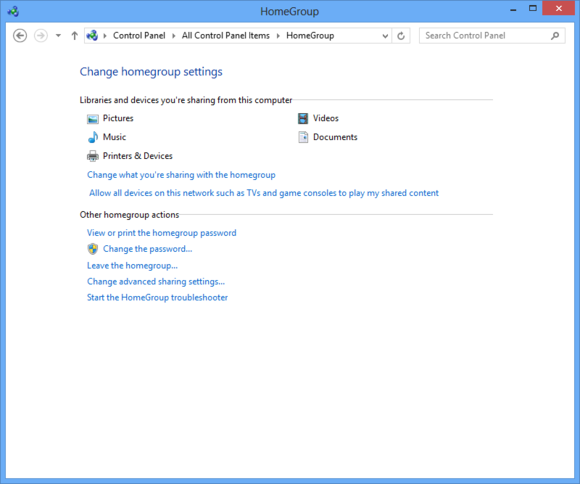 You create and manage your HomeGroup via the Control Panel, also accessible from the Network and Sharing Center.
To share your Storage Space(s) in a HomeGroup you’ll have to add them to an existing shared Library or create a new Library and share it with your HomeGroup. And if you need help modifying or creating Libraries, we have a past article about that too!
If you still have PCs running Windows Vista or XP, they can’t join a HomeGroup. So you’ll have to manually share drives and folders (discussed in yet another past article ) on your Windows 8 server so all PCs can access them.
Once all your PCs are sharing with the homegroup, you should have no trouble sharing documents back and forth across your home or office network. And if all you need is a way to easily share documents and files, congratulations! You're all done and your new network is ready to rock.
Streaming media across your networkIf you have music, photos, or videos you’d like to play or view on other PCs or devices (gaming consoles, TVs, digital media players, etc), you’ll also want to set up media sharing on your Windows 8 server.
Once you’ve configured media streaming, you can use the “Play To” functionality of Windows 8 to remotely start streaming a media file to a supported PC or device on the network. You’ll see an option for this when browsing files in the traditional Windows desktop and in the new metro-style Windows 8 apps. You can also remotely view and play media from other PCs via Windows Media Player: you’ll see media libraries appear on the bottom left for PCs that are configured to share their media. And on other non-Windows devices, you may be able to browse and play/view your shared media.
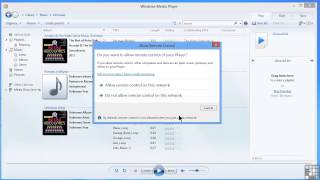
To configure media sharing, turn on any PCs and other devices you want to be able to stream media to or from. For your Windows 8 server and other Windows PCs, open Windows Media Player, select Stream on the toolbar, and choose “Allow remote control of my player” and “Automatically allow devices to play my media”.
And then select “More streaming options”, where you can choose which PCs and devices are allowed access.
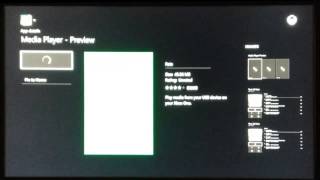
Access your files remotely with SkyDrive remote fetchTo access files on your Windows 8 server (or any other PC) when you’re out of your home or office, Microsoft provides the SkyDrive remote fetch feature. Once you install the Windows desktop app onto your PC you can remotely access any file on it via the SkyDrive website or on your mobile devices.
You can download documents and files, preview photos, and play videos. You can also copy files to your SkyDrive drive so you can more easily share it among your devices or with others.
Backing up your "server"Since you’ll be storing most of your files on your Windows 8 server, you should ensure you have a good backup solution in case files become corrupt or accidently deleted. Though Microsoft removed some backup features (like the ability to create complete backup or to backup files from any location) in Windows 8, its new File History feature provides a more automated and user-friendly solution.
Once you connect an external drive and enable File History, it automatically saves snapshots of all files in your Libraries. By default it’s set to save snapshots every hour for changed files. So if a file becomes corrupt, deleted, or you’d like a previous version of the file you can restore it.
To include your Storage Space(s) in the File History backup you’ll have to add them to an existing shared Library or create a new Library, which you may have already done earlier in order to share your Storage Space(s) to your HomeGroup.
When you’re ready to enable File History, press the Win key to go to the Start screen, type “File History”, select Settings on the right, and then open File History.
Bonus round: Backing up other PCs to the “server”There's one last trick you should know about: you can also use your Windows 8 server as a backup location for your other PCs. If you have other Windows 8 PCs and are using HomeGroup for sharing, you can enable the “Recommend this drive” option in the Advanced Settings of File History on your “server” PC.
That way you don’t have to hook up an external drive to each PC you want backed up with the File History feature; it can simply be backed up to the server via the network. For PCs with Windows 7 and earlier you can also utilize their automated backup systems and just point it to the network location of your impromptu server PC. If everything is working correctly, you should be master of your digital domain and have full control of your own small network with media streaming, data sharing and data redundancy at basically no extra cost.


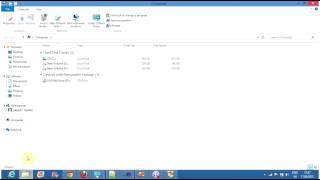


I'm running Windows 8 and in the Computer menu, I see a huge list of "media server" network locations of many of the PCs in my network (most running Windows 7).
Is there a way to either locally disable this so I don't see this list every time, or disable this sharing feature on the other computers?
I've tried disabling "Media Streaming options" from the Network and Sharing Center (on my PC), but that had no effect.
Another thing I tried was enabling Media Streaming. but then selecting all the found clients and clicking Blocked in the list of found clients. That had no effect in removing the list either.
I've also attempted disabling the Windows Media Player Network Sharing Service. but alas, the list remains.
I'm starting to believe there's a magic registry key to unbury and flip to a "1", but all the searching I've done has come up empty.
Если у вас есть несколько компьютеров в вашем доме или небольшом офисе, вы можете сэкономить время и выглядеть профессионально, сохраняя ваши документы и мультимедиа на одном компьютере, используя совместный доступ к сети со всех компьютеров и устройств. Это предотвратит Вас от необходимости хранить дубликаты файлов и уменьшает путаницу при попытке выяснить,на каком ПК хранятся файлы. Кроме этого,вам действительно не нужно беспокоиться о резервном копировании одного компьютера (хотя в целях безопасности вы должны всегда делать резервное копирование всего на регулярной основе).
 Настройка собственного сервера Windows. довольно проста: Microsoft фактически создала Windows Edition разработанную специально для централизованного хранения и резервного копирования,которая называется Windows Home Server. но её поддержка была прекращена в 2011 году. К счастью, в Windows 8 есть новые функции хранения и резервного копирования,которые делают её уникальной и пригодной в качестве импровизированного файл-сервер. В этой статье,я вас проведу через процесс установки. По пути мы узнаем о новой функции помещения для хранения,совместного использования файлов с HomeGroups, потокового аудио по сети, резервное копирование файлов и удалённого доступа к вашему хранилищу,когда вы в отъезде.
Создание Storage Spaces
Windows 8 включает в себя новую функцию хранения файлов,которая называется Storage Spaces ,и она предназначена для защиты от сбоев жесткого диска, делая копии данных и распространяя её по нескольким дискам. Это более экономически эффективно,и является удобным решением,чем RAID диски и работает так же,как любимая функция Drive Extender в ранних изданиях Windows Home Server.
Для начала, вы должны установить один или несколько внутренних или внешних дисков к Windows 8 компьютеру и запустить складские помещения (самый простой способ получить доступ к экрану Пуск и введите Storage Spaces ). Оттуда, создайте пул хранения и разделите его на один или несколько Storage Spaces,которые затем будут появляться и работать так же,как и любой другой диск в Windows . Если у вас есть два или более физических диска в компьютере,вы не потеряете ваши данные, если один (или даже два) диска потерпят неудачу. Вы также можете добавить несколько дисков в компьютер,чтобы расширить объём в любое время,делая это,есть отличный способ использовать любые старые накопители.
Поделитесь своими файлами в сети
Далее вы, вероятно, хотите поделиться своими файлами, любыми принтерами, которые Вы установили,и любыми данными для хранения,которые вы создали в сети,поэтому вы можете получить к ним доступ с других компьютеров и устройств. Если все ваши компьютеры работают под управлением Windows 7 или 8 ,то вы можете это сделать с помощью функции HomeGroup. которая позволяет обмениваться библиотеками (документами,музыкой,изображениями и видео) и принтерами. А так как домашняя группа защищена паролем, вам не придётся беспокоиться о доступе гостей и посетителей к вашим файлам.
 Вы можете создать и управлять домашней сетью через панель управления, которые также доступны с сетями с общим доступом.
Для совместного использования Storage Spaces в HomeGroup вы будете иметь, чтобы добавить их в существующую разделяемую библиотеку или создать новую библиотеку и поделиться ими с вашей домашней группой.
Если у вас есть ПК под управлением Windows Vista или XP, они не смогут присоединиться к домашней группе. Так что вам придется вручную поделиться дисками и папками ,которые находятся на вашем сервере Windows 8. так что все компьютеры могут получить к ним доступ.
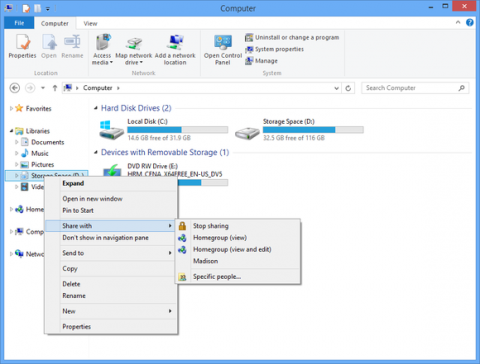 Щёлкните правой кнопкой мыши Библиотеки (или любой другой файл, папку или диск), чтобы поделиться ими с HomeGroup.
После того как все ваши компьютеры находятся в домашней группе, вы не должны иметь никаких проблем совместного использования документов,как туда,так и обратно,через вашу домашнюю или офисную сеть. И если это всё,что вам нужно,то этот способ для лёгкого обмена документами и файлами. Вы все сделали и новые сети готовы к работе.
Потоковое мультимедиа по сети
Если у вас есть музыка, фотографии и видео,которые вы хотели бы проиграть или посмотреть на других ПК или устройствах (игровые консоли, телевизоры, цифровые медиа-плееры и т.д.), вы также можете настроить общий доступ к медиафайлам на вашем сервере Windows 8. Как только вы настроили потоковую передачу мультимедиа, вы можете использовать “Play To” ,функция Windows 8 для удалённого запуска потоковых мультимедийных файлов в поддерживаемых ПК или устройствах в сети. При просмотре файлов на традиционном рабочем столе Windows,Вы увидите опции ,как и в новом стиле Метро приложений Windows 8. Вы также можете удалённо просматривать и воспроизводить мультимедиа с других компьютеров с помощью Windows Media Player: вы увидите медиа-библиотеку,которая появляется в левом нижнем углу для персональных компьютеров,которые настроены делиться своими мкльтимедйными файлами. А на других не-Windows устройствах, вы можете просматривать и воспроизводить вашу общую мультимедийную информацию.
Чтобы настроить общий доступ к мультимедиа, включите любой ПК и другие устройства,на которых Вы хотите просмотреть потокое мультимедиа. Для серверов Windows 8 и других компьютеров Windows. открывается Windows Media Player, выберите поток на панели инструментов и выберите «Разрешить удаленное управление моим проигрывателем» и «Автоматически разрешать устройствам для воспроизведения медиа».
А затем выберите “Дополнительно варианты потокового воспроизведения “, где вы можете выбрать,каким компьютерам и устройствам разрешить доступ.
Доступ к файлам удаленно с помощью SkyDrive
Чтобы получить доступ к файлам на вашем сервере Windows 8 (или любом другом компьютере), когда вы находитесь вне дома или офиса, Microsoft SkyDrive предоставляет функцию удаленного доступа. Как только вы установите приложение на рабочий стол на компьютере вы можете удаленно получить доступ к любому файлу через сайт SkyDrive или на мобильных устройствах.
Вы можете скачать документы и файлы, просматривать фотографии и проигрывать видео. Вы также можете скопировать файлы на SkyDrive диск,так что вы можете легко поделиться ими между другими устройствами.
Резервное копирование “сервер”
Так как вы будете хранить большую часть файлов на вашем сервере Windows 8. вы должны убедиться,что у вас есть хорошие решения для резервного копирования в случае, если файлы повреждены или случайно удалены. Хотя Microsoft удалила некоторые функции резервного копирования (например, возможность создания полной резервной копии или резервного копирования файлов из любого места) в Windows 8. есть новая функция История файлов,которая обеспечивает более автоматизированное и удобное решение.
Как только вы подключите внешний накопитель и разрешите доступ к Истории файла,он автоматически сохраняет снимки всех файлов в библиотеках. По умолчанию он установлен для сохранения снимков каждый час на изменившиеся файлы. Таким образом,если файл повреждён,удалён,или Вы хотели бы иметь предыдущую версию файла, вы можете его восстановить.
Включите ваше пространство для хранения в резерве Истории файлов и вы будете иметь возможность,чтобы добавить их в существующую разделяемую библиотеку или создать новую библиотеку, которую вы, возможно, уже сделали ранее для того, чтобы поделиться своими Storage Space в вашей HomeGroup.
Когда вы будете готовы, чтобы включить файл истории, нажмите кнопку Win для перехода в режим ожидания,введите тип “Файл Истории”, справа выберите пункт Настройки. а затем откротйе файл истории.
Резервное копирование других ПК на сервер
И последний трюк,о котором вы должны знать. Вы можете также использовать сервер Windows 8 как хранилище для других компьютеров. Если у вас есть другие Windows 8 ПК и они используют домашнюю группу для совместного использования,вы можете в меню Advanced Settings включить “Рекомендовать этот диск” из файла истории на “сервер” PC.
Таким образом, вы не должны подключать внешний накопитель к каждому ПК,если вы хотите сделать резервное копирование с помощью функции История файла, он может быть просто скопирован на сервер по сети. Для компьютеров с Windows 7 и более ранние версии,Вы можете также использовать их автоматизированные системы резервного копирования и просто направить их в сетевую папку вашего импровизированного PC сервера . Если все работает правильно, вы должны быть хозяином своей цифровой жизни и иметь полный контроль над своей собственной небольшой сетью потокового медиа, совместного использования данных и резервирования данных в основном без дополнительных затрат.
P.P.S. Если у Вас есть вопросы, желание прокомментировать или поделиться опытом, напишите, пожалуйста, в комментариях ниже.
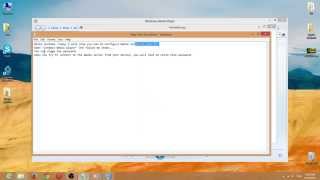
To detect whether the installation media is Windows 8 or Windows Server 2012, you can use (one of) the following tricks:
If \sources\background_cli.bmp exists, it’s installation media to install Windows 8. If \sources\background_svr.bmp exists, it’s installation media to install Windows Server 2012 or one of it’s Windows Server “8” pre-release versions.
If the \sources\adprep folder is missing, it’s Windows 8.
Alternatively, in the [BuildInfo] and [sku] sections of \sources\product.ini you can see the edition(s) of Windows 8 or Windows Server 2012 available through the installation media.
On the Release to Manufacturers (RTM) and later installation media, product.ini may not be available.
ArchitectureWindows installation media can be 32bit (x86) and 64bit (x86-64 or x64 for short).
To determine the language(s) of the installation media, check \sources\lang.ini. as this file contains a list of the available languages for the User Interface (UI). A fallback language is also specified.
The file \sources\idwbinfo.txt contains the name of the build branch the installation media belongs to in the [BUILDINFO] section, following BuildBranch= .
The BuildBranch value designates the development branch the installation media belongs to. Build Branches span multiple build numbers, so the BuildBranch value does not specify the version very specifically.
Alternatively, to determine the exact pre-release build of the installation media, locate setup.exe in the root of the installation media or \sources\setup.exe. Right-click it, then on the Details tab check either File version of Product version .
With the table listed in the blogpost titled Determining your Windows 8 and Windows Server 2012 version. you can now find the major pre-release version of your installation media.
ConcludingIt’s fairly easy to determine the Windows version on a disc or on USB installation media, when you know where to look for clues.
14 Mar 2014 Released not so long ago in the Windows Store for Windows 8, 8.1 and Just like before, you can use the Plex Media Server to stream your
6 Jan 2013 Media server developer Plex Inc rings in the New Year with two notable new updates to its cross-platform range of media server and media
28 Jul 2014 Plex Media Server is a complete solution for streaming media from your computer to your TV or various mobile devices in your home.
4 Jul 2012 A good co-worker recommended Plex Media Server which does all the above and more. Plex Media Server is For my use it will be on a Windows 7 Professional. Once the file has July 24, 2012 at 8:26 pm. Any progress?
9 Dec 2012 Plex Media Server streams your media directly from your computer, The Plex client for Windows 8 Metro supports both x86 and ARM,
14 Jul 2014 I currently have a dedicated PC running plex media server but was looking into possibly buying a windows 8 tablet to run media server instead
22 May 2014 You can install the Plex Media Center in your Windows 8 system, which would then work as the Plex Media Server. You can then connect your
11 May 2014 Today going to talk about setting up Plex Media Server and later will follow This was made to work on Windows 8, but should be compatible
5 Aug 2014 (Transcoder) An A/V sync issue affecting Windows 8 Plex app. Plex Media Server 0.9.7.10. Fixes. Workaround for LG TVs rebooting. (Windows)
Plex is a port of XBox Media Center for the Windows platform.
5 Jan 2014 Plex Media Server runs on Windows and Mac, and intelligently scans all your videos, photos and music. The best thing about the Plex Server is
Plex Media Server 0.9.8.6.175: Tu ordenador convertido en servidor multimedia. Agrega Windows Media Center a la Release Preview de Windows 8.
I have problem with Plex Media Server when i trying watch Channels through it, First i have installed Plex Media Server and Plex Media Center on my windows 7. the server 2.4: Posts: 8: Joined: Sun May 20, 2012 3:52 pm.
1 Feb 2013 Whenever I start my Plex Media Server on Windows 8 (64-bit), my computer crashes after some minutes, displaying something others called a
15 Mar 2013 During our initial setup of the Plex Media Server we ran into a crippling I use combination of Windows Media Center (Windows 8 on my 2012
You run the Plex server on the N40L, and the Plex client on your. to my Windows 8 PC. the QNAP is running twonky media server and the
With Plex, you can easily stream your videos, music, photos and home movies to your Windows device from your home computers running Plex Media Server
Windows XP; Windows Vista; Windows 7; Windows 8. Latest version: 0.9.8.6.175 05/08/14; Last month's downloads: 432; Size: 61.6 MB; Developer: Plex more
7 Mar 2014 Free Xap & Appx Download - [WP8] Plex v1.6.0.9 - Windows Phone Xap Windows Phone 8 device from your home computers running Plex Media NOTE: YOU MUST HAVE A PLEX MEDIA SERVER (AVAILABLE FOR
the availability of the latest plugin for FreeNAS: The Plex Media Server! you get the popup window which simply says "Plex Media Server",
4 Jan 2013 Plex, one of our favorite streaming media centres, has just put out a bevy of updates for three of its services. The Windows 8 app adds improved
20 Jun 2013 PlexConnect On Windows 8 And OS X 10.8.4: Running Plex Media Server on Apple TV 2 and Apple TV 3 without jailbreak.
My small media server (with 6 - 10 HDDs) needs a robust Windows OS A lot of people have said Plex doesn't need to be started in order for
6 Dec 2012 Plex for Windows 8: Access your Plex Media Server from your Windows 8 or RT device.
The Plex Media Server allows you to organize your digital media files such as Plex Media Server on your Windows computer, follow the instructions below: Step 8: Search and select the folder you want to add to your Plex Media Server.
19 Jun 2014 There are a few software options to stream content to the TV, just to name The content is centralized and served from the Plex Media Server within are free, Apps (Android, iOS, Windows 8 and set top boxes) costs $4.99.
4 Jan 2013 Plex, one of our favorite streaming media centers just put out a bevy of updates for three of its services. The Windows 8 app adds improved
25 Jul 2014 Plex for Windows 8.1: General user help and bug reports for Plex for Windows 8.1. Windows 8 Client Unable to Find Server - last post by Conradical.
14 Dec 2013 You must have a Plex Media Server (free) installed and running on a PC, Keep in mind it is for Nokia Lumia Windows Phone 8 devices only.
16 Jun 2012 Now on the right hand side – click on 'download Plex Media Center'. Go ahead and accept the defaults which includes the server, skins (only media stream), and Note this section is for Windows 7 and windows 8 users.
TVersity Media Server - совместимый UPnP AV медиа сервер, который расширяет функциональность мультимедийных UPnP-узлов для навигации, поиска, воспроизведения и записи, аудио и видео контента из интернета. Он также может заменить существующие мультимедийные UPnP-сервера и обрабатывать все медиа файлы, размещенные в Вашей домашней сети, в том числе форматы, которые не поддерживаются вашим медиа ресивером. Кроме того, программа позволяет управлять вашими Интернет медиа URL-адресами и создать свой персональный список каналов.
Некоторые основные возможности и функции "TVersity Media Server ":
Доступ по NFS - один из самых удобных и быстрых способов доступа к Вашему мультимедиа контенту через локальную сеть. Рассмотрим, что необходимо, чтобы воспользоваться им в рядовой домашней конфигурации ПК/ноутбук - локальная сеть - плеер iconBIT.
1. Скачиваем NFS-сервер для Windows, для примера, возьмем haneWin NFS Server 1.2.9. Лекарство есть в сети, ищем HaneWin.NFS.Server.v1.2.9.German.WinALL.Incl.Keygen-BLiZZARD.rar (сумма MD5: daa8e1f362b54eb0e1ee5db0937efb9c, размер: 932 785 байт).
2. Устанавливаем/запускаем программу от имени администратора. обязательно запоминаем/записываем путь куда установили программу.
3. В Брандмауэре Windows 7 разрешаем файлам nfsd.exe и pmapd.exe из папки с установленной программой доступ в сеть.
В нижеприведенном архиве готовые скрипты автоматического добавления правил входящих соединений для указанных приложений. При использовании 32-битной системы запускаем скрипт NFS Firewall (x86).cmd. при использовании 64-битной NFS Firewall (x64).cmd. Запускать только из проводника Windows. Если не знаете какой файл Вам нужен, запускайте оба.
Скрипт ориентирован на то, что программа haneWin NFS Server установлена по следующему пути: %ProgramFiles%\nfsd (если у Вас путь до папки с программой другой, соответственно редактируем скрипт) .
4. Сохраняем и распаковываем данный файл nfs.zip
Редактируем файлы под свои данные, в частности изменяем/добавляем нужные пути и изменяем IP на свои: IP клиента (плеера) в export и IP сервера в nfs.bookmark.
Рассмотрим примерное "исходное" содержимое файла export :
D:\ - name. D 192.168.1.104
D:\Videos - name. D_Video 192.168.1.104
Здесь, в простейшем случае, каждая строка должна быть следующего вида
/ IP_сервера :/ имя_шары
где в вышеприведенном примере 192.168.1.102 - статический IP-адрес сервера (обязательно задаем вручную в настройках сетевой карты ПК/ноутбука или выполняем привязку в DHCP-сервере Вашей сети). D и D_Video имена которые указаны в настройках export сервера NFS (в случае, если планируется использовать русскоязычные имена шар, файл nfs.bookmark необходимо сохранить в UTF-8 кодировке) .
Файл export копируем в папку установки NFS сервера .
Файл nfs.bookmark копируем в папку плеера /Data/DVDPlayer .
К корневому разделу на внутреннем flash-диске плеера доступ можно получить разными способами, для начала в настройках iconbit включаем FTP, больше ничего не изменяем, с помощью FTP-клиента на ПК, например, с помощью TotalCommander подключаемся по FTP к плееру, предварительно сняв галочку с анонимного доступа и указав логин root, пароль 1234 и переписываем указанный файл в плеер по указанному пути.
Либо доступ к плееру по FTP можно получить, также через проводник или любой браузер введя в адресную строку: Код: Выделить всё ftp://IP_плеера/Data/DVDPlayer и на соответствующий запрос ввести логин root. пароль 1234.
либо сразу ввести все в одной строке: Код: Выделить всё ftp://root:1234@IP_ плеера/Data/DVDPlayer вместо IP_плеера подставляем соответствующее значение.
Плеер также можно настроить нажав кнопку Menu на пульте ДУ в пункте плеера Менеджер Файлов->NFS - выбираем Добавить NFS-клиент. вписываем IP_сервера и имя_шары (name) указанное в файле export с символом " / " перед именем шары (т.е. / имя_шары ). Но вышеуказанным способом с помощью блокнота и FTP-клиента гораздо быстрее, особенно если путь не один, к тому же в последствии легко восстанавливать настройки после очередного обновления прошивки.
5. Настраиваем по шагам программу:
В файл export прописывайте реальные пути, которые нужны именно Вам, на скриншоте лишь пример. Внимательно проверяйте IP клиента и сервера. Не перепутайте значения местами.
Хочется верить, что настройки файла bookmarks.nfs вынесут в веб-морду, ничего сложного в этом нет.
Нужен ли NFS под windows или можно пользоваться Samba? У меня ноут по wi-fi подключен к роутеру Keenetic Giga, к нему проводом плеер.
Для теста: запустил bird50.mkv (средний поток 50 мбит/с) через самбу (обычную сеть windows) - видео тормозит, на ПК поток по сети показывает около 36-37 мбит/с. Следом запускаю этот же файл по NFS - без запинок, скорость по сети 50-51 мбит/с. Вот хотя бы ради этого только стоит поднимать NFS на Windows для нашего плеера.
Последний раз редактировалось TechnicsKuzya 19 янв 2014, 19:14, всего редактировалось 62 раз(а).
You can only download this software on a PC, please be sure to visit this page from a PC browser and increase the width of this page until you see the download buttons.
Before you installCheck compliance with the minimum system requirements.
New users should refer to the Quick Start guide before installing the software.
Note that you can install the Pro edition on top of the Basic or Free and vice versa, and in both cases all your media sources will be preserved.
Minimum System Requirements (Free edition) Minimum System Requirements (Pro edition)For Flash based web content, the latest Flash Player installed and working with either Firefox or Google Chrome is required (Flash player can be downloaded from here - please choose the Firefox version).
Minimum System Requirements (Screen Server)In addition to the above the Screen Server requires:
Windows 7 or newer is required.
For best results, it is highly recommended to change your screen resolution to 1280x720 before mirroring and to disable Windows aero.
Additional NotesThe minimum requirements will allow real-time transcoding of media files with bitrates up to 300-400 kbps. Higher bitrates will require faster machines.
Media files that do not require transcoding, i.e. can be played by the media player device as is, will work well on systems meeting the minimum requirements, disregarding their bitrate, and in fact can even work on slower machines.
A modern, desktop grade, single core CPU is required for real-time transcoding of standard definition video (e.g. WMV 640x480 1.5Mbps).
Multi core or multi CPU systems are required for real-time transcoding of high definition video (or Intel Quick Sync Video support in the CPU).
Non real-time transcoding of any bitrate video can be done on any machine, with the speed of the machine determining the time it takes to complete the transcoding.
TVersity Media Server / Screen Server would not have been possible without the linked 3rd party software .
ATTENTION: TVersity Media Server / Screen Server (including free, Basic and Pro editions) are intended for in-home, personal, non-commercial use only. A commercial license (including a developer license) is available here .