


 Рейтинг: 4.2/5.0 (1747 проголосовавших)
Категория: Windows: другое
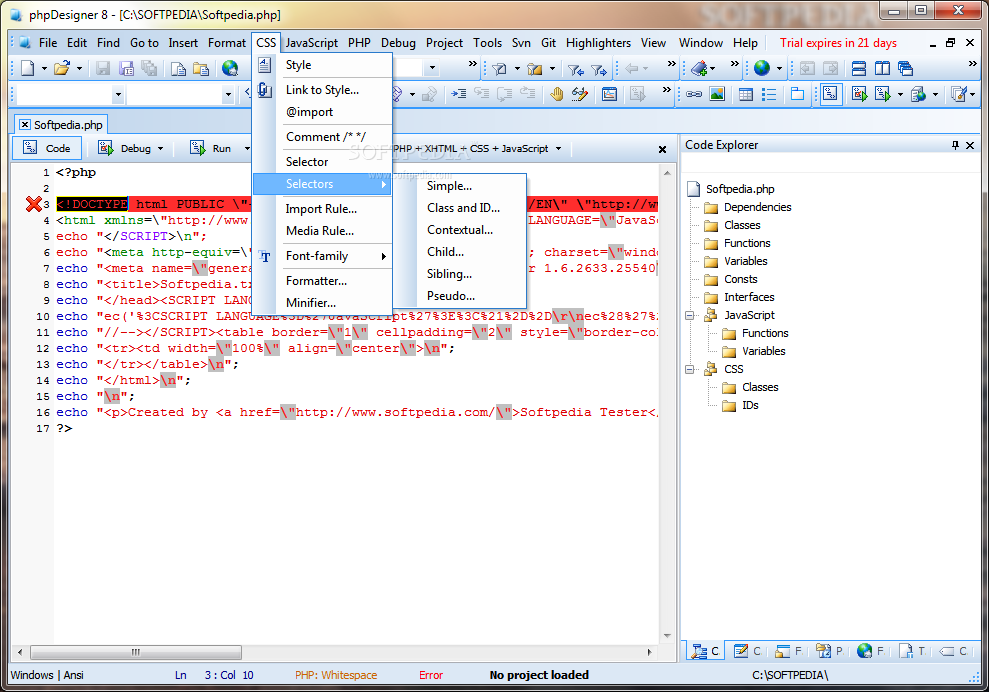
Описание: Программа “Signed Key” предназначена для графической подписи и защиты электронных документов MS Word. Подпись осуществляется элементами печати, подписи и штампа, аналогичными традиционным. Платно – только изготовление Вашей электронной версии печати и факсимиле. Чтобы отправить документ с печатью по электронной почте, раньше приходилось делать много лишних действий. Распечатать документ, поставить печать, сканировать и отправить. Наша программа убирает эти действия и позволяет ставить традиционную печать предприятия сразу на электронный документ. Кроме того, подписанный документ защищается от любого редактирования. Существует функция проверки подлинности установленной печати. Подпись документов производится с флэшки. Установки на компьютер не требуется.
 Перед скачиванием проверьте систему на наличие ошибок .
Автор: Вячеслав Качанкин
E-mail: signedpromo [Att] yandex dot ru
Размер файла в байтах: 342000
ID номер программы в каталоге 20219


Уникальная программа для увеличения посещаемости веб-сайта. Система очень проста, но при этом является очень эффективным инструментом повышения посещаемости Вашего сайта. Показывая на своём сайте 7 текстовых ссылок, Вы спустя некоторое время обнаружите, что ссылка на Ваш сайт стоит, как минимум, на 50 000 сайтах в сети.
 WEB - разработка (314)
Графика (387)
Деловые программы (1194)
Защита информации (479)
Игры (1105)
Интернет - издания (328)
Мультимедиа (352)
Signed Key - программа предназначена для графической подписи и защиты электронных документов MS Word. Подпись осуществляется элементами печати, подписи и штампа, аналогичными традиционным.
Чтобы отправить документ с печатью по электронной почте, раньше приходилось делать много лишних действий. Распечатать документ, поставить печать, сканировать и отправить. Signed Key убирает эти действия и позволяет ставить традиционную печать или подпись сразу на электронный документ. Кроме того, подписанный документ сохраняется только для чтения и без возможности редактирования. Существует функция проверки подлинности установленной печати. Подпись документов производится с флэшки.
Отзывы о Signed Key 1.0 Mozilla Firefox
Virtual DJ
Pidgin (Gaim)
CheMax Rus
The Bat! Home
Process Explorer
FAR Manager
Русская Рыбалка
Программа “Signed Key” это персональный модуль подписи руководителя.
С помощью программы “Signed Key” можно:
• Подписать документ MS Word электронным факсимиле
• Поставить печать и штамп на электронные документы
• Защитить документ от любого редактирования
• Проверить подлинность подписи
Подпись осуществляется графическими элементами печати, подписи и штампа (полными аналогами традиционных печатей, штампов и факсимиле). Подписанный документ сохраняется только для чтения и без возможности редактирования. Установки на компьютер не требуется. Подпись документов производится с выносного носителя (флешки).
Похожие программы на Signed KeyПрограмма для производства и продажи окон и дверей из ПВХ (поливинилхлорид)
Графический редактор для создания визиток
Программа для создания визитных карточек.
Отслеживает сетевой трафик, позволяя отслеживать Интернет-трафик определенного пользователя
Программа управления взаимоотношениями с клиентами и персоналом
One feature that will start to show up on the latest CTP of Whidbey is test key signing -- basically delay signing++. Lets do a quick review of what delay signing is. and then see where test key signing takes over. Recall a delay signed assembly is one which has a public key associated with it, however its strong name signature is simply a block of 0's. Since that block of 0's is unlikely to be the correct signature for the assembly, delay signed assemblies are registered for skip verification with the sn -Vr command. This command allows the assembly to load even though it does not have the correct signature bytes.
One problem with this is that it opens up a hole on the machines with these skip verification entries. There is no restriction on who can create the delay signed assemblies -- a delay signed assembly created by a developer on the CLR team looks the same as a delay signed assembly created by a malicious person on the Internet. Both can create an assembly that has the Microsoft public key, a zeroed signature block, and both will be treated the same by anyone who has the skip verification entries setup for the Microsoft key -- which turns out to be most of the team working on the CLR and framework libraries. Since these assemblies are granted FullTrust by policy, you can see the issue.
The same issue applies basically anywhere delay signing is used. Developers and testers have skip verification entries for trusted assemblies on their machines, and nothing prevents other parties from creating assemblies that look to those machines as if they came from the build process. The problem is mitigated by placing strong name codegroups below a zone code group in policy. but in general still remains.
Enter test key signing. A test key signed assembly is similar to a delay signed assembly in that it allows the assembly's signature and public key to be mismatched. However, a test signed assembly actually has a valid signature -- one created with a separate test key pair. When an assembly is test key signed, it still needs to use sn to register a test key for the assembly. This registration says "when loading this assembly, verify its signature against this public key, not the one specified in the assembly identity." In effect, you get the same benefits of delay signing, with the added feature that only people with access to the test signing key can create assemblies that can pretend to have your public key.
In order to use test key signing, you first delay sign your assembly as normal. For the VB and C# compilers this means something along the lines of:
csc /out:assembly.dll input files. /keyfile:publicKey.pk /delaysign+
Now you have a standard delay signed assembly.dll. Dumping the signature shows that it is the expected block of zeros :
Strong name signature (128 bytes):
0 0 0 0 0 0 0 0 0 0 0 0 0 0 0 0
0 0 0 0 0 0 0 0 0 0 0 0 0 0 0 0
The next step is to test key sign it:
D:\src>sn -TS assembly.dll testKey.snk
Microsoft (R) .NET Framework Strong Name Utility Version 2.0.50727.42
Copyright (c) Microsoft Corporation. All rights reserved.
Assembly 'assembly.dll' successfully re-signed
At this point assembly.dll has the public key of publicKey.pk, but a signature that is computed with testKey.snk. Note that the key size of publicKey.snk and testKey.snk must match, or the test signing operation will fail with the message "Key pair does not match public key from assembly". If we use the signature dumping code, then we'll see that it is no longer all zeros:
31 79 de c8 9c c3 5c 19 e5 5b 4b 66 65 53 ef 6d
89 45 77 b9 ba f4 81 56 d2 5a ab 7b 9 f8 a3 14
79 9a 38 f5 cb af 7f e9 f8 78 d4 24 57 27 a4 c0
e7 42 54 e1 a7 69 51 33 2e 3b 84 56 17 b6 78 4c
82 d 45 83 a9 6a 1e 5 77 f0 88 6e 89 91 88 e
89 a1 cd 7a 54 75 26 35 69 74 75 6f b1 63 5a 63
ec 8b 2 6c c 15 f1 9a d 20 75 a3 89 31 82 22
1b 8 86 3c fd 20 9c b8 1d 34 a a e2 6a f4 8f
Now we need to extract the public key from the test key, and set up a test key registration for this assembly:
D:\src>sn -p testKey.snk testPublicKey.pk
Microsoft (R) .NET Framework Strong Name Utility Version 2.0.50727.42
Copyright (c) Microsoft Corporation. All rights reserved.
Public key written to testPublicKey.pk
D:\src>sn -Vr assembly.dll testPublicKey.snk
Microsoft (R) .NET Framework Strong Name Utility Version 2.0.50727.42
Copyright (c) Microsoft Corporation. All rights reserved.
Verification entry added for assembly 'assembly,B77A5C561934E089'
Assembly.dll is now fully test signed and ready to use as if it were signed with publicKey.pk. Note that you need to register the test public key only, attempting to register the full keypair will result in the message: "The public key supplied for test signing is invalid". An * can also be used for the assembly name, if you supply the corresponding public key token, this works in the same way that the * wildcard works for delay signing. Notice also that running sn -v on the assembly shows that it is valid while sn -vf indicates that it is either delay signed or test signed.
In addition to the commands shown here, a few other sn commands got updated to support test key signing. There is a new -TSc option to test sign using a key container instead of the key file that -TS requires. sn -Vl will now show test signed assemblies and the public key they are signed with. sn -Vu and -Vx will also remove test key signatures for the given assembly. Finally, sn -R will also resign a test key signed assembly.
Test keys can be managed in a few ways. One option is to create a test signing key and check it into the source control system with the rest of the code, next to the official public key. You can then periodically change this key in the source control system. This has the advantage that developers can generally just create a new enlistment in your source control and everything is ready to build right away. The downside is the usual problems with checking in a key pair. (this is mitigated somewhat by the fact that you are changing this key pair periodically and that it is not the actual official pair).
Another option would be to have developers simply create a key on their own machines. The downside here is that there is a step that everybody must do before they can build the code, and that there is no central way to force individual developers to update their key every now and again.
[Updated 11/4/2005: fixed the keyfile to be registered]
Signing someone's key is saying to the world I have verified the identify of this person to the extent which I put in the signing. I believe this key belongs to the name in it, and the email listed also belongs to that person. That's a pretty strong statement! As such there are certain precautions you should take.
VerificationSo lets talk about each one of these verifications
The key you are to signIn order to verify the key you'll want them to bring you a hard copy of their fingerprint. This is to check that the copy of the key you have obtained either from a keyserver or email is actually the key this person uses and you haven't somehow gotten a forged key. Therefore, this should be generated by them on the machine that holds their secret key or better yet, from their private key. If you or they generate this by grabbing their key from a server and comparing it to what you're about to sign, then you're not verifying anything! Think about it: if you're trying to verify the integrity of something, you can't use that something to do the verification.
Their identityIn order to verify their identity, you'll need them to provide at least one form of photo ID. Even if you work with the person or know the person, it's important to do this step if you have never checked their legal identity. This is to be sure that this person has the legal right to use the name they are using. It is up to you how much ID you want to see and to what level you will set your verification of the key during signing. In order to set full verification (3), I require two forms of ID, at least one of which is photo ID, and at least one of which is government-issued.
Ownership of their email and the private keyThis is one many people forget, but it's important. One of PGP's most common uses is to verify email, so verifying an email address is critical. If you sign a key for Bill Doe and verify the identity, but don't verify the email which is, say, bill@whitehouse.gov, you've now vouched for email signed by that key from that email.
There are many ways to do it. The one this site will concentrate on the simpler of the two, but in this section I'll explain both.
When signing the key (which is covered below) rather than the default of signing all UIDs on the key, you sign each UID separately. You then encrypt-email the signed UID to the email address in that UID. In order for the person to get that signature and make it available (by, for example, uploading it to keyservers), they have to have both the private key and the email address. This ensures that the person who you are verifying has access to the private key and also owns that email address.
The other way is more complicated and I've only seen it practiced a few times. It goes like this.
This must be done for each UID (different word/num pairs). As such this doesn't scale well to a large keysigning party where you have to have a different pair for every UID each person has. As you can see it's also quite complicated, but you get the same verification from the first method. As such this site coveres only the first method.
OK, enough with the politics, how do we sign?
Import their keyIf they've provided you with a file with their key in it, import it.
If you want to retrieve it from a keyserver, you can search for it by email.
Or request it by keyid.
If searching a keyserver you may be given a choice of keys. Select the key you believe is theirs.
Verify their identityHave them come to your office/room/whatever with their fingerprint on a piece of paper (they should generate this by doing gpg -K --fingerprint them@something.com on the machine with their secret key! ) and photo ID. Then type:
And have them read off their fingerprint. If what you see and what you hear match, then you know you have the correct key. Now make sure they are who they say they are (either with ID, or by knowing who they are). Once you are positive the key they use is the key you are about to sign (they have the same fingerprint), and they are who they say they are.
Sign their key Single-UID keysFirst we'll cover the easy case where they only have one UID on their key.
To this you should say yes. Note that if the key does nto have an expiration date, you will not get this prompt.
If you have performed the verification described above and are confident in asserting the validity of their identity, then you can choose 3. If you are not sure of one of these or haven't verified very thoroughly, you should choose 2 or 1 as appropriate.
After you choose your level, it will ask for your passphrase so it can unlock your private key to use it to sign their public key, and then you're done with this step.
Multiple-UID keysOK, what about the case where they have multiple UIDs. The process is rather tedious, so I recommend using PIUS. a piece of software I wrote to automate this. However, I'll cover the manual process here.
For each UID, you'll want to repeat these steps. The first half is very similar to the above.
To this, you'll want to say no. You'll then be dropped to a prompt.
Type 1 to select the first UID.
Note that next to (1) is now an asterisk denoting this UID has been selected. You can now type sign to proceed with signing.
As with above, you will only get this prompt if their key has an expiration date. If you get this prompt, say yes .
Again, if you have done all the proper verification then say yes. You will be prompted for your passphrase and dropped back to a Command> prompt.
This is where things change a lot. You need to first get out of the gpg shell by typing save. Then export the key with the signed UID.
Now you can either use PGP/Mime to send an encrypted email to them@something.com with the contents of that file in it or you can use gpg -a -e -r them@something.com -o /tmp/them_at_something.com_ENCRYPTED.asc /tmp/them_at_something.com.asc to make an encrypted file you can attach to an ordinary email.
Note well that traditionally-signed email (non-PGP/Mime) does not encrypt attachments. So if you don't use PGP/Mime, be sure to encrypt the file first!
Next up, you need to delete the key from your keyring and re-import a clean un-signed copy. If you don't do this than 2 UIDs will be signed on the version you send to the second ID and if they only have access to the second email, they've gotten verification on the first one without actually having access to it.
Say yes to this. Now, re-import the key using whatever method you used originally such as --import. --search-keys. or --recv-key .
Then repeat this process for each UID. Note well. it is important to re-verify the fingerprint each time if your method of re-import is from a keyserver. If it's from a file on your local machine than verifying the fingerprint once for the key is sufficient.
As you can see, this process is quite tedious, time-consuming, and error prone. To help with this I've published an open-source program called PIUS to make this process much simpler. It will prompt you to verify the fingerprint and then handle the import-sign-export details for each UID and either email the results to the respective emails or save them to files for you.
Provide them with their signed keyIf you followed the single-UID method, you now need to send their signed key to them. If you followed the multiple-UID method, sending off the key was part of the process and you can skip this section.
The first step is to export the key.
Next, encrypt that file to them.
Attach the encrypted file to an email and send it off to them.
If you use PGP/Mime to send encrypted mail you can attach the unencrypted file to an email and PGP/Mime encrypt the email. However, traditional signing does not encrypt attachments), so if you don't use PGP/Mime be sure to encrypt the file as shown above.
Making signatures you receive availableOnce people have signed your key and send signed versions to you, you'll want to make this signatures available. The easiest way to do this is to import the signatures and then send your key to a keyserver. You can import the signature with --import .
Don't worry about overwriting other signatures, the new signatures will be merged into your copy of your key, you will not lose anything. If the file you got was encrypted to you, before you import it, you'll have to decrypt it.
Once you've imported the key, you can send it to your default keyserver.
There are three main rings of keyservers out there. Each group syncs within it's own pool well, and to the other pools with varying levels of success, so I recommend uploading to one of each. Something like this will work.
That's it! You're done!
Organizing Keysigning PartiesIf you are running a keysigning party, I recommend you use pius-keyring-mgr to build the keyring and pius-party-worksheet to generate the worksheet for the atendees. You can find both of them in PIUS version 2.0.9 or later.
Updated: February 11, 2014
Applies To: Windows Server 2012 R2, Windows Server 2012
To remove a signing key immediately, the zone must be unsigned and then re-signed. In an emergency, such as when signing keys have been compromised, do not attempt to retire a signing key and perform a manual key rollover. Signing key rollover includes a waiting period so that validity periods can expire. It you wish to replace a signing key through retirement, see Procedure: Retire a Signing Key .
You can use DNS Manager to review some signing key settings. However, Windows PowerShell provides additional settings for review.
Membership in the Administrators group, or equivalent, is the minimum required to complete these procedures. Review details about using the appropriate accounts and group memberships at Local and Domain Default Groups (http://go.microsoft.com/fwlink/?LinkId=83477).
To replace a signing key using DNS ManagerOpen DNS Manager on a primary, authoritative DNS server, or connect to a primary, authoritative DNS server with DNS Manager.
This was once just a page that contained my public encryption key. It has now grown to become an introduction to how and why to use the GNU Privacy Guard encryption software (GPG) to protect your privacy. It is continually growing. If you have questions, corrections, suggestions, software recommendations, or want to exchange encrypted e-mails, please contact Alan Eliasen. I'm also on the Twitter thingy as aeliasen. Thanks!
Table of Contents Public Key for Alan EliasenBelow is the public encryption key for Alan Eliasen, (eliasen@mindspring.com ) in armored OpenPGP format. This lets you write encrypted messages that only I can read!
Note: I have recently upgraded to a stronger 4096-bit RSA key. If you were previously using the old key, please see my key migration document for more information on the reasons for this change and how to migrate to the new key.
Don't worry: you don't have to read this. You can cut-and-paste it or obtain it in a plaintext file or import it from a keyserver using the directions in the Importing a Key section of this document.