


 Рейтинг: 4.1/5.0 (1892 проголосовавших)
Категория: Windows: Чертеж, САПР
IKEA home planner дизайна
автор: ремонт_квартир | 13-05-2015, 10:40 | Просмотров: 1198
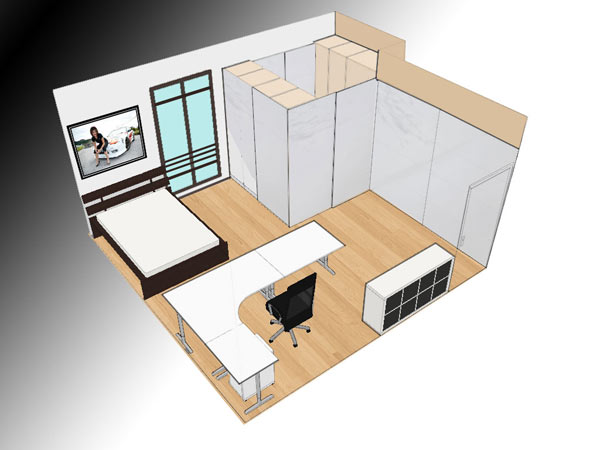
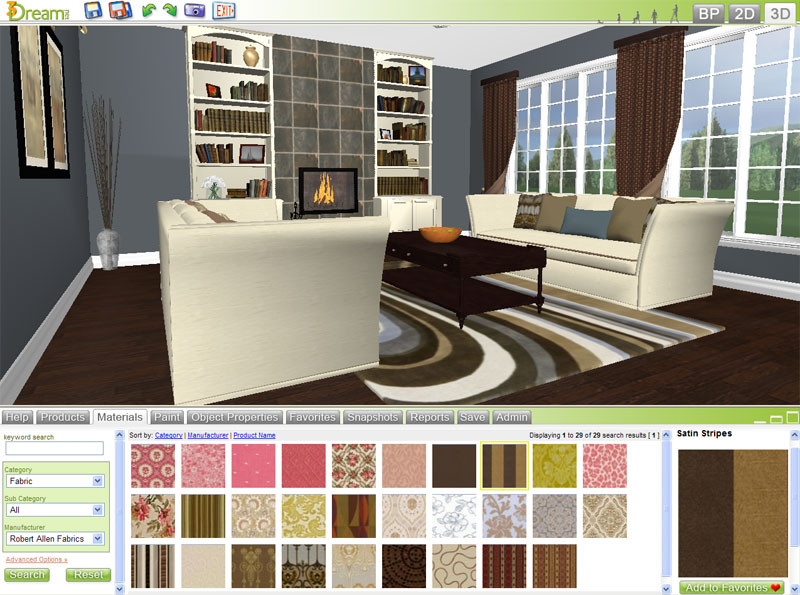
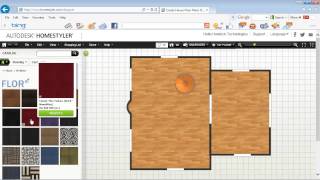
IKEA home planner – отличный вариант 3D моделирования собственного жилья. Данная программа отвечает всем современным требованиям по проектировке дизайна интерьера. Если вы ещё пытаетесь нарисовать обстановку в своей квартире на листе бумаги – тогда эта программа точно для вас. Вы не задумывались о том, что в наше, столь технологическое время, уже существуют варианты составить дизайн помещения более простым способом, чем карандаш и бумага? А с помощью данной программы вам под силу будет заранее обставить жильё оптимально подходящей мебелью.
В программе IKEA home planner предусмотрены самые разнообразные инструменты, которые способны не только составить дизайн интерьера, но и спроектировать здание, как говориться, с «ноля» и «под ключ». Создать свой собственный проект вы можете на основе уже имеющихся в самой программе планировок помещений. Либо же вам доступен вариант сделать чертёж своего собственного шаблона. Данная программа – отличный пример современной трёхмерной графики, позволяющий не передвигать мебель по комнате, а виртуально оказаться внутри неё и расставить её на свои места. Вам под силу собственноручно перемещать мебель, бытовую технику, стены, окна и двери не обращаясь к профессиональным мастерам.
Так как IKEA – известнейший производитель мебели, то логично будет предположить, что и моделей мебельной фурнитуры внесли в программу по максимуму. Вам предлагается мебель на любой вкус, а её размеры, цвет и месторасположение вы выбираете сами. При этом, не нужно быть специалистом чтобы разместить выбранный вами эскиз фурнитуры на рисунок, ведь вам достаточно всего лишь перетащить её при помощи курсора в выбранное место. Трёхмерное изображение поможет вам детально рассмотреть всю проделанную работу, ведь функции увеличения (уменьшения) и оборачивания рисунка прекрасно этому способствуют.
Если же вы уже сталкивались с подобного рода программами, тогда вам известно, что составив дизайн комнаты, приходится ещё выяснять цены на выбранные материалы и предметы мебели. А это занимает множество времени, сил и энергии. В этом и заключается главное отличие данной программы от её аналогов. Завершив все проектировочные работы, есть возможность отправить его в специализированный магазин IKEA, где вы получите профессиональную консультацию по ценовой политике на выбранные вами мебель и отделочные материалы.
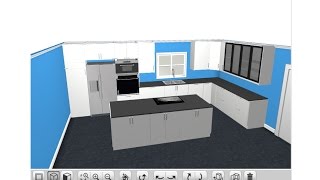


We do all sorts of helpful things to make buying a kitchen easier and our kitchen planner is one of them. It’s fun and simple to use and it’s really useful, it will give you a good idea of how your kitchen will look.
Start from scratch using a completely empty room, or choose a pre-designed room from our set of templates or saved designs. When you’ve got your space, start to fill it with your favourite kitchen cabinets, worktops and accessories. You can even go so far as to add lighting, chairs and plants to your kitchen to make it as real as possible. The only thing you won’t be able to do is cook in it.
When you’re happy with your finished plan, you can print it, email it and share it with as many people as you want to. It’s also a good idea to bring it with you if you book an appointment with one of our designers as it will help them to understand how you want your kitchen to look. And remember, any designs you save on this planner will also be automatically stored in your My Scrapbook area at Magnet online. This is a special area, exclusive to you where you can collect all your kitchen inspiration images in one place.
On your first visit to our planner you may be prompted to install it. This shouldn’t take long and once installation is complete the virtual planner will load and be ready to use. Our kitchen planner is supported by various systems - System Requirements
You may also like the designs in our gallery. Why not make one of them yours?
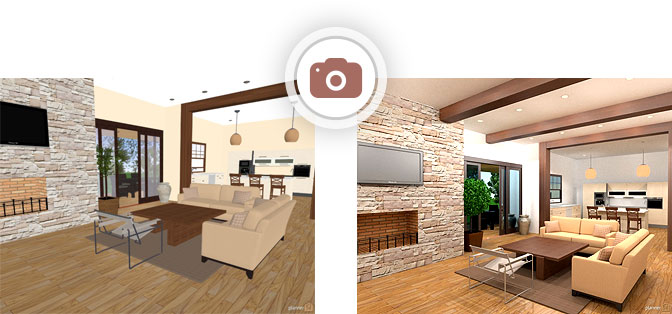
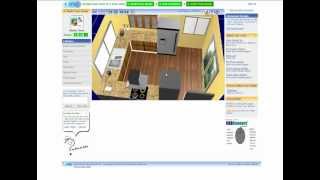
Try Easy Planner 3D Online Interior Design Software version 3.0 for free and experience cutting edge features. Provide feedback to help us refine and polish the next version of Easy Planner 3D.
Before you start, please find some time to read the minimum requirements > >Программа IKEA Home Planner позволяет каждому человеку стать собственным дизайнером интерьеров. Стоит отметить, что данная программа представлена одним из самых популярных производителей мебели Икеа.
Программа идеальным образом подойдёт для неподготовленных пользователей, которые стремятся подобрать мебель, исходя из точных размеров определённой комнаты, при этом получить готовый 3D дизайн помещения.
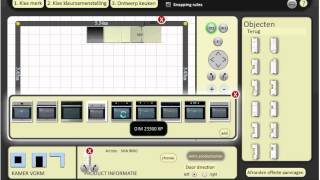
Программу можно скачать бесплатно на русском языке, поэтому сложностей в понимании возникнуть не должно. На компьютер программа не устанавливается, все манипуляции производятся онлайн прямо в окне браузера.
Каждый пользователь IKEA Home Planner имеет в своём распоряжении огромный ассортимент различных моделей мебели, а также некоторые отдельные элементы интерьера, которые дают возможность собрать интересующую комнату буквально «по кирпичикам». Более того, русская версия программы позволяет рассчитать примерную стоимость всех предметов.
Главное достоинство IKEA Home Planner заключается в том, что пользователь может сохранить созданный собою проект на сервере IKEA онлайн, за счёт чего имеется возможность получить качественную консультацию непосредственно в магазине от данного производителя и осуществить в дальнейшем покупку.
Скачать программу IKEA Home Planner 2012 вернее пользоваться ей онлайн, желательно тем, кто планирует покупать будущую мебель непосредственно у этого производителя. Здесь можно смело экспериментировать с определёнными моделями мебели, перемещать предметы, исходя из личных предпочтений, пробовать интересующие стили.
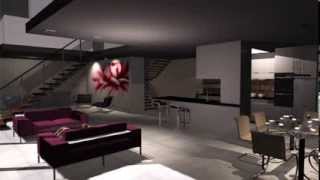
Видео пример использования IKEA Home Planner
В итоге можно распечатать самые удачные варианты интерьера со всеми размерами. Данная программа позволит почувствовать себя в качестве профессионального архитектора.
Найти планировщик можно по ссылке на официальном сайте Икея
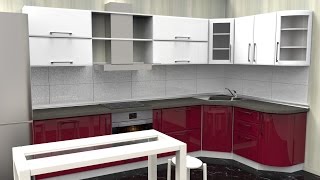
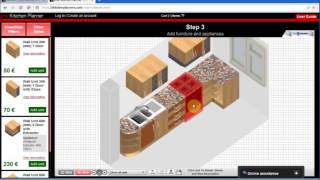
Choose from up to seven door styles, forty colours and three finishes. Enjoy creating your dream kitchen with our design tool, which makes designing your new kitchen easy and enjoyable. The tool focuses on the early stages of planning a kitchen – the design and style. With our tool, you are not only able to alter the colour and style of the cabinets but you can also accessorise the room with a variety of worktops, cabinet handles, wall tiles and flooring.
The tool is laid out in a step-by-step process. Below are the simple stages you will follow when using our tool:
Even if you find certain steps are not applicable to you, such as choosing the colour of a kitchen island, it is still an excellent way to experiment with contrasting colours and styles. This in turn will simplify the design process and help you to envision your dream kitchen.
Gathering InspirationIf you're looking for inspiration on colours or styles, why not visit the Wren Kitchens blog. We have excellent advice and inspiration centre to help guide you when designing a new kitchen, with articles on designing a striking black kitchen or a timeless kitchen that will last a lifetime.
Once you've finished using our planner, you have the option to save the design for later use, for example as part of a mood board, or you can book a store appointment or a free home measure. If you do choose the latter of the options, your design will be sent to the store of your choosing, so one of our expert designers can see and work with the style you're looking for.
Instructions
Yesterday we finally could start my radio controlled
motorised sailplane though the weather was very unsettled, partly raining and more wind then we wanted. But we wouldn't like to wait anymore.
Everything went well until at the third base leg. It seemed that it bored it already. First the plane suddenly got rid of one wing and looked for a quick landing. It was the field strait below.
Well, this was what I was worry about. The 8 bend is a weak point because the carbon tubes are not going through, they only meet each other. The middle 8 wing sections were printed with 3% infill, 0.2 mm layer height and ratio: 1.2 = 0.24 width, just to save weight.
In the meantime I printed it with 4% infill, layer height 0,3 mm and ratio: 1.2 = 0.36 mm. At the meeting points of the tubes I set a 4 mm wall, so the holes are not going through anymore. This gives a stable impression and I think even less infill would do it. We are just waiting for better weather to test it.
Also the fuselage broke at the connection between the forth and fifth section due to the hard crash. This part is hollow printed only with one perimeter but strong enough to survive normal landings.
I glued it already with additional thin printed patches on top and bottom side.
It is very important to have these parts as light as possible. Otherwise it displaces the centroid dramatically backwards and you will need ballast in the front.
Due to the high off weight of almost 960 g it needs a powerful motor and naturally a big and heavy accu. Accordingly the plane has to fly pretty fast. That means more stress to the parts and bonding surfaces as well. PLA is not easy to glue.
I want to give thanks to members of the ACNE.
Fortunately we have a lo of experienced pilots at the Aeroclub Niedereschbach ACNA e.V. nearby Frankfurt Germany: http://aero-club-nieder-eschbach.de
Without them, the plane would not have left the ground yet.
After I finished my design, I contacted them and they were so kind to give me valuable tips. So I had to redesign the whole fuselage other ten the tail. First I placed the servos one behind the other and planed to move the vertical rudder with two pull ropes. For more favourable centroid now they are side by side and moved more to the front. The steering is now controlled by 0,8 mm wires, which partly lie in 2 mm carbon pipes.
The holes in the rudder horns had to be smaller and are now 1 mm.
The centroid problem made it necessary to extend the nose extensive. To avoid ballast I tried out several noses. The current nose is now 55 mm longer and doesn't looks very good but needs no ballast anymore. To make it in harmony with the rest of the fuselage I have to redraw the complete fuselage. It will be a lot of work and I don't know, if I will find the time because I am already designing my next project reaching 2 meters wingspan or even more :-)
The plane became pretty heavy. The empty plane weights about 650 g. The wing (meanwhile 1550 mm wingspan) is the heaviest part: 450 g.
All together there are now nearly 960 g.
ATTENTION!
Before you are going to print the final wing, you have to buy the carbon rods and make sure that they fit into the wings because there are different!
I ordered some other (more light ones) and couldn't use them. If your rods don't fit, I will change the holes for you. If they are a little tight you can drill them carefully, or better use a reamer. The rods have to fit a bit tight so you don't need to glue. Glue makes it heavy.
I tried several ways to print the wings. The easiest and fastest way was to print only hollow 30 mm sections without infill and only one perimeter. Thus, all 30 mm results in a rib in each case consisting of 2 bottom layers and 2 top layers. If the holes in the wing sections are close-fitting enough you don't need to glue them. Just slide the wing panels onto the carbon pipes close together. The torsional stiffness will be good enough. But to hold the wings secured to the middle section tape them together with tape.
The two middle wing sections must be glue together of course.
This type of wing sections are up to 60 mm length suitable.
The most rigid type is the one with designed infill structure (wing_90_infill). You can print it as high as your printer can do. The only disadvantage is: it takes very much time.
All fin parts have holes for to dowel them together. 2 mm for 1.75 filament and 3.2 mm for 3.0 mm filament. These are only for adjusting. Of course additional they must be glued.
The inner horizontal rudders and the fin rudder have support on underneath its mounts.
Before fitting the horizontal middle fins to the tail you must remove very accurately the jutting edge of the first layer. Especially the inner nooks of the vertical nose have to be file off carefully.
Then the horizontal fins will fit exactly and tight to the tail and you almost don't need rubber bands for fastening :-)
The tail and rudder parts I printed with 0.3 mm layer height, 1 perimeter, 2 solid layers on bottom and top and no infill.
The rudder mounts with 0.2 mm layer height, 3 perimeter and 50% infill.
The inner ring on one side of each fusselage part is also a support. These must carefully break off or cut off afterwards.
All parts of the fusselage are printed with layer height 0.3 mm, 1 perimeter, 2 solid layers on bottom and top and no infill.
Except for the nose!
The motor frame is 2.5 mm thick and has to be solid. So you need at least 8 solid layers on bottom.
Edit 26.06.2013
I added new middle wing sections with structured infill. They are light and strong and already tested:
Wing_light_centerc._left_brim.stl
Wing_light_centerc._right_brim.stl
Roxxy BL-Outrunner 2834/08
Torque: 1.4 kg
Transmission: Carbonite ball bearings,
Weight: 9g
Dimensions: 23x12x24mm
Carbon Tubes
2x 8/6 mm (outer/inner diameter) x 740 mm long - (for the wings)
1x 8/6 mm (outer/inner diameter) x 59 mm long - (for the wing middle sections)
2x 4/3 mm (outer/inner diameter) x 729 mm long - (for the wings)
1x 4/3 mm (outer/inner diameter) x 59 mm long - (for the wing middle sections)
1x 4/3 mm (outer/inner diameter) x 74 mm long - (front holding-down rod for the wings)
1x 4/3 mm (outer/inner diameter) x 72 mm long - (back holding-down rod for the wings)
1x 4/3 mm (outer/inner diameter) x 47 mm long - (holding-down rodd for the horizontal fin)
1x 2/1 mm (outer/inner diameter) x 210 mm long - (for the vertical rudder)
1x 2/1 mm (outer/inner diameter) x 450 mm long - (for the horizontal rudder)
1x 0.8 x 520 mm long (for the vertical rudder)
1x 0.8 x 470 mm long (for the horizontal rudder)
The next days I will give more information.
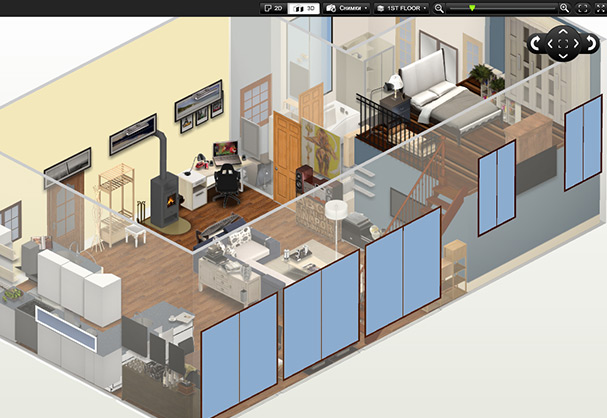
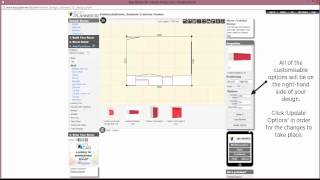
Designing Rooms with the 3D Floor Plan Maker Software
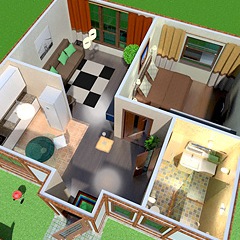
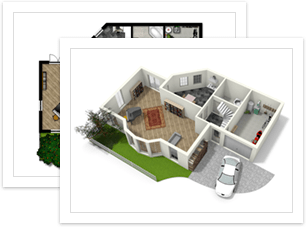
There are some software programs which allow people to create three dimensional images on their computers. The 3D floor plan maker is designed to create three dimensional images of buildings. This software is used by professional architects and designers to create plans for their clients. The software can also be purchased for home use by anyone interested in designing their own floor plans. The ease at which the program can be used means no special skills or training is required to create three dimensional plans.
The 3D floor plan maker comes with a set of templates as well as menus stocked with drag and drop items. The plan will begin by selecting a floor type and adding the dimensions for the length and width. This same procedure is used to create the walls of the structure, which can be added to create separate room divisions. The model on the screen can also be rotated using the mouse, so all angles and sides can be viewed. The handy drag and drop menu items can be used to place windows and doors inside the completed structure. Staircases and bookcases can also be added as built-in items.
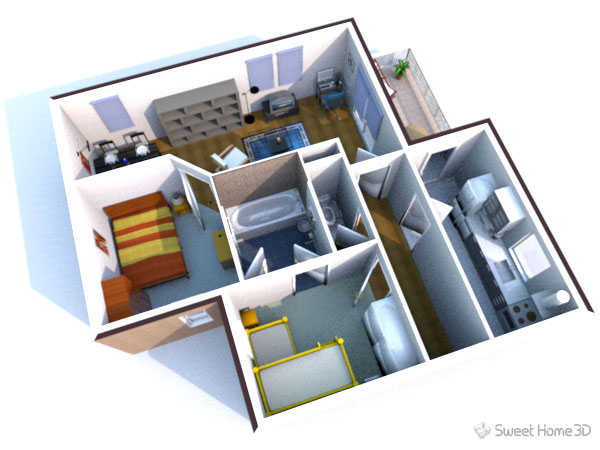
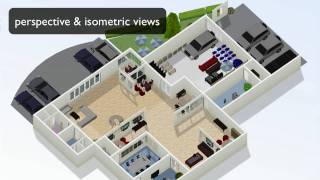
In addition to creating the basic structure of a house or building, the 3D floor plan maker can also be used to arrange the furnishings placed inside. The menu includes a full array of common furniture pieces from dining sets to sofas and plants. This helps the user see how the room will look once it is furnished. This is also a good way to create interior design plans for any room in the house. All of the drag and drop menu items can be rotated to position them in different areas. The completed plans can be saved on the hard drive, printed out on paper or uploaded to share with others…
Buying a new fitted kitchen on-line has never been easier. Listed below, in price order (lowest price first) are a selection of Easy to Order Ready Made Fitted Kitchens. Select the door style of the kitchen you like, then click through to the cabinets menu and start adding to your basket. Rendered pictures of each kitchen cabinet will make it easier for you to select exactly the unit you require, which comes complete with a colour co-ordinated carcase, the doors/drawer fronts and a choice of three stylish handles. All our kitchen furniture is delivered to you fully assembled, including the doors, and any wirework is factory fitted saving you time and money on your installation. If ordered on-line, we offer FREE DELIVERY nationwide on orders over Ј1,500 (Mainland UK only). Simply add your cabinets and accessories to your shopping basket for an immediate quick quote. Please allow 2-3 weeks for manufacture and delivery.
We build our kitchen cabinets to the highest possible specification. A selection of integrated and free standing kitchen appliances: Kitchen worktops to suit your lifestyle:The new range from Egger features an exciting choice of 18 decors including the very latest trends and a selection of the best mainstream decors
If you know what specification you require then please send us any drawings or a rough sketch of your worktop layout to assist us in our quotation to: info@3dkitchens.net
Axiom laminate splashbacks are the stylish alternative to tiling your kitchen to complement work surfaces or alternatively be used as a stunning design feature.
All our Cabinets use Blum Components