


 Рейтинг: 5.0/5.0 (1845 проголосовавших)
Категория: Windows: Загрузка файлов
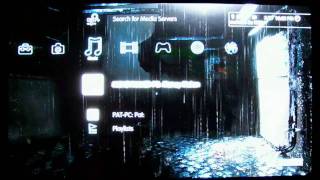
 Иногда стандартные инструменты и средства операционной системы начинают мешать использовать возможности компьютера с удовольствием. Так и стандартный медийный плеер не стал исключением, обычно он предустановлен во всех версиях операционных систем Windows. НУ и конечно, многие пользователи просто напросто не пользуются данным плеером, так как привыкли к сторонним программам воспроизведения или попросту не применяют компьютер как мультимедийный центр.
Так вот чтобы этот плеер не мешался в наших повседневных задачах и не занимал место на жёстком диске и ОЗУ, следует сделать ряд простых действий по исключению стандартной программы из системы.

Единственным минусом данного способа удаления стандартного мультимедиа плеера, является сохранение его системных копий. То есть программный компонент не удаляется полностью из операционной системы и может быть возобновлён процедурой обратной вышесказанному.


Windows Media Player 7 (WMP7) is a mammoth upgrade to Microsoft's media player software, enough so that the company might have been better served coming up with a new name. For Windows users, WMP7 replaces both Windows Media Player 6.4 and the built-in CD player, but it also potentially replaces a slew of third party applications as well. This is because WMP7 is an "all-in-one' digital media solution, offering a wide range of features that will help you find, play, organize, and even create digital music and video on your PC. In this way, WMP7 has transcended its previous role as a media "player," entering the realm previously dominated by such players as Real Jukebox and MusicMatch Media Jukebox.
In my review of Windows Me. I panned WMP7 for its bloated size and slightly schizophrenic interface. I also chastised Microsoft for including this application in Windows without providing any way to not install it or uninstall it later. But for users of other OSes, Windows Media Player 7 is an option, and I've actually started using it as my primary media player. In other areas, however--notably audio encoding and portable device compatibility--Windows Media Player 7 falls short, so I can't yet recommend it as the one-stop solution for all your digital media needs. In this review, I will take a look at WMP7 and discuss the areas where it excels as well as those where it falls flat.
First of all, WMP7 is a big application. It takes up a whopping 18MB or more of RAM, far more than media players like Winamp. But I don't see this as an issue at all: On a modern Windows 2000 system with 128 MB or more of RAM, 18 MB is a drop in the bucket, and that's RAM that would just be sitting there unused anyway. My feeling is that anyone who worries about this kind of thing has some priorities mixed, as Windows 2000 is smart enough to funnel RAM where it's most useful. If you're hitting the threshold of available RAM on a regular basis, you've got more important issues to resolve than the media player you'd like to use.
But WMP7 is big in other ways: Many people will want to run the application full screen, even on 1024 x 768 systems, simply so that they can take in all of the information it presents. Other programs--such as Real Jukebox--have far less cluttered and "big" interfaces. How big is WMP7? To simply view the entire width of the display in the Web-based Media Guide, you will need an 800 x 600 display, minimum. And you're definitely going to want to expand the window vertically (Figure). so you may as well just get used to the full screen display.
Overall, the user interface is one of WMP7's biggest limitations. It's an odd mix of a curved fascia stuck inside a rectangular window that's been rendered in HTML. And the dialog boxes, especially for setting options, are hard to navigate and poorly organized. On the other hand, one must consider the competition, and WMP7 is no more difficult to use than Real Jukebox, especially when you're first learning how it works. But Real Jukebox presents a much more refined user interface than WMP7, there's just no contest.
The main screens in WMP7--Now Playing, Media Guide, and the like--are easy to reach, however, and fairly obvious. And WMP7 basically does it all, when it comes to digital media playback: It can handle CD audio, Windows Media audio and video, MP3 audio, AVI video, and a host of other formats. Notably absent from the list, however, are QuickTime 4.0+ and RealAudio/Video, which are popular on the Web.
Using the Media Guide
If you're online, WMP7 launches with the Media Guide screen by default (Figure). This is simply a Web page that's hosted on Microsoft's Windows Media Web site and it's analogous to the MSN Web site you see when you launch Internet Explorer. I'm not a big fan of these types of sites and Microsoft's is particularly bad. However, it is updated on a daily basis, so there is always new content. But this content isn't yet rich enough to be targeted at particular users, so you'll be bombarded with information about Brittney Spears and Dr. Dre whether you want it or not. Actually, that's not strictly true: You can tell Windows Media Player to not load the Media Guide by default, and I recommend this. The current version is just too weak to be of any interest.
Most alarmingly, there's no easy way to purchase music online using this service, though that was touted as a major feature when WMP7 was launched in July. I'm still trying to find EMI's supposedly extensive collection of singles for purchase. I'm sure it's out there somewhere, but the Media Guide isn't any help at all.
Conclusion: The Media Guide is a joke.
Playing CDs
The WMP7 CD player is straightforward and easy to use (Figure). Like other PC-based CD players, WMP7 will access an online CD database such as CDDB when you insert a music CD and correctly display artist, album and track information. And, like other CD players, WMP7 lets you add CD information when it isn't available from CDDB. Likewise, you can edit the information provided by CDDB, which will change your local copy, not the Internet version. Subsequent CD plays will access the local database instead of CDDB.
Conclusion: Playing CDs with WMP7 is no better or worse than other tools.
Burning CDs
WMP7 also lets you record, or "burn," your own CDs, using music that's stored on your system in WAV format, Windows Media (WMA) or MP3 format. WMP7 can create CD-quality recordings, but your results will vary based on the quality of the source. To create your own CD, however, you'll need to first create a playlist (see Organizing music and video with the Media Library, below), which is a bit of a limitation. Programs such as Adaptec CD Creator allow you to easily create music (and data) CDs by simply dragging and dropping the files you wish to include. In WMP7, however, this functionality is exposed only through the File menu and you are presented with a list of available playlists, so you need to think ahead (Figure).
Conclusion: Burning CDs with WMP7 is needlessly convoluted.
Encoding music from CDs
The process of copying a CD audio track to your local system is called encoding, and you need to specify the format that the file will take when it is encoded. Today, this is typically MP3 format, but WMP7 only encodes in its own Windows Media format (WMA), which is a major limitation. By default, WMP7 includes licensing information when you copy audio tracks to your PC, however, and I recommend turning this feature off so that you can more easily use that music on other PCs or with other devices. On that note, I recommend skipping out on WMP7 for encoding anyway, as it won't encode in MP3 format. There may come a day when the world uses WMA as a standard audio format, but that day is not yet upon us.
That said, WMP7 is a fine encoder if you're interested in WMA format. It can copy in digital mode if your system supports it (and it probably will), which is faster and offers higher quality (Figure). You can specify the bit rate of your encoded audio tracks as well, an interesting exercise in compromise: Lower bit rates make smaller files, but don't sound as good. I generally encode MP3 files at 160 Kbps for near CD quality, but I've heard that WMA format can achieve similar results at lower bit rates. You'll want to experiment with this, however, taking into account how these recordings will sound on portable music devices, if that's a possibility. In my personal experience, WMA format is slightly better sound at the same bit rate than MP3, but I still wouldn't mess with anything below 128 Kbps. Your results will vary.
Conclusion: Unless you're married to Microsoft's audio format, skip out on WMP7 for encoding. I recommend Real Jukebox for this purpose.
Organizing music and video with the Media Library
The WMP7 Media Library is, in my mind, the reason you'll want to use this program. Audio and video that are playing in WMP7 are automatically added to the Media Library, which organizes this content by artist, album, and genre (Figure). And you can drag and drop entire drives worth of music into WMP7 to automatically add your entire music collection to the library. If you need something more specific, you can create playlists, which can contain any songs (or videos) you'd like. So, for example, you might create playlists such as "80's synth bands," "British Invasion," or whatever.
The WMP7 Media Library really makes it easy to organize and play back digital audio. You might shuffle through your entire collection, through all the rock songs, or through all the songs by Def Leppard. Or you might decide to play songs from a certain album. While it's true that other media players off similar functionality, the Media Library is the best of the lot, and it's very easy to use. The only minor complaint is that you might not want every single media file you play to be added to the library, and there's no way to turn this off. I occasionally find myself manually deleting files from the library because they no longer exist in that location on my systems.
Conclusion: The Media Library is the reason you need to try WMP7
Finding music on the Internet
WMP7 offers a Radio Tuner feature that allows you to connect to radio stations from around the world, over the Internet or, if you have the appropriate hardware, using standard AM and FM signals. You can search for radio stations by format (Rock, oldies, etc.), band (AM, FM, Internet), language, location, callsign, frequency, or keyword. While it's unlikely that I'll ever use this feature on a regular basis, it works as advertised, and you can quickly begin listening to rock stations in Seattle or Classical music stations from New York (Figure).
The Radio Tuner feature requires you to be connected to the Internet, and it offers a Media Library-like playlist feature so that you can easily save your favorite stations for easy use later on.
If you're looking for a Napster-like tool for downloading music and saving it to your local hard drive, you've got two options: The Media Guide offers this sort of functionality, but it's limited to throw-away songs from groups that are trying to suck you into a retail purchase. Or you could simply use Napster or one of its clones to find Internet music download sites, though this is of questionable legality at this time.
Conclusion: The Internet Tuner works great if you're into that kind of thing and have a 24/7, cable modem connection.
Connecting to portable devices
WMP7 supports a number of portable devices, though it's currently (and irritatingly) limited to a range of Windows CE-based PocketPCs and Palm-sized PCs, dedicated portable audio devices, and CompactFlash drives (Figure). Given the wide range of MP3 players our there, it's sort of depressing that popular players such as the RIO 100/300 are not supported, though I expect this to happen over time.
Like the CD burning function, copying music to portable devices requires that you organize the songs you want to copy into playlists beforehand. Numerous applications allow you to drag and drop any songs into portable devices, however, making this a big limitation and irritation.
Conclusion: Unless your device is supported, you're going to be out of luck. And the lack of drag and drop audio copying makes this program less than elegant for the job. Stick with the tools that came with your device or look for freeware/shareware solutions, such as the excellent J. River Media Jukebox or Real Jukebox.
Customizing Windows Media Player
WMP7 can be customized or personalized in a number of ways, including a "skinning" function that changes the way the application looks and an interesting visualization feature that provides an undulating graphical display that moves in concert with the currently playing song. You can also choose to use and/or display a graphic equalizer, and other audio-video effects.
The WMP7 "skins" feature is an interesting preview of the next version of Windows, which will offer a similar way to change the look and feel of its user interface (Figure). WMP7 skins only work in a special "compact mode," so there's actually no way to change the default WMP7 window. But compact mode offers developers a number of interesting ways to change no only the user interface of WMP7, but its functionality as well. It requires a lot of work, however, and an understanding of XML to make it happen, so the casual Photoshop user need not apply. The skins that ship with WMP7 are uniformly horrible, but you can download a number of new skins from the Windows Media Player Web site (there's a link from within the program, which is nice), some of which offer a number of powerful new features. On the other hand, most of the skins on the Web site stink as well, and they're nowhere near as refined as the skins that are available for Winamp and other popular players. I hope to see this change over time as developers get more attuned to the WMP skin programming model.
The WMP7 visualizations are interesting: When you switch the player into the "Now Playing" screen, you can view a set of animated graphics that move to the beat of the music (Figure) (Certain skins also support this feature in Compact Mode). In addition to the wide range of visualizations that ship with the player, a number of new ones are downloadable from the Web.
Conclusion: WMP7 isn't as configurable as other players, but it's skinning and visualization features are Good Enough. Something this trivial isn't a reason to choose one player over another.
Conclusion
Windows Media Player 7 is a great digital media player, but it falls short as an all-in-one tool. Many of its features--the online Media Guide, the CD burner, the WMA-only media encoder, and its support for portable devices--are poorly executed or incomplete, and a decision to use WMP7 or skip it over may rest in one of these areas. But while I do turn to other tools for certain functionality, WMP7 excels at organizing and playing digital audio, and I'll keep it in my stable of digital media tools, however, simply because of its excellent Media Library.
I recommend Adaptec EZ CD Creator 4.x for audio CD creation and Real Jukebox for MP3 encoding, so my search for that elusive all-in-digital media tool is still ongoing. But perhaps a future revision of WMP will right these wrongs. Regardless, I suspect that Microsoft's solution for digital media is here to stay.
We’ve blogged about a number of features related to home networking and media in Windows 7. A scenario which brings all these together in a pretty cool way is Media Streaming. This scenario allows you to use a Windows 7 PC as a hub for media sharing—where you can share media with other PCs and devices on your home network via streaming, and even stream this information securely over the internet. Scott Manchester on the Devices & Media program management team coordinated this post, but as you will see it represents work across the Core User Experience, Media Center, Networking, and even Windows Live chose to take advantage of the new APIs in this scenario. This is a pretty detailed post and there’s a lot to try out. Those of you using the RC to test things out, you can always install on another PC and use it for the 30-day period without requiring a new PID key. Have fun! --Steven
Windows 7 includes a number of exciting new media streaming features that enable you to enjoy your media collection on other PCs and devices in the home and while on the road from across the internet. We’ve created a networked media experience that is more friendly to use and simpler to set up. Now enjoying music, pictures, and video on your network connected PC or media device “just works” without concern for media formats, transports, or protocols.
There are a growing number of Network Media Devices (NMDs) certified to interoperate using an open and widely embraced industry standard called the Digital Living Network Alliance (DLNA). Windows 7 implements this open standard, which means that sharing media between NMDs, Windows PCs, Windows Home Server, and Extenders for Windows Media Center (including Xbox 360) is easier and more natural. Supporting this standard also means that the myriad of NMDs such as electronic picture frames, network radios, televisions, and others are companions to Windows 7 PCs and may seamlessly participate in the whole-home media experience.
Not Just for the TechieWe made it much simpler to configure media streaming. Before Windows 7, media streaming features were focused on media enthusiasts. To improve the setup experience, media streaming has been integrated with the new HomeGroup feature so in a typical home network configuration, media streaming is enabled and works by default. There is also a new “Stream” menu prominently displayed in the Window Media Player user interface (see figure below) that exposes simple scenario-based configuration options. These options allow you to:
Each of these scenarios will be discussed throughout this post.
HomeGroup introduces the concept of “shared libraries ” for music, pictures, and video. As described in a previous blog post. these shared libraries are accessible from within the navigation pane of Windows Explorer and Windows Media Player, and from the “shared” view of each media category within Windows Media Center (see figures below). The scope of these libraries is the same from each of these views.
Windows Explorer will automatically discover and provide access to shared media libraries on other HomeGroup PCs. In addition, Windows Media Player and Windows Media Center will automatically discover shared libraries from:
A HomeGroup is a secured set of Windows 7 PCs that can view and consume each other’s media seamlessly. Sharing is automatically set up among HomeGroup PCs and HomeGroup settings allow you to choose what types of media you would like to share; for example, you may choose to only share your music library and not your video or pictures.
In addition to all HomeGroup PCs being able to access your media, we made it easy to allow devices to access shared media libraries on Windows 7 PCs. This can be done conveniently from either HomeGroup settings or within Windows Media Player:
You can also choose to restrict which specific PCs or devices have access to your media by choosing “more streaming options…” from the Windows Media Player “Stream” menu.
Play To: Windows 7 as a Universal Remote Control for your Media CollectionIn addition to playing media streamed from other shared media libraries within Windows Media Player, Windows 7 can now send media to be played on other Windows 7 PCs and DLNA-certified digital media renderers. We call this feature “Play To.” With “Play To,” you can browse or search from within Windows Media Player or Windows Explorer to find your desired media, and then choose where you want it to be played. A versatile remote control window is presented for each “Play To” session, providing you with the ability to control the entire experience.
It does not matter where media collections are stored. “Play To” is available for both local media libraries and for shared media libraries. If you would like to send media from one Windows 7 PC to another, choose “Allow remote control of my Player” from the Windows Media Player “Stream” menu on the receiving PC. This will cause Windows Media Player to be discovered in the “Play To” menu of other Windows 7 PCs on the same network.
When media streaming is enabled on your Windows 7 PC, “Play To” will be available in Windows Media Player and Windows Explorer via the right click menu for media items. If Windows 7 has not discovered a “Play To” capable PC or device on the network, this context menu will not be available. DLNA provides guidelines to certify different device categories and roles. Not every DLNA-certified device supports the “Play To” feature. Look for DLNA-certified Digital Media Renderers (DMR), and for the best performance, look for DMR devices that carry the “Compatible with Windows 7” logo.
Once you’ve selected media items to play on another PC or device, a “Play To” remote control window will launch providing standard controls like play, pause, stop, skip forward and backward, seek forward and backward, volume, and mute. Not every device will support all of the control features and some media types may not support seek. Once the “Play To” remote control window is launched, you can reorder or delete items, add to the queue, or toggle repeat. It’s even possible to add new media items from Windows Media Player or Windows Explorer by dragging them into this window.
There is no artificial limit to the number of “Play To” sessions you can launch. You may send pictures to a picture frame, video clips to a TV, and music to another Windows 7 laptop all at the same time. Furthermore, different types of media can be sent to a single destination, as shown in the example above.
What About the Xbox 360 and Extenders for Windows Media Center?Xbox 360 has two ways to receive media streams from other Windows 7 PCs, which we refer to casually as “dashboard” mode and “extender” mode.
In dashboard mode, Xbox 360 functions in the role of a simple media player. While it’s not officially a DLNA-certified device, you can use Xbox 360 to browse the shared media libraries from Windows 7 PCs (there is also support for this in Windows Media Player 11) and pull content from those libraries for playback within the dashboard.
In extender mode, Xbox 360 (and other Extenders for Windows Media Center) is seen by Windows 7 PC’s on the network as both a Digital Media Player (DMP) and a Digital Media Renderer (DMR) device. Using the Extender for Windows Media Center on the Xbox 360, you can browse media libraries on other computers and pull that content for local playback, similar to the process of using Xbox 360 in dashboard mode. However, in extender mode Xbox 360 will also support “Play To” so that users of Windows 7 PC’s on the network can push content to it. All extenders, when associated with a Windows 7 PC, will be discovered in the “Play To” menu of other Windows 7 PCs.
Internet Access to Home MediaWith Windows 7 we’ve also extended the media streaming experience outside the home and allow you to access your home media from anywhere in the world via the internet. We’ve made media streaming over the internet a natural extension of the experience within the home. For the experience to be seamless we needed to solve some significant technical challenges, such as:
To overcome these technical hurdles, we designed a model that uses an Online ID Provider to help facilitate discovery, privacy, and security. The new Online ID Provider infrastructure in Windows 7 allows you to link your Online ID (e.g. you@live.com) with your Windows user account. This enables an authentication/authorization server to provide the necessary privacy to establish a protected link between two Windows 7 PCs (e.g. your laptop on the road and your PC at home). Internet access to home media is enabled from the “Stream” menu in Windows Media Player.
The setup process walks you through linking an online ID with your Windows user account, which must be performed on both the home PC and remote PC. The same online ID must be used on both PCs in order to establish the connection between them. In order for remote PCs to access the home media collection, the PC at home (acting as a server) must be on a “Home” network location. Remote PCs (acting as clients) can browse and receive content streamed from the home PC from any network location (Public, Work, or Home). The network location is chosen when first connecting to any network and can be changed later from the Network and Sharing Center.
Reliability - Network Connection RequirementsStreaming media over the internet from home works best with an “always on” broadband connection. Broadband uplink speeds vary from a modest 200Kbps to 10Mbps or more. Downlink connection speeds will also vary from crowded hotspots, hotel rooms, and wireless network connections in friends’ homes. Regardless of the uplink or downlink speeds, we wanted to ensure that even high bit rate content (e.g. high definition recorded TV) could be streamed with a good experience. The internet media streaming feature uses advanced bandwidth detection algorithms and end-to-end network heuristics to determine how to stream content that is at a higher bit rate than the smallest link in the network path.
Another challenge with internet access to home media is creating a peer-to-peer connection between the remote client PC and the home PC serving the media. A typical home network will get a single unique IP address from an internet service provider, and this IP address is shared by all the devices and PCs in the home using Network Address Translation (NAT), a function of an Internet Gateway Device (IGD) or Wireless Router. This creates a challenge for a remote PC or device to make an unsolicited connection inside the home, both in terms of resolving the home’s unique IP address and traversing the NAT to communicate directly to a unique PC or device on the home network.
Windows 7 employs some advanced NAT traversal technologies to establish the peer-to-peer connection and, with most IGDs, will allow a reliable connection to the home PC from any remote PC. For best results you should use a wireless router or IGD that has been certified by the Windows Logo program.
Media FormatsIn Windows 7 we let you enjoy the media you want and don’t trouble you with the need to know about file types or codecs in most cases. (For more details, see Table 1 below). In addition to supporting local playback of new formats, we can also ensure that the content will play on devices that may not support the codec, bit rate, container, or format of that content. We accomplish this by using the new transcoding support in Windows 7.
Let’s say for instance you have a DivX movie you want to watch on your new DLNA certified television which only supports WMV and MPEG2. Windows 7 will determine the capability of the TV (codec, bit rate, etc.) and dynamically convert the DivX video to a format the TV can play. The general rule of thumb is: if Windows Media Player can play the content on the PC then the content will almost always play back on the network connected device. Bandwidth estimation techniques are used for media streaming within the home and over the internet, which enables Windows 7 to transcode using the most optimal format and bit rate.
Table 1: New Decoders in Windows 7
The format and bit rate chosen for transcoding, especially for video, is highly dependent on the CPU performance of the transcoding PC as identified by its Windows Experience Index:
We also created a flexible model for silicon partners to provide hardware accelerators that automatically work with media streaming and other Windows 7 features. This new acceleration model allows hardware developers to build media foundation proxies for media format encoders and decoders that are fully implemented in their hardware (perhaps in a GPU or additional hardware device). With hardware supported encoding and decoding, Windows 7 can offload the computationally demanding transcoding to dedicated hardware as a background task without affecting the CPU performance of the PC.
Digital Living Network Support in Windows 7The Digital Living Network Alliance (DLNA) is a consortium of more than 200 companies interested in specifying technologies for exchanging media in home networks. The DLNA architecture is based on the UPnP specification, but in addition, DLNA specifies transport protocols (based on HTTP and RTP) and sets of media formats.
DLNA defines device roles (e.g. servers, players, renderers, etc.) and the protocols that these devices use to discover each other and communicate with each other (e.g. UPnP, HTTP, RTP, etc.). Windows 7 implements several of the DLNA device roles (see table 2 below) and it also implements the DLNA protocols required for communications and media exchange. With Windows 7, your PC will be able to interoperate with a broad variety of DLNA certified devices like TVs, stereo systems, cell phones, DVRs, game consoles, etc.
Table 2: DLNA Device Profiles Supported by Windows 7
Because Windows 7 implements several device roles, there are different ways in which you could choose to use a Windows 7 PC at home. The remainder of this section explains the different scenarios.
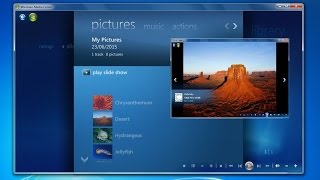
Scenario 1: You store your music, video, and pictures on a Windows 7 PC. You’ve recently acquired a TV with a DLNA logo. Using the TV, you can browse the media library available on the Windows 7 PC. You can use the TV to watch the video and pictures, and listen to music stored on the PC. Figure 1 illustrates this scenario. In this case, the Windows 7 PC behaves as a DMS. Notice that this scenario was already available in Windows Vista and in Windows XP using Windows Media Player 11.
Figure 1: The TV unit browses and plays content stored in a PC
Scenario 2: You have a Network Attached Storage (NAS) device where you store your music, video, and pictures. The NAS device implements a DMS. You open Windows Media Player on a Windows 7 PC. You can find the NAS device using Windows Media Player, and you can browse the media library available on the NAS device. You can watch the video or pictures, and listen to music stored on the NAS device. Figure 2 illustrates this scenario. In this case, the Windows 7 PC behaves as a DMP.
Figure 2: A Windows 7 PC browses and plays content stored on a NAS device
Scenario 3: You have a cell phone that not only takes pictures but can push the pictures to a Windows 7 PC. You can show the pictures to your friends using the large-screen display of the PC without the need to physically transfer the files to the PC with a USB thumb drive, for example. Figure 3 illustrates this scenario. In this case, the cell phone acts as a DMS and a DMC and the Windows 7 PC behaves as a DMR.
Figure 3: A cell phone pushes pictures for display on a Windows7 PC
Scenario 4: You’ve acquired a stereo system with the DLNA logo. On his Windows 7 PC, you’ve accumulated a vast collection of music with thousands of songs. Because your collection is large, you prefer to search, organize, and select songs using the rich capabilities of the Windows Media Player. Once you select the songs, you simply push the songs to your stereo system using “Play To.” You also have a NAS device containing an additional collection of music and video. You can use the Windows 7 PC to browse the content on the NAS device and push it to the stereo system. Figure 4 illustrates this scenario. In this case, the Windows 7 PC behaves as a DMS and a DMC.
Figure 4: A Windows 7 PC browses local content or shared content on the network. The PC then pushes the content for playback in a TV unit (DMR).
There's definitely a lot to enjoy here. Have fun.
-- Scott, Tim and the Devices & Media team
– We earlier saw how to set up windows media center in windows 7. In this guide, we will explain how to watch live TV or internet TV in media center.
To watch live TV in your laptop or computer through the media center on windows 7, you need a TV tuner and a TV signal source such as an cable TC jack or a TV antenna. If you don’t have a TV tuner, you may still be able to watch internet TV but not live TV. There are a lot of TV tuner cards available in the market and these can be connected to the computer via the USB port or an internal expansion slot.
How to set up Windows 7 media Center?Before you can watch live TV or internet TV, you need to set up Windows 7 Media Center .Here is a guide on setting up windows media center.
Windows media Center – How to watch live TV?Here are the steps to watch live TV on media center in windows 7.
Unlike live TV, Internet TV just requires an internet connection and you don’t need a special hardware like a TV tuner card! But an analog or digital TV tuner is required to play and record live TV in Windows 7 Media Center.
Чтобы вступить в группу, Вам необходимо войти .
ИнформацияОписание: Всем привет, уважаемые гости!
Вы находитесь в официальной группе авторской кинокомпании «7 Media Production», день рождения которой 2 апреля 2013 года. Показать полностью..
Руководитель кинокомпании - Псакин Артур Викторович. Мы специализируемся на создании игровых короткометражных фильмов для кинофестивалей России и Европы.
Съемки проходят в Москве и Подмосковье! Последние наши работы:
Художественный фильм "Легко ли быть дураком" - http://youtu.be/REYnGgT33YM
Художественный фильм "Переворот" - http://youtu.be/zso4bHZCXRA
Художественный фильм "Остановка" - http://youtu.be/S4aLJiuTcjQ
Приглашаем вас в ряды сотрудников нашей кинокомпании! Делитесь комментариями, впечатлениями и рассказывайте всем о нашем творчестве. А также уважаемые, спонсоры, просим обратить на нас внимание!
MediaMonkey Gold?
Why should you get MediaMonkey Gold?
Why buy MediaMonkey Gold when the standard version is free?
Purchasing MediaMonkey
MediaMonkey transactions are processed via Element5 a division of Digital River. Our store supports a variety of payment types including credit cards, cheques, and PayPal. Digital River is a leader in secure transaction processing: all communications are encrypted and stored securely.
Getting Your License KeySoon after you complete your purchase, you'll receive an e-mail containing installation instructions and a License Key to register MediaMonkey Gold.
If you have questions about the purchase process see the Element 5 faq. If you're having problems with your order you can contact Element 5 customer service .
Installing MediaMonkeyMediaMonkey for Windows is supported on 32/64 bit versions of Windows 10 (desktop), 8 (desktop), Windows 7, Windows Vista, and Windows XP, but is also known to work on WINE (Linux). Simply double-click the downloaded file to install it.
MediaMonkey supports over 15 languages: English, Afrikaans, Chinese, Czech, Danish, Dutch, Finnish, French, Greek, Hungarian, Italian, Japanese, Norwegian, Polish, Russian, Serbian, Slovakian, Spanish, Swedish, Ukrainian, and Vietnamese.
Existing MediaMonkey License HoldersIf you have a 2.x / 3.x license, please see the upgrade faq for upgrade information.
Как сделать галерею на Drupal - вопрос весьма популярный. А тем более - как сделать галерею на Drupal 7? Решение есть, и, надо сказать, отличное решение. Модуль Media Gallery разработан именно для 7 версии друпала. Что умеет Media Gallery?
Впечатляет, да? Поддерживаемые форматы впечатляют не меньше: jpg, jpeg, gif, png, txt, doc, xls, pdf, ppt, pps, odt, ods, odp, mp3, mov, m4v, mp4, mpeg, avi, ogg, wmv, ico. Кроме того - есть дополнительные модули, взаимодействующие с медиа-галереей, которые расширяют возможности и позволяют вставлять в галерею, например, видео с YouTube и фотографии с Flickr. Вобщем очень функциональная галерея.
Теперь о том, как ее использовать.
Прежде всего скачать и установить модули:
Опционально:
После того, как все модули будут включены, у нас в админском разделе "Конфигурация" появится пункт "Gallery Settings" - здесь настраиваются параметры страницы, на которой выводятся коллекции, то бишь список всех галлерей (как выглядит можно посмотреть у меня на странице фотогалерея). Добавится тип материала Галерея (или Gallery, если язык по умолчанию английский).
Прежде чем добавлять фотографии и наслаждаться результатом, нужно вернуться в раздел администрирования "Конфигурация" и, кликнув по ссылочке "Media Types" настроить стили отображения файлов для разных видов (для изображений - полный материал, аннотация, блок, коллекция), а именно - выставить соответствующие пресеты в manage display.
С основными настройками все. Дальше можно тестировать, добавлять свои медиа-галереи и радоватаься. Но не расслабляться, ведь у Drupal еще столько неисследованных возможностей.
UPD: у многих возникает одна и та же проблема с Media Gallery: не отображаются превьюшки фотографий. вместо них вылезает непонятная и сильно растянутая хрень.
Решается косяк так:
Идем в раздел конфигурация. Видим в блоке Media следующее:
Выбираем Изображение -> manage display. Тыкаем, переходим на следующую страницу: (кликабельно)
Тыкаем manage display, и видим. (тоже кликабельно)
По умолчанию для всех выделенных желтым вариантов отображения картинок в галерее установлено тоже что и на скрине - Generic files. Для gallery thumbnail, gallery lightbox, block thumbnail, collection thumbnail устанавливаем нужные пресеты (они созданы при установке модуля Media Gallery автоматически):