


 Рейтинг: 4.5/5.0 (1904 проголосовавших)
Категория: Windows: Защита данных
My Folder 1.0.0.0 изменения значки папок в Windows.
Программа может быть пущена на каталанском, датском, немецком, английском, Испанском, Юскаре, французах, итальянце, голландцах, норвежце, португальце и Suomi.
После установки программы можно щелкнуть по прибору для испытания на излом с правильной кнопкой мыши и изменить значок папки с одним из вариантов, которые программа предлагает (цвета, событие, уровень, приоритет, объект).
Можно также прибавить больше значков к своей библиотеке, импортируя их из любого dll. exe. или icl.file. Убедитесь, что указали, когда вы хотите прибавить значки от файла ресурсов (не от файла). Тем путем вы будете в состоянии выбрать который значки импортировать. Иначе, вы импортируете только значок, который идентифицирует файл. Прибавления могут быть позже удалены от вашего набора, или перемещены в другую галерею.
Программа также пускает вам, чтобы создать новые приборы для испытания на излом в ваших дисках.
Всегда возможно отменить изменения и возвратиться к значку исходного прибора для испытания на излом.
Программа также предлагает ссылку, чтобы купить больше библиотек значка в http://www.grafile.com/Category_Page.aspx?cat=1
Обнови Софт рекомендует использовать программу My Folder в соответствии с правилами интеллектуальной собственности. Обнови Софт не рекомендует использовать кряк, серийник, ключ, keygen, crack, serial для My Folder.


Lock my Folder is a new folder password protected software which can help you lock your files, folders with your personal password. Prevent people from viewing, editing, altering your folders as easy as 1-2-3. Locking files, folders, and drives is the best way to guarantee that nobody accidentally or intentionally gets access to your private and confidential information.
Lock files, folder with secure encryption and password protection. You will be asked to type in a password when you open Lock ny Folder at the first time. To help avoid typos, you must enter your password twice. If you do type a different password, Lock my Folder will prompt you for a correction. The password you enter is used for each folder and file to be locked.
Lock/unlock all selected items with one click
Works perfectly on disk types like NTFS
Supports unlock all items when starting
You need not run Lock my Folder at all time, it supports lock all items when exit
Lock my Folder это программное обеспечение Shareware в категории (2), разработанная PtShare .
Проверяли обновления 0 раз пользователями нашего клиентского приложения UpdateStar в прошлом месяце.
Последняя версия Lock my Folder-1.7, выпущенный на 19.02.2008. Первоначально он был добавлен в нашу базу данных на 26.08.2007.
Lock my Folder требует любой операционной системы Windows запущена на компьютере, он будет установлен на.
Lock my Folder не был оценен нашими пользователями еще.
Так уж устроено, что в нашей жизни у каждого человека есть своё законное личное пространство и совсем некстати, когда кто-то пытается его нарушить. Любой имеет право на свои тайны и секреты. поэтому должна быть и защита таких тайн.
Владельцы apple-девайсов могут спать спокойно, потому что для них такая защита есть. Предлагаем вашему вниманию программу My Secret Folder – универсальное решение для защиты вашего устройства от несанкционированного доступа.
В самом деле, некоторая информация, принадлежащая только вам, не должна быть просмотрена кем-то другим, кого она совершенно не касается. Как правило, самой ценной и секретной информацией всегда являются личные фотографии или видео. Поэтому, совершенно не лишним будет всё это скрыть от посторонних глаз. В этом и поможет My Secret Folder.
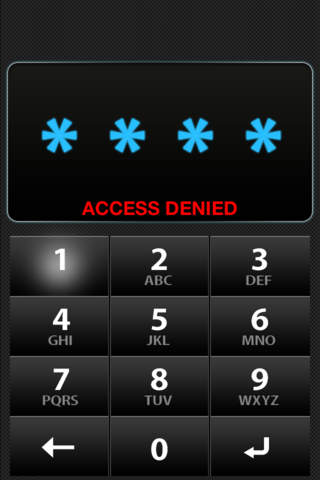
После покупки и скачивания программы на экране вашего устройства появится новый значок, который с виду очень сильно напоминает обыкновенную папку под названием My Folder (мой файл). Сделано это специально, чтобы запутать нежелательного гостя в вашем телефоне. Зайдя в программу, вам предложат ввести пароль для доступа. К слову, в приложении есть два типа паролей: первый лично для вас (Main), второй для возможных гостей (Decoy).
Главная особенность My Secret Folder в том, что он позволяет узнать, кто и когда пытался несанкционированно запустить приложение. Вы сможете не только увидеть, сколько всего было попыток взлома, но и посмотреть более подробную информацию в логах.
Процесс импорта фотографий и видеоклипов предельно прост: либо через саму камеру, либо через имеющиеся у вас фотоальбомы. Не забудьте при этом стереть оригиналы. В случае необходимости их восстановить это можно будет сделать через My Secret Folder. В дополнение, в программе можно создавать собственные фотоальбомы и настраивать различные параметры на свой вкус.
В целом, программа очень полезна, особенно, если вам есть что скрывать. Так или иначе, это хорошее и надёжное хранилище фотографий и видеороликов .
Общая информация о программе:Тип: Lifestyle.
Устройства: iPhone, iPad, iPod touch.
Folder Protect v2.0.0
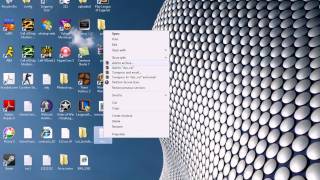
C этой программы за безопасность файлов вы можете не переживать, после установки и запуска утилиты, вы сможете совершенно спокойно защищать паролем и даже выставлять различные права доступа к любым папкам, конкретным файлам, дискам, даже на установленные приложения можно накладывать ограничения по запуску, попробуйте скачать Folder Protect. может вам пригодится.
Эта не просто разработка которая позволит заблокировать файл полностью от чужих глаз, тут все немного иначе, вы сможете сами настраивать уровень безопасности, либо просто скроете файл, либо заблокируете к нему доступ, также сможет полностью удалить его. Если верить описанию авторов, программа работает на уровне ядра Windows, что позволит программе функционировать даже в безопасном режиме. Теперь давать доступ к нужной вам информации другим пользователем не имеет риска, так как Folder Protect защитит файлы от удаления, изменения и так далее, а без ввода пароля вы никогда не сможете удалить разработку с вашего компьютера.
Folder Protect умеет работать в режиме скрытности, можно будет настроить время, в которое данные будут автоматически защищены, например вы знаете, что должен прийти ребенок со школы в это время, выставляете его на программе и идете спокойно на работу. Folder Protect умеет защищать конкретные заданные вами расширения, например изображения, видео, документы и прочие другие файлы. Почти для любой операции вам надо совершить всего один клик мышкой, после установки Folder Protect, инструмент будет интегрирован в контекстное меню, оттуда можно быстро защитить нужный файл.
Название выпуска. Folder.Protect.v2.0.0.keygen-BRD
 Что такое ScreenSaver
Скачать утилиту для удаления ScreenSaver
Удалить ScreenSaver вручную
Удалить ScreenSaver из Google Chrome
Информация об угрозе
Способ заражения ScreenSaver
ScreenSaver устанавливается на ваш компьютер вместе с бесплатными программами. Этот способ можно назвать "пакетная установка". Бесплатные программы предлагают вам установить дополнительные модули (ScreenSaver). Если вы не отклоните предложение установка начнется в фоне. ScreenSaver копирует свои файлы на компьютер. Обычно это файл amee.exe. Иногда создается ключ автозагрузки с именем ScreenSaver и значением amee.exe. Вы также сможете найти угрозу в списке процессов с именем amee.exe или ScreenSaver. также создается папка с названием ScreenSaver в папках C:\Program Files\ или C:\ProgramData. После установки ScreenSaver начинает показывать реламные баннеры и всплывающую рекламу в браузерах. рекомендуется немедленно удалить ScreenSaver.
Скачайте программу SpyHunter от Enigma Software Group LLCСкачайте эту продвинутую утилиту для удаления ScreenSaver и amee.exe (загрузка начнется немедленно):
*SpyHunter был разработан компанией EnigmaSoftware и может удалить ScreenSaver автоматически. Протестирован нами на Windows XP, Windows Vista, Windows 7, Windows 8 и Windows 10. Триальная версия SpyHunter предоставляет функцию обнаружения угрозы ScreenSaver бесплатно .
Функции SpyHunter 4 Удаляет файлы созданные ScreenSaver.
Удаляет ключи реестра созданные ScreenSaver.
Активируйте активную защиту для предотвращения заражения.
Решите побочные проблемы с браузерами (реклама, перенаправления).
Удаление гарантировано - если SpyHunter не справляется обратитесь за бесплатной поддержкой.
Тех. поддержка в режиме 24/7 включена в предложение.
Поделитесь если помогло!
Скачайте Stronghold AntiMalware от Security Stronghold LLCСкачайте антивирусные сканер способный удалить ScreenSaver и amee.exe (загрузка начнется немедленно):
Функции Stronghold Antimalware Удаляет файлы созданные ScreenSaver.
Удаляет ключи реестра созданные ScreenSaver.
Устраняет браузерные проблемы.
"Утилита для удаления тулбаров" поможет избавиться от нежелательных дополнений.
Удаление гарантировано - если Stronghold AntiMalware не справляется обратитесь за бесплатной поддержкой.
Тех. поддержка в режиме 24/7 и 5 часов удаленной поддержки GoToAssist включены в предложение.
Обратитесь в нашу службу технической поддержки с проблемой связанной с ScreenSaver. Опишите все обстоятельства заражения ScreenSaver и его последствия. Команда предоставит вам варианты решения этой проблемы бесплатно в течении нескольких часов.
Показать инструкции для:
При установке программа Dropbox автоматически создает папку Dropbox в вашей домашней папке (то есть в той папке, название которой совпадает с вашим именем для входа в аккаунт на компьютере). В качестве значка папки будет использоваться наш логотип, а сама папка всегда будет называться Dropbox .
Чтобы быстро открыть папку Dropbox, нажмите правой кнопкой мыши значок Dropbox в области уведомлений. а затем нажмите на ссылку Папка Dropbox .
Папка Dropbox похожа на волшебную шляпу. То, что вы в нее положите, появится на всех ваших компьютерах, смартфонах и планшетах, где установлено приложение Dropbox. Файлы в папке Dropbox будут автоматически синхронизироваться, так что вы в любой момент сможете открыть их на нашем сайте, даже если у вас под рукой нет устройства с установленным приложеним. Файлы, загруженные непосредственно через сайт Dropbox, автоматически появятся и в папке Dropbox, и вы сможете использовать их так же, как и файлы из любой другой папки на компьютере — даже без подключения к Интернету!
Для администраторов Dropbox Business или участников рабочих групп:Если вы свяжете личный аккаунт Dropbox с рабочим. в вашей домашней папке будут созданы две отдельные папки. К названию каждой из папок будет в скобках добавлено уточнение: в рабочей папке это будет название рабочей группы, а в личной — ярлык «Личный».
Чтобы быстро открыть любую из папок Dropbox, нажмите на значок Dropbox в строке меню или области уведомлений. Выберите значок домика, чтобы открыть личную папку, или значок портфеля, чтобы открыть рабочую папку.
Чтобы быстро открыть папку Dropbox, нажмите на значок Dropbox в строке меню. а затем нажмите на ссылку Папка Dropbox .
Папка Dropbox похожа на волшебную шляпу. То, что вы в нее положите, появится на всех ваших компьютерах, смартфонах и планшетах, где установлено приложение Dropbox. Файлы в папке Dropbox будут автоматически синхронизироваться, так что вы в любой момент сможете открыть их на нашем сайте, даже если у вас под рукой нет устройства с установленным приложеним. Файлы, загруженные непосредственно через сайт Dropbox, автоматически появятся и в папке Dropbox, и вы сможете использовать их так же, как и файлы из любой другой папки на компьютере — даже без подключения к Интернету!
Для администраторов Dropbox Business или участников рабочих групп:Если вы свяжете личный аккаунт Dropbox с рабочим. в вашей домашней папке будут созданы две отдельные папки. К названию каждой из папок будет в скобках добавлено уточнение: в рабочей папке это будет название рабочей группы, а в личной — ярлык «Личный».
Чтобы быстро открыть любую из папок Dropbox, нажмите на значок Dropbox в строке меню или области уведомлений. Выберите значок домика, чтобы открыть личную папку, или значок портфеля, чтобы открыть рабочую папку.
Чтобы быстро открыть папку Dropbox, нажмите правой кнопкой мыши значок Dropbox в области уведомлений. а затем нажмите Открыть папку Dropbox .
Папка Dropbox похожа на волшебную шляпу. То, что вы в нее положите, появится на всех ваших компьютерах, смартфонах и планшетах, где установлено приложение Dropbox. Файлы в папке Dropbox будут автоматически синхронизироваться, так что вы в любой момент сможете открыть их на нашем сайте, даже если у вас под рукой нет устройства с установленным приложеним. Файлы, загруженные непосредственно через сайт Dropbox, автоматически появятся и в папке Dropbox, и вы сможете использовать их так же, как и файлы из любой другой папки на компьютере — даже без подключения к Интернету!
Для опытных пользователейЕсли вы не перемещали папку Dropbox из стандартного местоположения, то перейти к ней можно из Проводника Windows, скопировав в адресную строку следующий текст:
%HOMEPATH%\Dropbox
Если вы изменили местоположение папки Dropbox, то перейти к ней можно в настройках программы Dropbox .
Примечание для пользователей Бизнес аккаунтов: если вы подключили и личный, и рабочий аккаунты Dropbox, вам нужно будет выбрать, какой из них вы хотите открыть. Например, если ваша компания называется Pepo, то чтобы открыть личный аккаунт, нужно будет написать
Если вы не перемещали папку Dropbox из стандартного местоположения, то перейти к ней можно из Проводника Windows, скопировав в адресную строку следующий текст:
%HOMEPATH%\Dropbox
Если вы изменили местоположение папки Dropbox, то перейти к ней можно в настройках программы Dropbox .
Примечание для пользователей Бизнес аккаунтов: если вы подключили и личный, и рабочий аккаунты Dropbox, вам нужно будет выбрать, какой из них вы хотите открыть. Например, если ваша компания называется Pepo, то чтобы открыть личный аккаунт, нужно будет написать
/Dropbox (Личный). а чтобы открыть рабочий —
Чтобы перейти к стандартному расположению папки Dropbox с помощью Finder. выполните следующие действия:
Примечание для пользователей Бизнес аккаунтов: если вы подключили и личный, и рабочий аккаунты Dropbox, вам нужно будет выбрать, какой из них вы хотите открыть. Например, если ваша компания называется Pepo, то чтобы открыть личный аккаунт, нужно будет написать
/Dropbox (Личный). а чтобы открыть рабочий —
Applies to both GoodSync for Windows and GoodSync for Mac, unless noted otherwise.
Printable Manual is available in PDF IntroductionGoodSync synchronizes two or more folders with files, that is, GoodSync makes sure that folders and all files in them are the same by copying the new or updated files from the folder where they appeared to the folder where they are old or not present and by propagating deletions.
GoodSync can be used in these everyday scenarios:
In this Section we discuss challenges that synchronization programs face and that GoodSync successfully addresses.
Backup vs SynchronizationSynchronization task would appear to be trivial (compare file modification files and let the newer file win) if it was not for deletions that need to be propagated. If you delete file on one side, GoodSync will propagate this deletion to the other side of sync job by deleting this file on the other side. The sophistication of GoodSync algorithm allows us to propagate deletions correctly through multiple chained folders.
Another complication is that user may decide to replace newer version of the file with its older version. GoodSync can handle this situation correctly too, it will propagate the older file version, if it detects that user made such replacement.
Chained SynchronizationChained syncing is a process when the contents of several folders (e.g. A, B, C and D) are synchronized by performing synchronization of pairs in sequence that results in propagation of changes (e.g. sync A and B, then B and C, then C and D results in changes in A propagating to folder B, then C, then D). GoodSync can perform Chained Syncing correctly.
You can use GoodSync chains to synchronize files between Computers that are not connected to each other.
For instance, you can synchronize files between Work and Home computer using USB disk as an intermediary:
Several jobs can synchronize one folder to many other folders. In addition to that, you can have yet more jobs that synchronize sub-folders or super-folders of this folder. GoodSync will correctly record file changes in states of all folders in which the changes occurred.
For example, you can have a folder C:\work\project that contains project whose files change often. Folder c:\work contains other projects that are changes less often.
You have a job 'Project to Server' which synchronizes project files to an SFTP server once a day and from this server the files are synchronized by other members of the team.
You also have a job 'Work to PortHD' which synchronizes (backs up) all contents of the C:\work files folder to a portable hard drive once a week.
GoodSync will make sure that all changes performed by the 'Project to Server' job are visible to the 'Work to PortHD' job and vice versa.
Using GoodSync Synchronization Step By StepTypical GoodSync user experience consists of these stages:
Each synchronized pair of folders is memorized in a Job.
Job also has a set of options that control various aspects of synchronization process.
Each Job has a name that is requested when Job is created.
When you start GoodSync for the first time, initial nameless job is created for you automatically.
GoodSync memorizes list of Jobs and all their parameters per computer.
Jobs can be created, deleted, renamed, analyzed and synced. All job commands are in the Job menu.
This is a general outline of the synchronization algorithm (the actual algorithm is rather complex, it contains several important inventions and trade secrets that cannot be disclosed here):
For GoodSync, backup is a regular synchronization that happens to be one-way. Only changed files and file deletions are propagated to backup folder. This is how you setup a backup:
You can select multiple folders to backup or sync, starting with GoodSync ver 9.
Multiple folder selection is turned into Include and Exclude Filters that enforce copying only the selected folders.
So to understand what the result of your multiple-folder selection is, look into what Sync Folders are and into Options -> Filters.
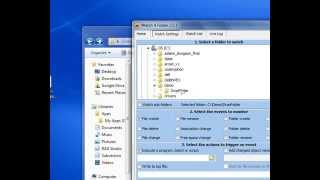
In the Browse dialog with Select Multiple Items option checked you will see:
You can select multiple folders to sync only on one side of the job (usually Left), and on another side of the job (usually Right) you select folder which corresponds to Longest Common Ancestor of all folders selected on the Left side.
Only in 1-way Right to Left job you select multiple folders on the Right (source side) and destination folder on the Left (destination side). In all other types of jobs you select multiple folders on the Left and destination folder on the Right.
Example: 2-way job:
On the Left side you select multiple folders:
User Name\Documents\My RoboForm Data\Default Profile
User Name\Documents\Outlook Files
User Name\Documents\TaxACT 2012
On the Right side you Browse to folder:
User Name\Documents\TaxACT 2012 -- sds://d.docs.live.net/acct/MyBackups/TaxACT 2012
Note that you cannot have folders from different disks in one job,
because it would force their common parent to be above the disk level.
Mini Window vs Main Window (Windows only)Main Window contains the User Interface displayed to the user.
It contains:
Mini-Window or Mini-Mode is super-compressed summary of what is going on in GoodSync.
Select 'View -> Job List' and Job List will be shown.
For each job GoodSync shows these columns in Job List:
- Job Status: stopped, analyzing, syncing, in sync.
- Job Name
- Last Run Time
- Auto Mode: if not empty, list how job can be auto-started.
- Left Folder
- Right Folder
You can sort by any of these columns by clicking on the column header. Sorting can be done in ascending or descending order.
Sorting by Left/Right folders will allow you to group files by Source (Left) or Destination (Right) folder, so you can easily see what jobs do you have working with a particular folder.
In the initial unsorted mode you can also drag and drop jobs to change their natural unsorted order.
GoodSync File Tree Sample
Action is a file/folder operation that is:
Each actions gets an icon in the center 3 columns of the tree.
See the next Chapter for the detailed list of actions' icons.
Copy File actionThis is the most fundamental action of GoodSync.
It copies file from Left to Right or from Right to Left.
Copy of file deleted on the Left from Left to Right means that this file will be deleted on the Right.
Copy of file deleted on the Right from Right to Left means that this file will be deleted on the Left.
That is, GoodSync "copy" of the deleted file simply propagates a deletion.
Copy Time actionIf file has the same length on the left and right side of the sync but modification time is not the same then you can turn Copy File action offered by GoodSync into a Copy Time action. Copy Time action copies file modification time from Left to Right or from Right to Left, but not file contents.
A recommended way of applying it is to select View -> Other -> SameLength DiffTime. This will show you all files that have the same length but different file time. If you think that these files are really the same, right-click any of the files and select Copy Time L to R or R to L. You can also right-click the folder and change Copy File into Copy Time for all eligible files in the folder.
Copy Name Case actionIf files on the left and right differ only by case of file names then this action is used to propagate name case change.
Copy State actionIf file is present on the left side and absent on the right side of the sync (or vice versa) or if file is deleted on both side and this is not yet recorded in the state then GoodSync would recommend a special Copy State L to R or R to L action for such files.
The results of the Analyze step will inform you that Copy State will be done, if this is necessary.
You can change direction of Copy State action if you know which side is preferred.
You can see specific Copy State action using View -> Other -> Copy State L to R or R to L.
The following are the potential causes of the CopyState situation described above:
If file is the same on the left and right side of the sync but the stored state of the file is not the same then GoodSync would recommend a special Sync State action for such files.
The results of the Analyze step will inform you that Sync State will be done, if this is necessary.
You cannot change direction of Sync State action, as it is not directional action.
The following are the potential causes of the CopyState situation described above:
This action tells GoodSync not to do anything for this pair of files, because files are the same on both sides.
Error actionThe file or folder cannot be read, see status area for details.
Conflict actionIf you changed the file on both sides of the synchronized folder pair then GoodSync cannot determine which version is preferred (because it does not know which set of changes should win and which should be dropped) and GoodSync then declares a conflict .
By default, conflict is a no-copy action. But you can change conflict into LeftToRight or RightToLeft Copy, thus declaring one side a winner.
Types of ConflictsGoodSync may produce these types of conflicts:
File was modified or deleted by user both on the left and right side.
Resolvable conflict, user may select sync direction.
User deleted folder on the left (right) and modified or deleted files in this folder on the right (left).
Resolvable conflict, user may select sync direction.Items (files or folders) on one side differ only by case.
Un-resolvable conflict, user must correct the problem.Items (files or folders) on one side differ only by ACL (Extended Attrs), file bodies are the same.
Minor conflict, user may select sync direction.
FAT file system still used in Windows and some FTP servers have these problems:
GoodSync recognizes two types of Time Shifts:
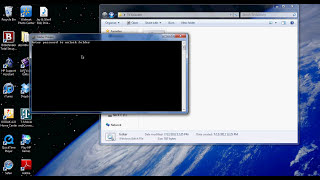
I’ve been using Vista for about a year now and overall I’m pretty happy. It’s essentially XP with nicer drop shadows. But there is one thing that drives me absolutely nuts and I’ve yet to find a solution for it.
Almost every time I try to delete a folder off my machine I get this message: “Destination Folder Access Denied. You need permission to perform this action.” It’s my folder, I created it on my own machine. Who do I need permission from? Bill Gates? My mother?
The whole idea is ridiculous. This is my machine, I’m logged in as an Administrator – I should be able to delete any file I want. If the file is in use by another process, please let me know about it, but ultimately the decision to delete should be mine.
This issue is symptomatic of a general level of distrust in the user. It’s great to prevent newbie users from deleting the ‘windows’ directory, but please have a power-user mode where I don’t have to be nannied with warnings and wizards every step of the way.
Unlocker is a nice freeware app that sometimes fixes this problem but often it too is helpless against vista’s security restrictions. I did disable the UAC (another vista annoyance is the fact that you get a warning message every time you reboot telling you that disabling the UAC is a terrible idea) but this does not help with this issue.
(This anti-Microsoft rant is here to provide balance for some of my previous anti-Apple rants ).