

 Рейтинг: 4.2/5.0 (1927 проголосовавших)
Категория: Windows: Загрузка файлов
Загрузка фотографий в альбом пользователя
Загрузка фотографий на сервер ВКонтакте от имени пользователя осуществляется приложением в 3 этапа:
1. С помощью метода photos.getUploadServer приложение узнает http-адрес для загрузки фотографий в зависимости от альбома, в который их необходимо загрузить.
2. Приложение формирует POST -запрос на полученный адрес.
Запрос должен содержать поля file1-file5. которые содержат файлы с изображениями (JPG, PNG, BMP или GIF).
Обратите внимание. что ответ сервера всегда приходит в формате JSON, а поля server, photos_list, album_id и hash в нем содержат строки, внутренний формат которых может изменяться со временем. В частности, строка photos_list может содержать другой json-объект, который не следует декодировать, разбирать на части или иным образом модифицировать.
3. С помощью метода photos.save приложение передает серверу полученные данные (server, photos_list, album_id и hash ) и получает данные о загруженных изображениях.
Фотографии загружены.
Загрузка фотографий на стену пользователя
Загрузка фотографий на стену пользователя осуществляется в 3 этапа:
1. С помощью метода photos.getWallUploadServer приложение узнает http-адрес для загрузки фотографии на стену текущего пользователя, другого пользователя или группы в зависимости от переданных параметров user_id или group_id.
2. Приложение формирует POST -запрос на полученный адрес.
Запрос должен включать поле photo. содержащее файл с изображением (JPG, PNG, BMP или GIF)
Пример результата загрузки фотографии:
Обратите внимание. что ответ сервера всегда приходит в формате JSON, а поля server, photo и hash в нем содержат строки, внутренний формат которых может изменяться со временем. В частности, строка photo может содержать другой json-объект, который не следует декодировать, разбирать на части или иным образом модифицировать.
3. С помощью метода photos.saveWallPhoto приложение передает серверу полученные данные (server, photo, hash и опциональные user_id и group_id ) и получает данные о загруженной фотографии. Обратите внимание, за один вызов photos.saveWallPhoto не может быть загружено более 6 фотографий.
После успешной загрузки фотографии Вы можете разместить её на стене, используя метод wall.post и указав идентификатор фотографии в параметре attachments. Обратите внимание, что при размещении фотографии на стене другого пользователя или группы необходимо указывать параметры user_id и group_id. соответствующие используемым в п.1.
Загрузка главной фотографии на страницу пользователя или сообщества
Загрузка главной фотографии на страницу пользователя или сообщества осуществляется приложением в 4 этапа:
1. С помощью метода photos.getOwnerPhotoUploadServer приложение узнает http-адрес для загрузки фотографий.
2. Приложение формирует POST -запрос на полученный адрес.
Запрос должен содержать поле photo, которое содержит файл с изображением (JPG, PNG, BMP или GIF).
Также дополнительно можно передать параметр _square_crop в формате "x,y,w" (без кавычек), где x и y - координаты миниатюры, а w - размер квадрата. Тогда для фотографии также будет подготовлена квадратная миниатюра.
Обратите внимание. что ответ сервера всегда приходит в формате JSON, а поля server, photo и hash в нем содержат строки, внутренний формат которых может изменяться со временем. В частности, строка photo может содержать другой json-объект, который не следует декодировать, разбирать на части или иным образом модифицировать.
3. С помощью вызова метода JS API VK.api photos.saveOwnerPhoto с параметрами server, photo и hash приложение открывает окно предупреждения для сохранения новой фотографии. Если пользователь соглашается, то фотография успешно сохраняется и возвращается параметр photo_src. При этом выполнять 4-й пункт не нужно.
Если данный метод вызывается через прямое обращение к API, то необходимо выполнить дополнительно п. 4 с результатом ответа от сервера.
4. С помощью вызова функции showProfilePhotoBox Flash-контейнера с параметром photo_hash. полученном в п.3, приложение вызывает окно для подтверждения изменения его фотографии.
Фотография будет изменена, если пользователь подтвердит это действие.
Загрузка фотографии в личное сообщение
Данная функция доступна только Desktop-приложениям.
Загрузка фотографии в личное сообщение пользователю осуществляется в 3 этапа:
1. С помощью метода photos.getMessagesUploadServer приложение узнает http-адрес для загрузки фотографии в личное сообщение.
2. Приложение формирует POST-запрос на полученный адрес.
Запрос должен включать поле photo, содержащее файл с изображением (JPG, PNG, BMP или GIF)
Обратите внимание, что ответ сервера всегда приходит в формате JSON, а поля server, photo и hash в нем содержат строки, внутренний формат которых может изменяться со временем. В частности, строка photo может содержать другой json-объект, который не следует декодировать, разбирать на части или иным образом модифицировать.
3. С помощью метода photos.saveMessagesPhoto приложение передает серверу полученные данные (server, photo и hash) и получает данные о загруженной фотографии.
После успешной загрузки фотографии Вы можете прикрепить ее к личному сообщению, используя метод messages.send и указав идентификатор фотографии в параметре attachment.
Загрузка аудиозаписей
Загрузка аудиозаписей на сервер ВКонтакте от имени пользователя осуществляется приложением в 3 этапа:
1. С помощью метода audio.getUploadServer приложение узнает http-адрес для загрузки аудиозаписей.
3. С помощью метода audio.save приложение передает серверу полученные данные (server, audio и hash) и получает данные о загруженной аудиозаписи.
Аудиозаписи загружены.
Загрузка видеозаписей
Загрузка видеозаписи на сервер ВКонтакте от имени пользователя осуществляется приложением в 2 этапа:
1. С помощью метода video.save приложение узнает http-адрес для загрузки видеозаписи, а также - данные видеозаписи, которая будет загружена. Метод video.save должен быть вызван один раз для каждой загружаемой видеозаписи.
2. Приложение формирует POST -запрос на полученный адрес.
В ответ приложение получает размер загруженного файла и идентификатор ролика, либо сообщение об ошибке в формате JSON: <"size":1234,"video_id":1234567>
Видеозапись загружена.
После загрузки видеозапись еще проходит обработку сервером, поэтому в списке видеозаписей может появиться спустя некоторое время.
Загрузка документов
Загрузка документов на сервер ВКонтакте от имени пользователя осуществляется приложением в 2 этапа:


You can't go on any site nowadays without seeing an option to upload an image. All of the big sites are doing it, however it's one of those things that is very poorly covered in PHP articles across the internet. We'll cover the basic upload process and then in a future article move on to additional things like image resizing and cropping.
The HTML FormWith this, you'll be using an input of type file. this will give the user an input which when clicked will give the user a browse box to choose the file to upload. The form that you put this in must have an enctype of multipart/form-data .
Normally when a form is posted to a PHP page, you can get the values of fields by looking in the $_POST global array, however, file uploads get put in a separate one called $_FILES. This is indexed with the name of the file input that you chose before, so in our case we'll be looking into the $_FILES['file_upload'] array. There are a few different values within this array that you use: name. type. size. tmp_name. error .
When uploading, running a print_r on $_FILES will return something similar to this:
The process we're going to use is pretty straight forward:
If the error number is greater than 0, there's an error. So simply, we can do:
Check if the file type is allowed.We only want to allow .png files to be uploaded, so we're going to have to make sure that the type is image/png. again simply:
Check that the file is under our file size limit.Sizes are all based in bytes, so if we don't want any files bigger than 500kb uploading, we'll have to check that the size is less than 500000:
Check that the file doesn't already exist (based on name).We're going to be putting our files in a directory called upload. You need to make sure that you CHMOD this directory to have the required permissions for writing. We will simply use the PHP function file_exists() :
There is no reason that you can't prepend, or append the timestamp of the upload to the name to make it unique, and in some cases might be a sensible thing to do.
Finally upload the file.Finally, we want to upload the file, as at this point if the script is still running the file is safe to upload. We will simply move the file using the move_uploaded_file function from its current temporary location to where we want it:
Upload SecurityOne of the vital things to realise is that are potentially allowing anything to be uploaded to your site which could be used to maliciously take over your server. You should be sure to employ some common sense when doing this, and some of the below methods will help you go someway to making your uploads secure. There are plenty of other methods you could use.
Storage locationWhen allowing a user to upload files, you should store them outside the web root, this means a directory that is not inside the www or public_html directory on most systems. This means that if someone manages to upload a script or something to your site intead of an image they will not be able to access it.
You can then display the images through a separate PHP file that will load the image and explicitly set the headers for the image and output it to the user using specific PHP image functions such as imagecreatefrompng so if it's not an image the display will fail.
Make sure you never allow direct access to the file from the web, that could just get very nasty
Verify upload is an imageOne of the best things to do when uploading is to ensure that it is an actual image that is being uploaded, you can do this by passing the uploaded file through a PHP image function such as getimagesize(). this will return false if the file is not an image:
This will check that the file is an image, and die telling the user to ensure that it's an image that is being uploaded and not just a malicious file pretending to be an image.
Disable script executionAnother thing to do, is to use some .htaccess code to disable the execution of scripts within your uploads file. Something along the lines of the code below in a .htaccess file in your uploads directory should help:
Chown Uploads DirectoryYou should definitely change the owner of the uploads directory, make it so that it's owned by apache and that it has the permissions 770 and it shouldn't be accessible by any user. However, the directory will still be modifiable through your various PHP scripts. This method might not be possible on shared hosting environments where you don't have root permissions.
Other ideasYou can check the extension against a list of blacklisted extensions such as .php. js. pl. py etc. But you shouldn't rely on this as your only security check that you use.
It's as simple as that, one thing to think about is if you're uploading files, you will probably want to store a history of who uploaded the file and when in a database. Find below the complete PHP code:
MediaWiki supports uploading and integration of media files. This page describes the technical aspects of this feature, see Manual:Image administration Manual:Image administration and Help:Images for general usage information.
Starting from MediaWiki version 1.1, uploads are initially disabled by default, due to security considerations. Uploads can be enabled via a configuration setting, although it is recommended that you check certain prerequisites first.
Prerequisites Edit Make sure uploads are enabled in PHP EditThe following needs to be set in php.ini (which may be located somewhere like /etc/php/php.ini. /etc/php4/php.ini. /etc/php5/cli/php.ini & /etc/php5/apache2/php.ini (openSUSE 11.2), /usr/local/lib/php.ini or on Win32 C:\Windows\php.ini ):
If this is not set, PHP scripts cannot use the upload functions, and MediaWiki's uploads will not be enabled.
If the open_basedir directive is set, it must include both the destination upload folder in your MediaWiki installation ("<$IP>/images") and the 'upload_tmp_dir' folder (default system folder if not set). The addition of the 'upload_tmp_dir' can avoid messages like "Could not find file "/var/tmp/php31aWnF" (where in this example the 'upload_tmp_dir' is '/var/tmp'). Read more about PHP file uploads at File upload basics and in particular move_uploaded_file .
Note: The formal value for the variable is a boolean expression. PHP treats each string not recognised as a False value as true, hence the often used "on" value yields the same result.
Check for Windows and IIS users EditSet %SystemRoot%\TEMP to have permissions for the Internet Guest Account (IUSR _MachineName, or IUSR for IIS 7+): Read, write and execute;
Check directory security EditThe upload directory needs to be configured so that it is not possible for an end user to upload and execute other scripts, which could then exploit access to your web directory and damage your wiki or web site.
Set the /images folder (or the /uploads folder in previous versions) to have permission "755":
If using safe_mode. make sure the directory is owned by the user used for running the php script (that is, the apache user or, in case of suphp, the script owner).
If using CentOS 6 or Mageia the owner:group in the chown command should be "apache:apache" instead of "www-data:www-data".
If using SELinux. make sure to adjust the ACLs accordingly (see there).
If using suphp. make sure the umask is set to 0022 (or less) in /etc/suphp.conf.
If you don't want a public user to list your images folder, an option is to set this up in your apache configuration:
Flength File Help " Failed To Find Flength File "
Assuming the script is set up properly, you are probably dealing with some kind of write-caching. Some servers perform write-caching which prevents writing out the flength file or the entire CGITemp file during the upload. The flength file or the CGITemp file do not actually hit the disk until the upload is complete, making it worthless for reporting on progress during the upload. This may be fixed using a .htaccess file assuming your host supports them. Here is a link to an excellent tutorial on using .htaccess files. I strongly recommend giving it a quick read before attempting to install your own .htaccess file.
1. A mod_security module for Apache.
To fix it just create a file called .htaccess (that's a period followed by "htaccess") and put the following lines in that file. Upload the file into the directory where the Uber-Uploader CGI ".pl" scripts resides, or in some directory above it (like your server's DOCUMENT_ROOT, i.e. the top-level of your webspace). htaccess files must be uploaded as ASCII mode, not BINARY. You may need to CHMOD the htaccess file to 644 or (RW-R--R--).
# Turn off mod_security filtering.
SecFilterEngine Off
# The below probably isn't needed,
# but better safe than sorry.
SecFilterScanPOST Off
<IfModule mod_security.c>
"^multipart/form-data;" "MODSEC_NOPOSTBUFFERING=Do not buffer file uploads"
</IfModule>
<IfModule mod_gzip.c>
mod_gzip_on No
</IfModule>
2. "Performance Cache" enabled on OS X SERVER.
Komodo already has upload feature, but it's not very usable, because it takes a lot of clicks to actually upload a file to remote server. You'd have to choose server, and then target path each time. It misses really quick solution, where project's upload settings are preconfigured, and all you need is actually commit file, with no questions asked.
Uploader makes web programmer's life brighter. First, if you assign a keyboard shortcut to "General: Upload" command, you can commit project files immediately. Then, if you configure your project for automatic upload, project files will be uploaded on each save action, exactly like in NetBeans.
What do you think about new notifications?
Should they stay or should they go?
New in version 1.62:
New in version 1.61:
Version 1.3.1.4318 for Windows 10/8.1/7/Vista/XP/2000
Supported operating systems (v.1.3.2): Windows 10/8.1/7/Vista/XP SP3 (also server versions)
Also runs on Linux with Wine (Wine version 1.7.41 or newer is strongly recommended).
Main Features
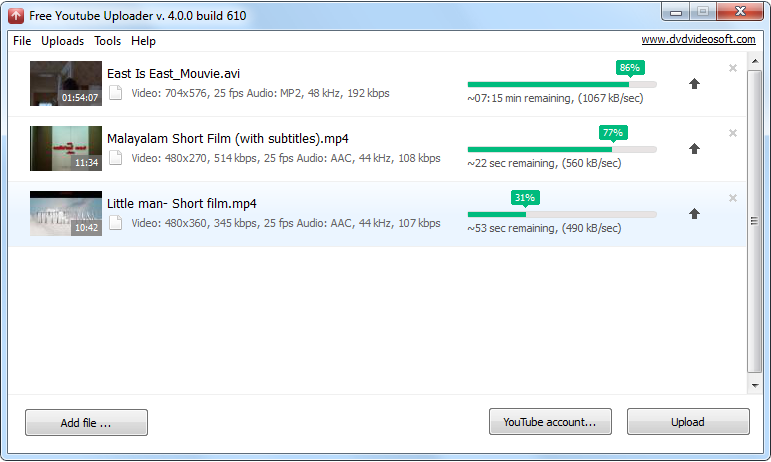
To upload files, you can use WordPress's online interface, the Dashboard or one of the recommended editors and upload your files via FTP.
This article tells you how to upload files using the Dashboard. To upload files via FTP, read Uploading WordPress to a Remote Host.
About Uploading Files on DashboardAfter you log in to WordPress and click on the Dashboard menu at the top of the screen, you can upload files with the Flash uploader.
WordPress supports uploading the following file types:
Not all webhosts permit these files to be uploaded. Also, they may not permit large file uploads. If you are having issues, please check with your host first.
To Upload a File in a PostNote: If you are having problems uploading files with the default Flash uploader, you may want to use the Browser uploader instead.
To Upload a File in a Page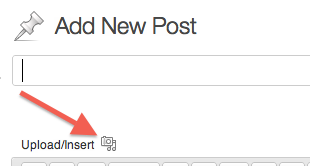
Note: If the file does not open, then the file type is not supported, the chosen format may not match the file’s true format or the file may be damaged.
To Upload a File with the Browser UploaderTo upload a file in a page: on the Dashboard menu, click Pages. click Add New to display "Add New Page," and then, on the Upload/Insert menu, click the icon that represents the type of file you want to upload.
To upload a file in a post: on the Dashboard menu, click Posts. click Add New to view the "Add New Post" page, and then, on the Upload/Insert menu, click the icon that represents the type of file you want to upload.
MultiPowUpload is the universal java script control that includes multiple files uploading features of HTML5 (Drag-n-drop), Flash and Silverlight to replace the classic file uploading via Form in a browser. MultiPowUpload can be placed on a web site easily and works in a >99% browsers because it shows control that current browser supports (HTML5 or Flash or Silverlight). It offers lots of new possibilities that are not available during the usual upload via Form.
The most significant possibilities are: Live Demo
  Screenshots
This upload software intended for fast and easy integration into web solutions functionality of uploading multiple files on a server through Internet from a web browser. With such tool you can upload any data, and the extended image support (preview, thumbnails uploading and image operations like crop, rotate) makes it ideal tool for uploading pictures for photo galleries. MultiPowUpload supports any server side platform, like ASP.NET and PHP.
MultiPowUpload flash file uploader features