


 Рейтинг: 4.9/5.0 (1890 проголосовавших)
Категория: Windows: Администрирование
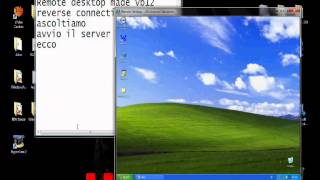
Remote desktop panel, also called VNC viewer, represents a VNC client.
When VNCRobot is not connected to any VNC server, the panel displays the default image as is shown on the following picture.
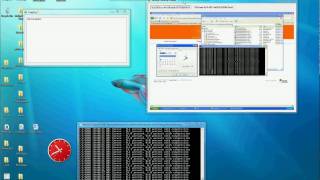
When VNCRobot is connected to a VNC server, it displays desktop of the server machine. The viewer becomes active in terms of RFB communication when you move your mouse pointer into the panel bounds. The underlying RFB module then starts to send your mouse moves, clicks and drags to the remote server as well as the keys you press or type on the keyboard. A typical VNC viewer connected to a VNC server running on a Red Hat Linux machine using a GNOME is displayed below.
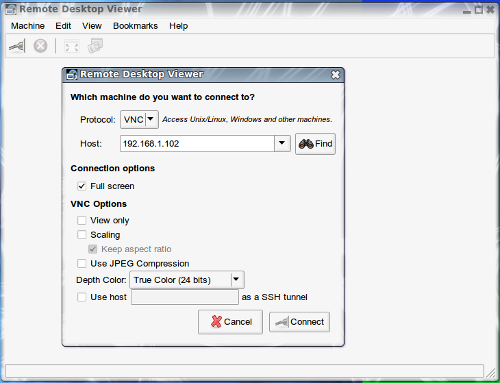
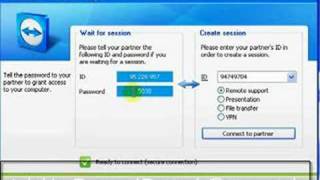
2. Connecting to a VNC Server You may connect to a VNC server in three ways:The 'Server and port' field must be populated with the server name and optional display or port number to connect to. While VNC servers on Unix/Linux typically listen on port 5901, the string is 'myserver:1' or 'myserver.mydomain.com:1' (using desktop numbers) or 'myserver::5901' or 'myserver.mydomain.com::5901' (using direct port). If no display number/port is passed, VNCRobot tries to connect to display number :0 (port 5900, typical default value for Windows).
VNC servers are typically protected with passwords but can be also configured to require no security. If no password is provided, VNCRobot attempts to authenticate without password. If the server requires it, a new window is displayed and user has to provide a valid password.
The flags below the password field allow to configure the VNC session:
If you need to disconnect from a VNC server and preserve the VNCRobot GUI open, select Disconnect Server in the File menu. You can also disconnect by execution of the Disconnect command.
If you are connected and you select File -> Connect Server or File -> Reconnect Server menu items to connect to another VNC server, VNCRobot disconnects from the original connection.
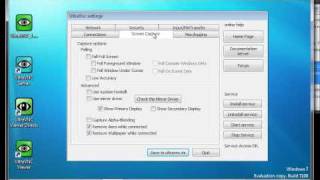
5. Encoding PreferencesVNCRobot Preferences window provides since v1.3 a comfortable way to set the image encoding used in the communication with the VNC server. Supported encodings are Raw, RRE, CoRRE, CopyRect, Hextile and Zlib.
Note that preferred encoding type has impact on performance. Raw encoding is the less effective one when updates of the remote desktop image are sent as raw pixels. See specification of the RFB protocol and the documentation on existing VNC servers for more information. he following screenshot shows the coresponding part of the Preferences->Tools->RFB Preferences window:
Changes of the order of prefered encodings are sent to server (RFB message SetEncodings) immediately after you close the Preferences window with OK. Be aware that most VNC server implementations take it just as a hint and they typically match it against the encoding types they support. It means that if you place e.g. CopyRect on the first place, it doesn't mean that the server will start to communicate in this encoding only.
6. Refresh DaemonRefresh daemon is a background process which keeps your VNC session alive. If you don't move your mouse or type a key for a long time, the remote server usually runs a screensaver or locks up the desktop after a certain time. Also some VNC servers are known to close the connection after a period of idle time.
Refresh daemon prevents these situations. It watches the time since your last interaction and when it exceeds a certain value, it moves your mouse by one or two pixels and back. This makes your VNC server think that you are still active and keeps the connection alive.
Note that the Refresh Daemon doesn't run while a script is being executed. This is intended to prevent unwanted interference into the script execution. There's a flag in the Preferences window allowing to change this behavior.
This feature is by default on and the timeout is preset to 5 minutes. To configure it go to Preferences and select the Tools -> Refresh Daemon tree node.


This page was linked to by Digg.com on June 21 2006. You'll notice from some of the stupid posts on that page that there are a heap of people that don't understand the concept of AJAX. Anyway, I got about 20,000 vistors that checked it out.
 Компания Google выпустила расширение Chrome Remote Desktop (beta), которое позволяет осуществлять удаленный доступ к другому компьютеру через браузер Chrome. Получить доступ к удаленному компьютеру можно независимо от операционной системы (Windows, Linux или Mac). Данная технология может использоваться в службах IT-поддержки и для прямой взаимопомощи между пользователями. Расширение пока выпущено в бета версии, то есть все еще находится в стадии разработки и разработчиков интересуют мнения пользователей. А первые тесты и отзывы как раз говорят о том, что приложение вполне работоспособное и в недалеком будущем может составить конкуренцию хорошо известным сервисам, таким как Team Viewer и LogMeIn.
Установка расширения «Удаленный рабочий стол Chrome»
Расширение должно быть установлено на обоих компьютерах участвующих в соединении. То есть, независимо от того, собираетесь ли вы подключиться к удаленному компьютеру или ожидаете подключение к вашей системе, вам необходимо сделать следующее:
1. Перейдите по этой ссылке и нажмите кнопку «Добавить в Chrome»
2. Если вы еще не были залогинены, будет предложено войти в ваш аккаунт Google. После этого понадобится подтвердить установку расширения нажатием кнопки «Установить».
3. После загрузки расширения (около 20 Мб) в списке приложений появится ярлык «Удаленный рабочий стол Chrome». Запустите его.
4. В следующем окошке нажмите «Продолжить», чтобы перейти к настройкам разрешений.
5. Нажмите «Разрешить доступ»
Чтобы предоставить доступ для подключения к вашему компьютеру
1. Нажмите «Открыть доступ к этому компьютеру»
2. Будет сгенерирован код, который необходимо передать пользователю, который будет подключаться к вашему компьютеру.
Для подключения к удаленному рабочему столу
1. Нажмите «Получить доступ к общему компьютеру»
2. Введите переданный вам код доступа и нажмите «Подключиться»
Как видите, все довольно просто. В процессе доработки расширения возможны изменения. В частности разработчиками объявлено о добавлении постоянных кодов аутентификации, чтобы не требовалось каждый раз генерировать новый код для очередного подключения.
Hey how to I load Remote Desktop where the user views what the on screen while other connection has full control.
Alicia W. Accepted Solution on 2015-05-20 at 09:29:29 ID: 40787818
We have SCCM 2012 in our environment. To get the Remote Desktop Viewer to work on my PC, I did the following:
1. logged on to a pc or server that had SCCM configuration manager installed w/ Desktop Viewer
2. browse to the i386 folder in the CM installation path (in my case that was: c:\program files (x86)\CM\bin\i386\)
3. copy the 0000049 folder, CMRCViewer.exe & RDpCoreSCCM.dll to a folder on your PC (I put that folder & files in C:\Tools\CMRCViewer)
4. On that PC, launch CMRCViewer.exe with an account that has admin rights on the remote PC
I don't know if this will work with SCCM 2007, but it's worth a shot.
NOTE: CTRL+ALT+DEL doesn't always work on a PC that doesn't have someone already logged on. So, have the user press CNTRL+ALT+DEL for you if needed.
See this page for reference:
I'm trying to use "Remote Desktop Viewer" to connect to remote server.
I opened "Remote Desktop Viewer", switched "Protocol" to "RDP" then entered my "Host" and my "Username" and clicked "Connect".
Code: Select all gnome-session: Password: connected to uftwfbkpsvr02:3389
gnome-session: @@@@@@@@@@@@@@@@@@@@@@@@@@@@@@@@@@@@@@@@@@@@@@@@@@@@@@@@@@@
gnome-session: @ WARNING: CERTIFICATE NAME MISMATCH! @
gnome-session: @@@@@@@@@@@@@@@@@@@@@@@@@@@@@@@@@@@@@@@@@@@@@@@@@@@@@@@@@@@
gnome-session: The hostname used for this connection (XXXXX)
gnome-session: does not match the name given in the certificate:
gnome-session: XXXXX
gnome-session: A valid certificate for the wrong name should NOT be trusted!
gnome-session: Certificate details:
gnome-session: Subject: CN = XXXXX
gnome-session: Issuer: CN = XXXXX
gnome-session: Thumbprint: 53:7b:c6:f6:b9:60:65:67:44:ea:06:56:c8:63:5b:a0:a1:6c:de
gnome-session: The above X.509 certificate could not be verified, possibly because you do not have the CA certificate in your certificate store, or the certificate has expired. Please look at the documentation on how to create local certificate store for a private CA.
gnome-session: Do you trust the above certificate? (Y/N)
gnome-session: Error: Could not read answer from stdin.
gnome-session: SSL_write: Failure in SSL library (protocol error?)
gnome-session: Authentication failure, check credentials.
gnome-session: If credentials are valid, the NTLMSSP implementation may be to blame.
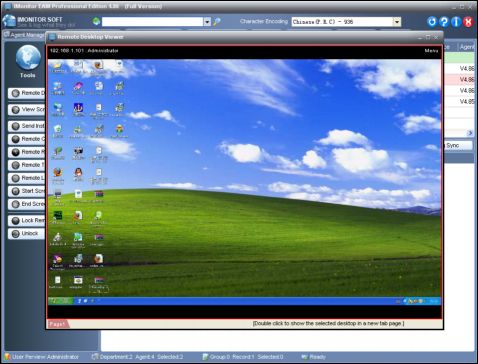
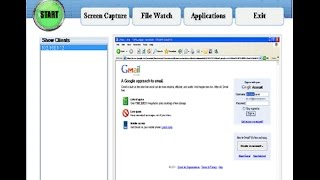
The Remote Desktop Viewer Lite is a system to remotely monitor desktop activity. This system is designed to view a remote desktop's activity.
IntroductionThe Remote Desktop Viewer Lite is a system to remotely monitor desktop activity. This system is designed to view a remote desktop's activity.
It is composed of three Visual C++ .NET 2003 projects
Quick Compress is a project that I have previously uploaded. I will briefly sum it up here. It is an ATL/COM component that performs Huffman compression and run length encoding. Both methods are written directly in assembler for optimized performance.
RemoteDesktopService and RemoteDesktop both call on it to compress and uncompress the data.
If it weren't for MSDN and sample code, I wouldn't have been able to have a rapid turn around on the development of the service. Please refer to the article “Creating a Simple Win32 Service in C++” by Nigel Thompson. It is located in the section DLLs, Processes, and Threads in Technical Articles. I used this program as the foundation for my service.
A Windows registration file fine tunes the behavior of the service. It controls the socket connectivity parameters, the bit depth of the display, the port to allow connections, and an optional password required to make a successful connection. If no registration file is installed, the program uses intelligent defaults, except it will use true color because it looks the best.
The socket connectivity parameters should not be adjusted unless you really know what you are doing. Here is a breakdown of their behavior:
BitCount can only be the following values; changing it to another value is undefined behavior and usually causes a failure in the GDI system.
This service runs using the following design:
Choosing this type of a project for this application did not come lightly. When I was a brand new Windows 95 programmer using C and the Win32 API solely, I would have balked at such a monstrosity. Back then I wanted to write the boiler plate code because learning Windows programming requires getting your hands dirty. Well, many years have passed since then and my zeal is about sharing the important part of my code with you.
This is a pretty simple SDI application. It derives from CScrollView because of the wonder that class provides for scrolling around the document. So much for handling WM_HSCROLL and WM_VSCROLL. Oh well, in the name of progress I suppose this is OK.
To connect to the server, use the 'New Connection'. In case of an error in connection, no real message is displayed. However if you are in debug mode you will see an error message in the debug output.
To disconnect from the server use the 'Close Connection'.
The ServiceThe service itself is its own installer and uninstaller.
Data flows from the client to the server and back.
We will see how data compression is integrated into the data flow.
If the server simply sent the desktop every time it changed, that wouldn't be very optimal at all. A few techniques have been added to get the size down.
This step masks out all the common bits of each desktop.
Please refer to my other article for a breakdown of the compression and encoding techniques.
The key to keeping the data is the initial second buffer, or the “last desktop”. The code uses a DIB that is filled with the color black in both the client and the server applications.
For fun you can fool around with the raster codes of these original buffers. You may get some strange kaleidoscopic effects. Just put on your favorite classic rock and trance with it.
TCP/IP connectivityThe socket class: there is a custom, home grown socket class that handles all the communication from the client and server. Who doesn't like writing their own socket classes? It's a rite of passage as far as I am concerned. It is a robust enough class that is decently lightweight and does the trick. It has solid error detection and graceful behaviors when connectivity is lost or can't be established. It simply focuses on the Berkeley subset of socket functions available on Win32 API. I am going to leave it to the reader to break down this class.
Debug versus Release modesDebug mode contains informative output for most of the system. Using the debug viewer from SysInternals is a good way to see what is going on. Another way is to run the program in the debugger and pay attention to the 'Output' tab. In the service you will have to attach to the process to get the same thing. Services can't be run like other programs but they can be debugged when you attach to them. Be prepared for Visual Studio to crash here from time to time. It sometimes has problems enumerating the processes. I've sent 20 error reports to Microsoft when I was deep in the development of this. Lucky for me that the program creates its own report and asked me if I wanted to send it on. I enjoyed spamming Microsoft with these reports.
Building and Running the SystemThe zip contains all the source code and projects.
If you redistribute the application make sure to put the QuickCompress.dll in the application path.
The following chart shows some typical compression ratios using a 1280 x 960 resolution display. In debug mode the actual amount of data that is sent for each desktop is sent to the debugger output.
(You wondered why I called it the lite version.)
Good question.
Each socket represents a grid of the screen and is responsible for sending only its data. This concept helps leverage the power of your networking to handle more than one data stream at a time.
I've contemplated on a screen divided into 4 areas ought to deliver the best performance and compression.
Ahh. the real deal here. This is where I am ultimately headed. I have the Windows DDK which describes how to build a graphics mirror driver.
Balancing this type of graphical refresh with my method ought to really deliver a punch and make this program a real contender to VNC.
If you’ve noticed Chrome Remote Desktop Viewer plugin in Chrome:plugins page, don’t think you’ve installed Chrome Remote Desktop extension in the past and the plugin has been left behind after removing the extension, that’s not true. When you install Chrome in your computer, Chrome Remote Desktop Viewer comes enabled by default.
Yes! This plugin is related Chrome Remote Desktop app launched by Google and it “allows securely access other computers that have been shared with you, to use this plugin you need to install Chrome remote desktop extension”.
Remoting Viewer renamed as Chrome Remote Desktop ViewerA few days ago, this plugin’s actual name was Remoting Viewer or Remote Viewer, which Chrome team has renamed to Chrome Remote Desktop Viewer to suite branding of their Remote web app and may be also due to users’ concerns of it as spyware or phishing app.
Update: Many people have asked me to post the source code for this project. The code posted below is in a ‘prototyping’ phase. So code may not follow best coding standards and will be in severe need of refactoring.
I previously shared a remote desktop viewer implementation. That particular implementation used an adaptive algorithm to send back only the part of the screen that had changed. The remote component hosted a WCF service that could be polled at intervals by the viewer to refresh the image of the remote machine. This implementation was quick and left a bad taste in my mouth for two reasons:
A better design is to host the WCF service in the viewer and then have the clients push data only when necessary. This implementation only requires the viewer to expose the WCF service through the firewall. The following image shows the class diagram for components involved in implementing the WCF viewer service:
The WCF service is defined using he IViewerService contract. The three methods are:
The ViewerSession class is used to encapsulate the content for each remote client that connects to the viewer. The ViewerService contains a Dictionary of these sessions. The data flow is as follows:
The current implementation of the remote client is a Console application. This is a great test bench implementation. This allows diagnostic data to be written to the screen. The Main method is shown below:
The ScreenCapture instance provides the features to capture screen and cursor updates. The ViewerServiceClient instance provides the proxy to the WCF service. Updates are pushed to the WCF service via two threads. One is responsible for cursor updates and the other is responsible for screen updates. At times screen updates are fairly bulky. Having a separate cursor thread allows the cursor to be displayed without continuous updates and provides a much smoother viewer experience. The multiple threads do introduce the need for thread safety with respect to the WCF server resources. The following methods provide the push services:
The presentation layer of the viewer simply adds a listener to the OnImageChange event that updates the presentation layer with the new data when signaled. The current implementation is a WinForms application. The callback registered to OnImageChange is shown below:
The clients (multiple) will be calling the service methods asynchronously on a thread different than the UI thread. This requires the use of the InvokeRequired property and the Invoke method. When a new client contacts the viewer, a new tab UI element is created and the display image is added to the dictionary for look up. The background image for the picture box is set to the image for the currently selected tab. The following styles are set in the form’s load method to force the form to double buffer repaints to reduce flickering:
The following is a video of the implementation showing multiple remote client connections to the viewer (view in HD)
In the above video, the WCF service is configured to bind to my external IP address. I was attempting to get some real-world connection conditions into the video. Unfortunately, I think my firewall / NAT resolved the address and the packets never reached the internet. Regardless, the video demonstrates 3-4 screen captures per second from both the clients. The default JPEG compression is doing a great job at minimizing the number of bytes transferred. The image quality is a little degraded when compared to normal remote desktop experience.
Overall, I am pleased with the performance. In the next couple of blogs I hope to add some ability to interact with the remote desktop (move mouse, click, type, …).