


 Рейтинг: 4.1/5.0 (1885 проголосовавших)
Категория: Windows: другое
Sign up for the awesome email course to learn how to build your own. You will also get a free "HTPC Lessons Learned" eBook.
You’re almost done! Before you can receive your free HTPC Lessons Learned eBook you need to confirm your email right now.
POPULAR POSTSLast updated November 17th, 2015
Media Center software is the front end for your Home Theater PC to play movies, music, photos and much more via TV. This list will simplify your task by highlighting the most popular media centers.
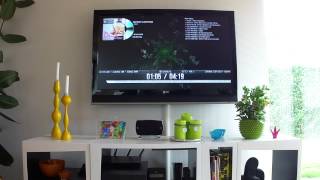
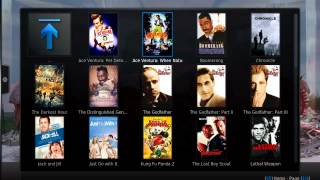
1. Kodi (was XBMC) Media Center Kodi Media Center was originally designed as a media center interface for the XBOX game console. Today, it has evolved as a powerful media center for Windows, Linux, Android and Mac OS X that is capable of playing most available media file types.
Kodi is a well establish and robust software for more advanced users which many people regards as the best media center available. XBMC has been the foundation for many alternative media centers. The user interface looks very elegant even without any customization.
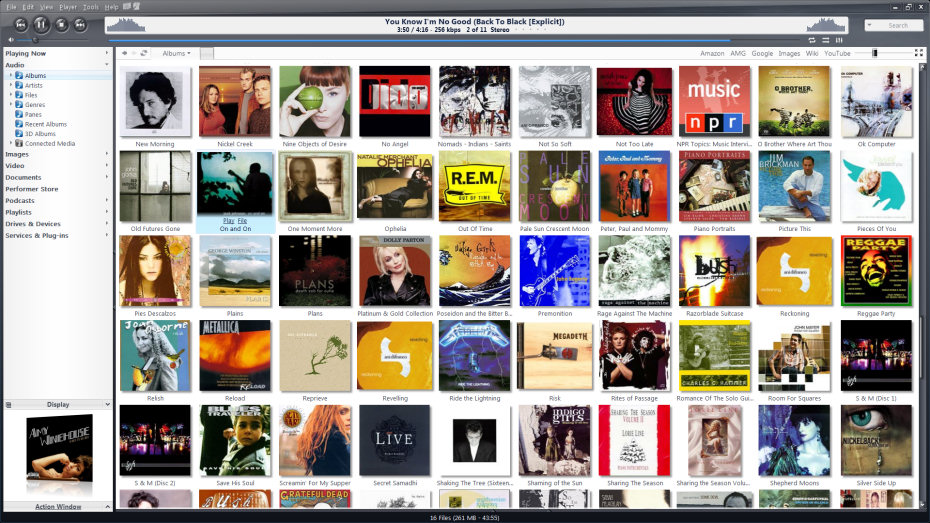
2. Windows Media Center The music and music video streamers love having Windows Media Center (WMC) in their home theater PC. You can play music, videos, movies, and anything else you can stream off the net with this one program.
WMC is the most mainstream media center thanks to Microsoft’s advertisement and bundling efforts. There is nothing too technical about Windows Media Center and it plays most media formats out there.
Windows Media Center has been a favorite choice especially for those who enjoy watching and recording live TV. Since releasing Windows 10, Microsoft has left WMC to fade away, so many people need to transition to new media center software.
However, while TV tuner setup is easy on WMC, it is more difficult on others, with many not even supporting cable TV at all.
 Plex Home Theater is a true media center alternative for Mac OS X, Windows and Linux, and it is integrated with Plex Media Server; so if you want to sync your media files between several computers and portable devices, then this program will be perfect for you.
The interface is visually stunning and it has an excellent integration with its media server.
You can use Plex Media Server to transcode any media file you have in your library and stream it using a PleXBMC add-on for Kodi.
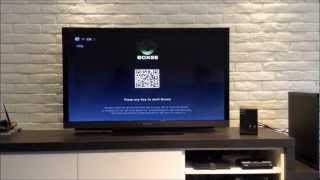
 Emby is another great alternative to centrally manage all of your media files and then watch them using the front-end application.
Emby organizes your media files so that it never takes more than a few clicks to find the latest movie or TV show. In addition, you can setup customized views of your library for each member of your family with the ability to pause and resume from different devices.
Emby also has an add-on for Kodi that brings you a super easy way to view your content.
5. NextPVR NextPVR is probably the best alternative to Windows Media Center to watch and record live TV.
It is easy to setup and supports advanced features such as recording series.
You can use NextPVR as a front-end application, but the user interface is not as stylish as WMC or Kodi, but it is clean and simple.
You can also use NextPVR as a back-end and integrate it with Kodi using a PVR add-on.
6. Media Portal Another good media center with TV tuner support is Media Portal. Media Portal turns your computer into a highly advanced media center.
It is an open source application similar to Kodi, but the key advantage of this software is that you can turn your PC into a PVR (Personal Video Recorder).
 MythTV is the PVR of the Linux media center. You can record your shows and play them back at any time. It’s a great alternative to TiVo if you keep running out of space for all of your TV shows.
This one is for advanced users that want to set up their home theater computer to link to their television. Once linked, you will be able to record live television programs and store them on your PC. Then you will be able to play them at any time. MythTV has several variations for different Linux distributions such as a Mythbuntu and MythDora.
8. JRiver Media Center JRiver Media Center is a jukebox-style media center like Windows Media Player or iTunes. However, it comes with a 10-foot interface optimized Theater View, which works perfectly with your HDTV.
The great thing about JRiver is that it supports even the most advanced codecs out of the box, and it is known to playback your music with excellent sound quality. It even comes with Netflix, Hulu and YouTube services integrated, so it is suitable for playing online video content, too. It is a perfect choice for you especially if you are an audiophile and like to play lossless formats of audio such as FLAC, APE, ALAC, WM and WAV files. JRiver costs $49.98.
9. Steam Big Picture Valve’s Steam is the most popular game platform available. Using Steam’s Big Picture mode allows you to buy and launch PC games from your sofa.
When you integrate Steam’s Big Picture mode with Kodi Media Center, you will get a really powerful combination that gives you much more control over your media experience in comparison to any commercial game console.
10. HDHomeRun DVR HDHomeRun DVR is SiliconDust company’s attempt to fill in the gap in the DIY DVR market after Microsoft decided not to include Windows Media Center into Windows 10 anymore.
HDHomeRun DVR works with your front-end device and NAS server adding the ability to watch, schedule and record live TV.
It is still in the development phase, and I have not evaluated it myself yet since it is not available in the country I live in.
However, features such as DRM (for protected cable TV shows), Live TV pause, Kodi and Plex integrations will certainly make this DVR software popular in the future.
Conclusion As you can see, there are several media center software available to choose from. Which media center is the best depends eventually on your needs for the media center. Are you interested in basic DVD playback and music listening capabilities or more advanced ways to play online and high definition video content?
Don’t know how to get started? My recommendation is to get started with Kodi media center and then set up a back-end with Plex Media Server.


1, добавлено: 04 Сен 2012 16:57
TheDark SmartTV Media Center - виджет для телевизоров и BD-плееров Samsung с функцией SmartTV (2010-2012 года).
Виджет TheDark SmartTV Media Center - Устанавливается через сервер установленный на компьютере.
В виджете TheDark SmartTV Media Center по умолчанию прописаны плейлисты IPTV и онлайнвидеосерверов с возможностью
добовления плейлистов вашего провайдера IPTV.
Основные возможности виджета:
- поддержка управления голосом, жестами и мышью (USB или беспроводной) (только для моделей 2012 года),
- простой и понятный интерфейс, персональные настройки, изменяемый внешний вид,
- 376 каналов IPTV,
- большая фильмотека (более 100000 видео) на Сетевой папке нашего сайта,
- удобный Проводник для просмотра файлов,
- легкое подключение любых папок компьютера для просмотра на ТВ,
- расширенные функции работы с кабельнами и IPTV каналами с программой передач (двух типов),
- воспроизведение мультимедиа файлов с USB носителей, с компьютеров локальной и Интернет сети,
- воспроизведение IP-TV и интернет телеканалов с персональными настройками каналов,
- переключение аудио дорожек (для моделей 2011 и новее)
- подключение внешних субтитров (для моделей 2011 и новее)
- просмотр слайдшоу фотографий с эффектами перехода,
- экранные часы с несколькими режимами,
- видео может растягиваться на весь экран без искажений и черных полос (несколько режимов),
- полная поддержка имен файлов русскими буквами,
- раздел Избранное в котором запоминаются позиция воспроизведения любого файла, ссылки на папки, сайты и телеканалы,
- просмотр текстовых файлов,
- уведомления о новых личных сообщениях и их прочтение на экране,
- простой Веб-браузер
- автозапуск при включении телевизора
Основные возможности сервера:
- специально разработанный сервер для SmartTV, не требующий специальных знаний
- легкая автоматическая установка любых виджетов в телевизор из папки (создавать widgetlist.xml не требуется)
- воспроизведение на телевизоре файлов из папок компьютера (Сетевые папки, другие программы не требуются)
- управление компьютером с пульта телевизора (выключение, тв тюнер, громкость, воспроизведение и др.)
- автоматическое рекурсивное преобразование XML и M3U плейлистов в NetPlay файлы для нашего виджета
- удобное создание и редактирование NetPlay файлов (ссылки на IPTV каналы, фильмы итд) без специальных знаний.
Установка TheDark SmartTV Media Center:
1.Зайдите на оффициальный сайт виджита и зарегистрируйтесь: http://smart-tv-home.ru/
2.Скачайте и установите на компьютер программу-сервер TheDark SmartTV Media Server.
Установка TheDark SmartTV Media Center в телевизоре:
1. Создание в телевизоре нового пользователя (кроме ТВ 2012г. т.к.пользователь develop уже есть)
1.1. Нажмите кнопку на пульте SMART HUB.
1.2. Нажмите на красную кнопку (A).
1.3. Нажмите кнопку "Создать учетную запись":
1.4. Введите имя пользователя(Учетная запись самсунг): develop
1.5. Введите новый пароль два раза
1.6. Нажмите "Создать учетную запись".
2. Вход под учетной записью develop
2.1. Нажмите кнопку на пульте SMART HUB.
2.2. Нажмите на красную кнопку (A).
2.3. Введите или выберите из списка ранее созданные имя и пароль пользователя (В ТВ 2012г. пароль 000000)
2.4. Нажмите Вход
3. Скачивание (синхронизация) виджетов с сервера компьютера
3.1. Нажмите синию кнопку (D) или (TOOLS) для моделей 2012 года
3.1. Нажмите последнию строчку "Разработка"
3.2. Нажмите "Настройка IP адреса" и впишите IP адрес сервера (что бы его узнать запустите TheDark Smart TV Server)
для скачивания, например 192.168.1.107 (третья цифра должна быть не ноль)
3.3. Нажмите "Синхронизация приложений пользователя"
3.4. Установятся виджеты.
3.5. Выходим из установки в меню и нажимаем красную кнопку «А» и выходим с пользователя Develop.
3.6. Теперь важно. Выходим из Smart-TV обязательно иначе виджеты не появятся.
3.7. Потом заходим опять и идём в конец списка…
4. Обновления (синхронизация) виджетов:
Для обновления виджетов повторите пункты 2 и 3 (пункт 3.2 выпольнять не нужно)
ВНИМАНИЕ! Если телевизор после установок виджетов зависает:
4. выключите телевизор
5. подключите кабель
6. включите телевизор.
Управление:
========================================
клавиша EXIT - показать/скрыть Проводник
клавиша RETURN - на один уровень выше в Проводнике
клавиша ВЛЕВО - пролистать Проводник на страницу к концу
клавиша ВПРАВО - пролистать Проводник на страницу к началу
клавиша ВНИЗ - переместиться на один элемент вниз или воспроизвести предыдущий элемент списка/канал (при закрытом Проводнике)
клавиша ВВЕРХ - переместиться на один элемент вверх или воспроизвести следующий элемент списка/канал (при закрытом Проводнике)
клавиша ENTER - выполнить элемент меню в Проводнике или показать Проводник (при закрытом Проводнике)
клавиша GUIDE - показать/скрыть Программу передач
клавиша CH.LIST - показать/скрыть Список каналов, а для источника сигнала HDMI - показать/скрыть PIP
клавиша SOURCE - выбор источника сигнала из списка
клавиша VOL_UP и VOL_DOWN - (при выводе звука на внеший рессивер) перебор режима вывода звука (иначе) регулировка громкости
клавиша TTX/MIX - для ТВ режима - телетекст, для Медиа режима - выбрать следующую аудио дорожку (для моделей 2010 и новее)
клавиша AD/SUB - отобразить панель субтитров (для моделей 2010 и новее)
клавиша P.SIZE и FAV.CH - выбор режима отображения видео файла или телеканала
клавиша INFO - показать информацию о текущем воспроизведении
клавиша TOOLS - отобразить меню настроек ТВ
клавиша А - (при закрытом Проводнике) выбор режима отображения видео файла или телеканала
клавиша D - (при закрытом Проводнике) изменить режим отображения часов или показать личные сообщения при их наличии
клавиша PAUSE - приостановить/продолжить воспроизведение
клавиша PLAY - отобразить панель перемотки
клавиша STOP - остановить воспроизведение файла и перейти в ТВ режим
клавиша REC - начать запись RTMP телеканала (только для rtmp:// каналов)
клавиши ПЕРЕМОТКИ - перемотка аудио/видео на N минут вперед/назад (задается в Настройках)
клавиши 0-9 - ввод номера канала/элемента (во время отображения панели ввода клавиши вверх/вниз - выбор соседник элементов)
клавиша 3D - выбор 3D режима
Портал – это виртуальное и очень большое хранилище всевозможных полезных файлов. Это и аудио и видеотека одновременно, это огромный запас компьютерных программ и игр. Пользоваться порталом означает получить доступ ко всем его ресурсам:
Доступ к большой фонотеке музыки в формате MP3, всех жанров и направлений. На сегодняшний день доступно более 10 000 официальных альбомов разных исполнителей.
Перейти в раздел Музыка
Доступ к огромному архиву кино: большое количество фильмов и музыкальных клипов. Существует четкое разделение по жанрам, от детских анимационных до боевиков и детективов. Для каждого фильма присутствуют описание и картинка обложки фильма.
Перейти в раздел Фильмы
Доступ к лучшим программам для Вашего компьютера или мобильного телефона. Все программы проходят предварительное тестирование специалистами IDC, на предмет работоспособности, а также проверяются на вирусы.
Перейти в раздел Программы
Услуга предоставляет любителям сетевых игр возможность быть ближе, не смотря на расстояния. На основе нашего сервера объединяются все геймеры региона.
На сегодняшний день нашим клиентом доступны самые популярные сетевые игры. Вы можете сразиться с друзьями в такие популярные игры как Call of duty 4, CounterStrike 1.6, Counter-Strike Source, Day of Defeat Source, Team Fortress 2, Quake 3 Arena, UnrealTournament, Starcraft, Warcraft 3, Diablo, World of Warcraft. Игры постоянно пополняются.
Для меломанов и просто любителей слушать хорошую музыку в высоком качестве. На сегодняшний день доступно более 20 зарубежных и российских радиостанций различных стилей и направлений. Для прослушивания каналов, Вам не надо покупать дополнительно FM-tuner, достаточно просто скачать программу WinAmp на свой компьютер. Также Вы сможете записывать понравившиеся песни прямо к себе на компьютер в популярных форматах MP3 и WMA.
Одноблочная аудиосистема Merlin SoundBar Home Media Center со встроенным сабвуфером не требует каких-либо дополнительных колонок для полноценного объемного звука в кино и играх. Более того, встроенная док-станция для Apple iPod и iPhone и совместимый с ними пульт дистанционного управления позволяет вам использовать эти устройства для прослушивания ваших любимых музыкальных произведений.
Ключевые особенности медиацентра Merlin SoundBar Home Media Center:Мультимедийный центр Merlin SoundBar Home Media Center оснащен встроенным медиаплеером с возможностью записи и поставляется с жестким диском объемом 1 или 2ТБ. Кроме того, он может быть подключен к вашей домашней компьютерной сети по LAN-соединению, проводному или беспроводному (встроенный wi-fi).
Также возможно подключение к Интернету для прямого доступа к таким он-лайн службам как YouTube, интернет радио, ленте новостей, прогноз погоды.
Настоящий объемный звук с помощью технологииDolby Virtual Speaker – это совершенная технология, воспроизводящая полноценный объемный звук всего лишь из двух фронтальных источников звука. Уникальная технология полностью заменяет 5.1-канальную систему. Нет надобности в дополнительных колонках и трудоемких работах по их установке в комнате.
Проигрывание музыки с портативных устройств с помощью технологии MP3 LinkMP3 Link позволяет проигрывать MP3 файлы напрямую с ваших портативных устройств. Просто подключите медиацентр Merlin SoundBar Home Media Center к MP3 Link доку и наслаждайтесь высококачественным звуком воспроизводимым домашним медиацентром от Merlin.
Записывай и просматривай фотографии и фильм прямо с USB-дискаUSb Link – это возможность подключать к медиацентру любое совместимое с USB 2.0 устройство – флеш-диск, внешний HDD и т.п. Кроме того, можно вести на них запись с любого AV-устройства – DVD-плеер, телевизор и т.д.
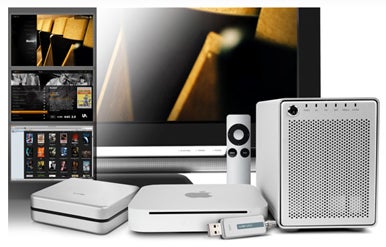
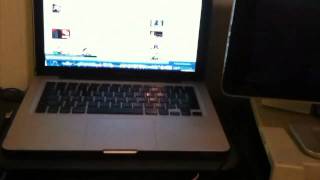
A Mac Mini as a home theater PC showing Apple's stock Front Row interface
A Home Theater PC (HTPC ) or Media Center appliance is a convergence device that combines some or all the capabilities of a personal computer with a software application that supports video, photo, music playback, and sometimes video recording functionality. Although computers with some of these capabilities were available from the late 1980s, the "Home Theater PC" term first appeared in mainstream press in 1996. In recent years, other types of consumer electronics, including gaming systems and dedicated media devices have crossed over to manage video and music content. The term "media center" also refers to specialized application software designed to run on standard personal computers. [ 1 ]
An HTPC and other convergence devices integrate components of a home theater into a unit co-located with a home entertainment system. An HTPC system typically has a remote control and the software interface normally has a 10-foot user interface design so that it can be comfortably viewed at typical television viewing distances. An HTPC can be purchased pre-configured with the required hardware and software needed to add video programming or music to the PC. Enthusiasts can also piece together a system out of discrete components as part of a software-based HTPC. [ 1 ] [ 2 ] [ 3 ] [ 4 ] [ 5 ]
Since 2007 digital media receiver software has been incorporated into consumer electronics through software or hardware changes including gaming systems, blu-ray players, televisions. and set top boxes. The increased availability of specialized devices, coupled with paid and free digital content, now offer alternatives to multipurpose (and more costly) personal computers. [ 6 ]
Home media specialists not only can design the seating and decor for your dream home theater, but most of them can help you find specific media control options, conceal your television and various accessories, set up optimal seating, choose and install ideal lighting, and help create the ultimate viewing environment. Some of these California professionals work entirely on their own, while others work with subcontractors to get the job done. Here are some related professionals and vendors to complement the work of home media design & installation: General Contractors. Interior Designers & Decorators. Paint & Wall Coverings. Furniture & Accessories. Specialty Contractors.
Before you call a designer, envision how the room will be used. Is it going to be an all-television viewing center or a full home theater? Or do you want it to be more of a central gathering area, where guests can watch TV, play games or just hang out? Do you want it to be used frequently, or just for special occasions? Do you want to use an existing room or build an additional room?
Questions to ask a home media designer:Want to turn your PC into a digital video recorder and media center box? For more than a decade Microsoft has made that by offering Windows Media Center. But when Windows 10 ships in the summer of 2015 it won’t include Media Center .
The good news is that there are still some good options available for Home Theater PC (HTPC) enthusiasts.
The bad news is that some of the best alternatives were killed long before Windows Media Center:
If you want to retain all the functionality of Windows Media Center, Microsoft says your best option is not to upgrade to Windows 10. The company will continue to offer support for Windows 7 through January, 2020 and for Windows 8 Pro through January, 2023.
And if you’re using Windows Media Center with a CableCard to record encrypted broadcasts from your cable TV provider, that really is probably your best bet.
Update. Some home theater PC enthusiasts have come up with an unofficial Windows Media installer for Windows 10. Since it’s unofficial you may want to proceed with caution… or try one of the Media Center alternatives listed below.
On the other hand if you’re looking for a way to record broadcast television from an over-the-air antenna or unencrypted channels from your cable provider, there are still a few other good options which should work with Windows 10 (and some work with Linux if you feel like leaving Microsoft behind altogether).
If you’re in the US you’ll probably have to pay $25 per year for electronic program guide updates from Schedules Direct. But that’s still probably cheaper than the cost of a TiVo subscription or of renting a DVR from your pay TV provider.
Don’t care about live TV at all? Then you’re in pretty good shape, since there are a number of solutions that will help your turn your ordinary PC into an HTPC, allowing you to plug your computer into a TV, sit back on your couch with a remote (or keyboard), and navigate videos, photos, music, and streaming media.
Here are some of the best solutions as of mid-2015:
Media Center SoftwareThis is probably the most popular cross-platform media center solution. Originally started as a XBMC: a project to turn the first-gen Xbox game console into a media center, Kodi outgrew the name and the game console.
Now Kodi is available for Windows, Linux, OS X, Android, and supports all sorts of hardware including the inexpensive, low-power Raspberry Pi mini PC.
Kodi is an open source application with a strong development community, support for third-party add-ons, and a customizable look and feel thanks to support for skins.
You can use it to manage and play music, videos, and photos stored on a local hard drive or a shared network drive. It also supports DVD playback. But you can also use add-ons to stream content from hundreds of internet services. With a little work you can also use Kodi as the front-end for for a digital video recorder.
You’ll need to install a third-party DVR app (see the DVR section below) to actually handle live and recorded TV functionality. But once everything is set up, you can use Kodi to watch and pause TV, view program guides, and schedule recordings.
Kodi costs nothing to install or use.
Media PortalThis open source app isn’t quite as versatile as Kodi since, among other things, it only runs on Windows. But it has one thing going for it: Media Portal has a built-in DVR, which means you don’t have to install and configure a separate digital video recorder package.
Like Kodi, Media Portal includes support for music, videos, and photos and there’s support for plugins and skins .
Media Portal costs nothing to use, but you may need to pay for program guide data if you use it as a digital video recorder.
This is one of the most popular media center applications not called Kodi (or XBMC), and it’s a cross-platform solution that supports Windows, Mac, and Linux.
But Plex is a bit different from Kodi or Media Portal since it’s basically a two-part system composed of a media server back-end and a home theater front-end.
The media server indexes your content and lets you install plugins to add features. The front-end lets you play your media… either on your PC, or on you phone, tablet, Roku, or other device.
What’s interesting about Plex is that the front-end can either run on the same PC as the back-end or on a different device. This lets you, for example, load up all of your music and movies onto a desktop PC with large hard drive, install the Plex Media Server, and then stream your content to a laptop, smartphone, tablet, or TV box such as a Roku, Chromecast, or Amazon Fire TV.
The basic Plex service is free but the iOS app costs $5 and while the Android app is free, you’ll either have to pay $5 or sign up for a Plex Pass subscription to stream videos to your Android device for longer than one minutes. Plex Pass also grants access to some premium features and previews of upcoming features that may be available to all users in the future.
Plex, by the way, doesn’t have native support for DVR functionality, but there are some DIY solutions .
This media center app works a lot like Plex. There’s a server that you install on your PC to index your media and a series of client apps that you can install on the same PC or on other devices to view your content.
Emby will stream your media to any device and it can convert files on-the-fly if necessary.
Up until recently Emby was known as Media Browser, but the team changed the name when it became clear that it does a lot more than simply let you browse your media.
Emby is free and open source software. You can run the server on Windows, OS X, Linux, OS X, FreeBSD, or network-attached storage devices that support FreeNAS or Open Media Vault. Synology NAS support is also in the works.
You can use a web interface to interact with your media library, install an Emby Theater app, or use any number of other client apps.
Among other platforms, there are Emby TV apps or plugins for Roku, Xbox 360, Kodi, Samsung Smart TVs, Amazon Fire TV, Android TV, Chromecast, and even Windows Media Center.
There are also mobile apps for Android, iOS, Windows Phone, and Windows 8.1.
Best known for its DVR features, this open source software for Linux and OS X also includes music, photo, and video features as well as support for plugins and a MythWeb utility that lets you remotely control your MythTV box through a web-based remote.
Once it’s configured, MythTV provides a 10-foot user interface for navigating and playing media as well as for DVR functions.
MythTV can be trickier to set up than some of the other applications on this list though. The official project page offers source code for MythTV rather than pre-compiled binaries. But if you don’t want to compile it from source, you can find pre-compiled packages for several operating systems or install an operating system such as Mythbuntu which is built around the media center suite.
Looking for a free and open alternative to Kodi and don’t care if it supports Windows? LinuxMCE is another open source media center app, and as the name suggests, it’s designed to run on Linux.
In fact, LinuxMCE isn’t just an app that you install on your computer. It’s a complete operating system. Download a disk image, burn it to a DVD, and the LinuxMCE installer will load Kubuntu Linux on your computer and walk you through the process of installing LinuxMCE .
You can use LinuxMCE as a media center for organizing and displaying your media. But it also supports home automation features, letting you control your lights, security system, VoIP phones, and heating and cooling systems, among other things.
It’s not the prettiest media center software, but it’s pretty powerful.
The latest stable release of LinuxMCE came in February, 2013, but the software is still under active development and you can find recent pre-release builds from the download page .
LinuxMCE includes the MythTV DVR for digital video recorder functions.
OpenELEC and GeeXboXSpeaking of Linux-based operating systems, these are two relatively popular options for turning your PC into a media PC.
Both are free and open source GNU/Linux operating systems that put Kodi/XBMC front-and-center.
Sure, you could just install Kodi as an app and use it with your current operating system. But OpenELEC and GeeXboX take a less-is-more approach and offer a light-weight operating system designed specifically for media.
OpenELEC boots quickly and takes up less than 125MB of disk space when installed although it might use more space after you install some third-party add-ons. It supports a wide range of hardware including Raspberry Pi and Cubox-i mini PCs with ARM chips as well as more powerful hardware with Intel and AMD processors.
GeeXboX has been around longer, but it’s less well-known these days. Like OpenELEC, GeeXboX supports systems with ARM and x86 chips.
One of the biggest differences between these operating systems is that OpenELEC is designed to be installed to local storage, while GeeXboX can be installed on your hard drive or SSD or run from a LiveCD, USB, or SD card.
While MeediOS isn’t as popular as some of the solutions listed above, this open source media center for Windows has a fairly long history, features an attractive user interface and support for themes and plugins.
But honestly, I’d check out some of the other options listed above before trying MeediOS.
At least it’s free.
DVR software Media PortalSetting up Media Portal to work as a media center is pretty simple. It takes a little more work to set it up as a digital video recorder since you’ll need to configure it to work with your TV tuner and to import TV schedule data for the electronic program guide.
The software basically includes two parts. a TV server for those functions, and a client, which is pretty much the same thing you’d use to even if you weren’t planning to use Media Portal for TV.
Once Media Portal is set up though, it’s probably one of the strongest alternatives to Windows Media Center since it’s a one-stop-shop for TV, music, video, photos, and more. Or you could just use Media Portal’s DVR features as a back-end for Kodi.
Sadly, like all of software-based DVRs in this section, Media Portal cannot decode encrypted channels if you’re using CableCard.
This free personal video recorder comes from the developer of the discontinued GB-PVR project.
It can be used as a standalone DVR and media center app, or you can NextPVR as a back-end for recording videos while using Kodi as the front-end media center.
NextPVR runs on Windows and it’s available to use for free, but unlike some of the other applications on this list, it’s not a community-supported, free and open source software project.
So it’s a decent option if you’re looking for a DVR package that supports a wide range of TV tuners, offers a powerful feature set, and which is relatively easy to set up and use.
On the other hand, if you’re looking for a new DVR solution because Microsoft has ceased development of Windows Media Center, you might want to look at an open source solution since they’re not as likely to shut down if one company decides to cease development (that’s not to say open source projects live forever… but there’s always the chance that someone will pick up the pieces and continue development even if the founders leave the project).
This open source, Linux-based software can handle program guide data from a variety of sources including Schedules Direct and offers all the basic DVR functions including support for playing, pausing, and recording live TV and scheduling recordings.
MythTV also includes support for automatic commercial detection and an option for automatic commercial skipping .
MythTV has back-end and front-end components and while the back-end is Linux/OS X-only, there’s been some work to develop a Windows front-end .
Rather than a full-fledged DVR and media center system, Tvheadend is a back-end TV streaming server and digital video recorder.
Install the open source software on a Linux or OS X computer and you can pair it with a front-end like Kodi.
You can also use several other front-end clients including Movian and VLC, or use a mobile app called TvhClient to control Tvheadend and stream media to your phone.
These clients let you play audio and video files, search your library, play live TV, and do much more.
Set top boxesPart of the reason Windows Media Center (and BeyondTV, Sage TV, and several other projects) have been discontinued is because while geeks like me have been plugging computers into our TVs for years, most people would rather have something simpler… like a smart TV with built-in support for Netflix and YouTube or a small, cheap, low-power set top box that requires next to no configuration.
Sure, you might not be able to use a web browser with these devices. Most don’t offer support for live TV or include enough built-in storage for your massive media collection. And you might need to pay subscription fees to stream content from sites like Netflix, Hulu, and Amazon.
But the best smart TV boxes are relatively inexpensive and dead simple to use.
While I’ve still got a computer plugged into the TV in my living room, I’ve been using a Amazon Fire TV Stick for most of my media needs for the past half year. After spending a decade trying to configure the perfect DVR/HTPC, I’ve decided I’m tired of dealing with glitchy recordings from an imperfectly aligned rooftop antenna. I don’t actually spend all that much time watching TV or movies anyway, and there’s plenty of great content on Amazon and Netflix.
So I only switch over to the PC input on my TV when I want to use a web browser or watch a show I recorded before I disconnected my TV tuner.
Incidentally, you can install Kodi on the Fire TV or Fire TV Stick. but it’s not quite as simple as installing Kodi on a PC and some features may not work as well on a Fire TV.
Many new TVs come with “smart” features, but I’d rather buy a dumb TV and a smart box because if the manufacturer stops pushing out software updates for the box in a few years it’s a lot cheaper to replace a Roku or Chromecast than a big-screen TV.
Here are some of the best options for TV boxes available in mid-2015:
The TiVo could end up being one of the most expensive options, since it’s a digital video recorder with a $14.99 per month fee for program guide data. But recent TiVo models can do much more than just record television programs. They also support streaming content from Netflix, Amazon, Hulu, Vudu, and other sites.
We should see more boxes in the coming months as a growing number of devices running Google’s Android TV software hit the market.
The maker of the (relatively) popular HDHomeRun network-connected line of TV tuners also plan to launch their own DVR software soon, following a successful Kickstarter campaign .
The idea is to let you use an app running on your PC to schedule recordings or watch or play live TV streaming from an HDHomeRun tuner. The recordings can be stored on your PC or on a network-attached storage device and then you can play the content on your PC or on an Android phone or tablet.
So while Windows Media Center may be on its last legs, it looks like there’s still a future for media center/DVR software… even in an age of subscription-based, on-demand streaming services.

 From family photos and wedding videos to our favorite songs and movies, we have a wealth of digital content on our computers. But while you may have invested in a high-quality external monitor, chances are you’re viewing images and video on a relatively small computer screen, and playing music and movies through your computer’s simple speakers. Imagine how great it would be view your digital files and the best of the web on your television screen or home theater projector – as you lean back on your comfortable sofa.
That’s just for a computer whiz, gadget geek, or over-the-top entertainment equipment snob, right? Wrong. And you don’t need an ugly cable running from your computer to your television, either. Your TV is way better than an average computer monitor, and you can take advantage of its features and user-friendly controls by setting up a home media network.
When you set up your home media center, you get to watch everything from HD television to streaming web videos and music. You can also record live TV shows and movies on demand. And here’s the best part: it’s free !
You’ll be as shocked as I was about the overall financial savings. And once you read about the features you get, the short list of components you need, and the simple steps to set it up, you’ll be surprised how easy it is too.
Benefits of a Home Media NetworkWith a home media network, you’ll be able to do the following:
1. Access free, live digital HD television .
You may already know how to watch free digital HD TV channels in your area. including high-definition shows and movies. You just need to attach a high-quality antenna to your TV using standard coaxial cable. With a home media network, the antenna connects directly to your computer, which acts as your media server. Thus, even with an older television that isn’t compatible with digital TV, you’ll avoid needing a digital converter box. Your media server will handle that role.
2. Record and play back shows and movies .
Once you set up a media network, you’ll have your own personal video recorder (PVR), and you won’t need to pay an expensive monthly fee for a TiVo subscription or a rental DVR unit from your cable or satellite company. When you combine the free access to your favorite TV programs and hit movies with your PVR capability, you’ll be able to record and play back at your own convenience, and even skip commercials.
Not so fast. You can’t keep your cable or satellite subscription (i.e. DIRECTV ) and use this tip as a way to avoid paying for a DVR unit. Your home media network won’t be able to record media that comes through your cable or satellite box. Cable and satellite providers encrypt their signals, making it extremely difficult to record them on your computer. Your home media network will only work with free over-the-air television, which is not encrypted.
3. Access media on your local hard drive and websites .
With a robust network, you’ll combine the media on your hard drive with all of the content you can stream from the Internet. This capability includes free sites like YouTube and Hulu, along with paid services like Netflix and Amazon Instant Video. It’ll all be on your TV, so you won’t need to huddle around a computer to view vacation photos and home videos or streaming news, original programming, and kitten videos.
4. Use a full digital TV guide and remote control just like with a normal cable package .
Don’t worry. Your home media center won’t force you to carry a mouse and keyboard around the house to change the channels. You’ll have full remote control access via a user-friendly interface on your TV. With it, you’ll be able to access live content, record shows and movies, access your hard drive, and bring up websites and Internet content. Just like with on-demand features from your cable company, you will be able to preview, play, or pause all of your recorded movies, television, and music.
Connecting Your Computer and Your TVYou don’t need a degree in computer science or electrical engineering to set up your network. You don’t need to be a child genius who grew up with all of this stuff either. You just need to learn a few new terms that might look ugly, but they’re relatively easy to understand and then put to use.
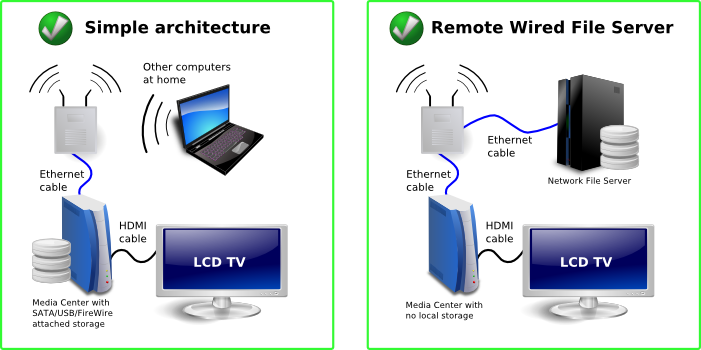
You’re going to create a client/server setup. Your computer will be the media server. and you can keep it anywhere. The client is a device called a media extender. which is a small, quiet box that sits on or near your television. Your media extender will access content on the media server – your computer – and convert it so that you can play it back on the television. It will also provide you with a user-friendly menu interface to access your content with PVR playback capabilities. Keep in mind that you’ll need one extender for every TV you want to connect.
You can connect the media extender to your computer with a wired connection, using an Ethernet cable. which is the same type of wire you use to connect your computer to a cable modem to gain access to the Internet. Cables will be simple to set up, and they’ll stay neat and clean if you keep your computer and TV near each other. You can also use wireless networking, if you hate the clutter of wires, especially if you’re connecting multiple TVs throughout the house to the same desktop computer server. You just need a wireless adapter for your media extender.
Now that we have the basic setup explained, let’s get into the components you’ll use to design your home media network.
Components of a Home Media CenterFirst, you need a personal computer, preferably a desktop computer. A tower is more practical than a laptop computer because you’re going to add television tuner cards and you’ll need substantial additional storage. You do not need to go out and buy anything fancy; any computer built in the last five years should be sufficient.
And you’re not just buying a machine to wire your entertainment systems. You should be able to use the computer for all standard functions, even while it’s running your network. Just keep in mind that you’ll have to leave it on all the time so you can record and access video content. If you don’t already have a suitable PC, you can expect to spend around $400 to buy a new one, or you can find a used one for far less.
A media server needs a television tuner card to record programs that your computer receives. A TV tuner card is a device that plugs into your motherboard and lets your computer record television on your hard drive. You can spend a little more to get a card with two tuners on it, and then you can record or watch two programs at a time.
I have both a single and a double tuner card from a company called Hauppauge, so my system can play or record three channels at once. The double tuner card, the WinTV-HVR-2250. typically sells for under $150. Once you install a tuner card, your cable from your antenna will connect directly to your computer, not your television. You may continue to connect it to your television as well, even if only as a backup.
3. StorageWhen it comes to storage, a media server is the way to capitalize on the power of one of the $80 hard drives that store an amazing 2+ terabytes of data. Seagate, Western Digital, and others now make inexpensive “green” drives that consume very little power. Just one of these drives can hold over 100 DVDs and hundreds of hours of television. In the future, as your media library grows, and the price of storage continues to drop, it will be even less expensive to add more drives and computer hardware upgrades to your system.
4. SoftwareYou’ll use media server software to catalog and manipulate all of your digital content through a simple interface on your computer or television. I evaluated many different media server programs and found that a program from a small company called SageTV fit my needs for around $80. I like SageTV because it’s very flexible, customizable, and user-friendly. It works flawlessly with their proprietary media extender, and they maintain a community of developers who are constantly coming out with free add-ons and enhancements.
However, SageTV is an underdog compared to the 800-pound gorilla: Windows Media Center . I decided against Windows Media Center for my system because I felt the software features weren’t as easy to use. But you may already own a copy of this program since Microsoft includes it in many recent editions of Windows including: Windows XP Media Center Edition, Windows Vista (Home Premium and Ultimate), Windows 7 (Home Premium, Professional, Enterprise, and Ultimate). If you already own it and don’t find it too tough to navigate, you may choose using Windows Media Center over buying a new program, since you’ve already paid for it.
5. Media ExtendersNow that your computer is loaded with the hardware and software it needs, you need to bring those files to your television. The media extender takes the data from the hard drive on your media server and displays it on your television. It also connects the remote control that you’ll use to access content. You can think of the media extender as the cable box necessary to receive the signal from your server and play the content on your television.
One simple media extender that has worked well for me is SageTV’s HD Theater 300. I mounted the extender near my television, and it’s barely noticeable. The SageTV product is designed to work only in combination with the SageTV Media Server software that I bought. You can buy the SageTV HD Theater 300 bundled with the SageTV Media server software for $200 total, and additional extenders are $150.
I have three extenders, one for each television in my house. If I had more TVs, I could buy more extenders, and each television could simultaneously access content from my server. SageTV has plenty of bigger competitors, most of which are designed to work with Microsoft’s Windows Media Center. The Apple TV product is another option for Mac lovers out there.
Oddly, Microsoft does not sell their own dedicated media extender to allow you to control the server from your television. You can either use the Xbox Media Center Extender or choose from a handful of third-party media extenders.
6. Connecting the DevicesThe antenna connects to the tuner card in your computer with a coaxial cable that you can buy at any hardware store. Between your media server computer and your media extenders, you need some way to network the devices together to transmit the digital information. To do so, you can either use an Ethernet cable or set up a wireless network.
You may already have a wireless network in your home that you use to connect your family’s computers. If you’re new to using a wireless network, you need to make sure that the extender you choose has a compatible wireless adapter. You also want to be sure that the wireless system has enough capacity to transmit high-definition television. Your last step before victoriously flipping on your TV and connected computer is to just connect the media extender to each television with an HDMI or RCA cable, just like you would use for a DVD player.
Putting Together Your Media Network Up-front CostsThere are no monthly fees, since you’re maintaining your own network. You just need to consider the initial costs of the new devices you’ll need. An adequate system for three televisions will cost about $900 in total. If you don’t already have a PC to use, then you’ll be looking at about $400 extra on top of that, but that’s all.
Depending on the cost of your cable or satellite television service, you would easily break even after a year or two. Personally, I like the fact that I own the system and that my monthly cost for using it, aside from electricity, is zero. I also have no need for DVD or Blu-ray players next to each television anymore. When I have a new DVD format disc. I just put it on my media server, and I can play it on any television in the house.
Required Technical SkillsTo set up a network, you’ll get down and dirty with your machinery, but it’s not really a huge technical challenge. Even if you don’t have a long list of computer skills, you can complete a basic media network on your own or with a little bit of conventional support.
The toughest task for most people will be installing the tuner cards and hard drive for added storage. Fortunately, any reputable store that sell these to you will usually do the installation for a nominal fee. Alternatively, if you have a friend or neighborhood kid who you rely on for your occasional technical question, you can trust that person to take care of this installation in about ten minutes. Talk to your tech savvy friends or the people you’re already buying equipment from. You should be able to avoid hiring someone to come to your home.
Software installation and configuration isn’t very challenging, but like any new product there is always a learning curve. Fortunately, there is a huge online community of people who share their tips and tricks for getting the most out of their media networks. Anytime I posed a question to the user forums on SageTV’s website, I quickly received a flurry of helpful replies. Talk to your computer-minded friends about what software and settings they recommend.
Final WordBuilding a home media center does require an up-front commitment of time, money, and knowledge. But the rewards far surpass the cost. In return for missing out on some cable programming, I now have a complete library of all my recorded television, movies, music, and pictures available on demand from any television in my house. In the past, I could count on my cable bill growing every year, and instead now I wait for new advances that will grow the capabilities of this system. I am constantly discovering new television programs and movies through the Internet, and I have one less bill to pay every month.
Have you considered building your home media network, or have you already set it up? What software and hardware choices did you make? What problems did you face, and what has been the most positive change since you got started?