


 Рейтинг: 4.2/5.0 (1850 проголосовавших)
Категория: Windows: Плееры
Анонсирован новый значительный выпуск открытого медиацентра Kodi 14.0. ранее развивающегося под именем XBMC, но переименованного из-за желания избавиться от упоминания Xbox в аббревиатуре XBMC (XBox Media Center), так как проект не может зарегистрировать торговую марку и не имеет юридических рычагов для контроля за использованием имени, что создаёт благоприятные условия для мошенников, распространяющих поддельные сборки продукта.
Изначально, проект был нацелен на создание открытого мультимедиа плеера для игровой приставки XBOX, но в процессе развития трансформировался в кросс-платформенный медиацентр, работающий на современных программных платформах. Из интересных функций Kodi, можно отметить поддержку широкого спектра форматов мультимедиа и средств аппаратного ускорения декодирования видео; поддержка пультов дистанционного управления; возможность проигрывания файлов по FTP/SFTP, SSH и WebDAV; возможность удалённого управления через web-интерфейс; наличие гибкой системы плагинов, реализованных на языке Python и доступных для установки через специальный каталог дополнений; подготовка плагинов для интеграции с популярными online-сервисами; возможность загрузки метаданных (текстов песен, обложек, рейтинга и т.п.) для имеющегося контента. На базе Kodi развивается около десятка коммерческих телеприставок и несколько открытых ответвлений (Boxee, GeeXboX, 9x9 Player, MediaPortal, Plex). 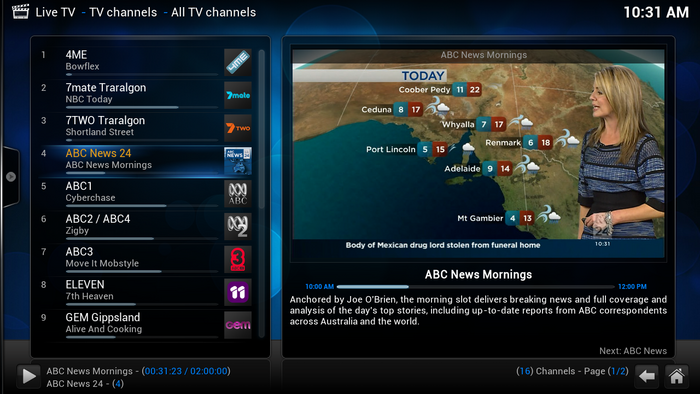


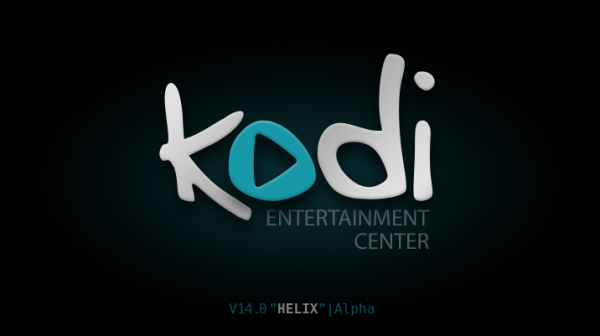
Состоялся выпуск открытого медиацентра Kodi 14.0 "Helix". ранее развивающегося под именем XBMC. но переименованного из-за желания избавиться от упоминания Xbox в аббревиатуре XBMC (XB ox M edia C enter), так как проект не может зарегистрировать торговую марку и не имеет юридических рычагов для контроля за использованием имени, что создаёт благоприятные условия для мошенников, распространяющих поддельные сборки продукта.
Kodi создан быть идеальным компаньоном для вашего HTPC (аббревиатура от англ. H ome T heatre P ersonal C omputer) — персональный компьютер, оснащенный программным и в некоторых случаях аппаратным обеспечением, позволяющим использовать его в качестве компьютера для домашнего кинотеатра. Поддерживающий почти бесконечный ряд различных пультов дистанционного управления и оснащённый красивым интерфесом и мощным механизмом смены скинов, Kodi очень удобен для управления с дивана и является идеальным решением для вашего домашнего кинотеатра. Установка этой программы на ваш компьютер превратит его в полнофункциональное мультимедийное устройство.
Отказ от ответственности . Проект Kodi не предоставляет никакой поддержки для нелегального видеоконтента.
Основные новшества Kodi 14.0 "Helix".
- Возможность переключения между несколькими раскладками клавиатуры на экранной клавиатуре;
- Обновление используемой версии ffmpeg (2.4.4), что позволило добавить поддержку видеокодеков h.265/HEVC и VP9. Поддержка h.265 пока доступна только в программной реализации, что может привести к проблемам с воспроизведением на маломощных системах;
- Улучшение интерфейса медиабиблиотеки. Существенно сокращено время сканирования библиотеки, что особенно заметно при начальном сканировании контента при первом запуске на платформах Android и iOS. Расширены средства предоставления доступа к содержимому библиотеки через UPnP. В частности, существенно улучшена совместимость с различными серверами, такими как PlayOn и MediaBrowser, и клиентами. В том числе улучшена работа UPnP-клиента Kodi с UPnP-сервером Kodi, например, улучшения средства поиска и добавлена поддержка категорий, с сортировкой по дате, рейтингу, голосованиям, обложкам альбомов;
- Улучшение менеджера установки дополнений, в котором расширены возможности по отслеживанию обновлений и реализован более полный контроль над дополнениями. Например, пользователь теперь может отключить принудительную установку обновлений, запретить вывод уведомлений о появлении обновлений или сохранить ранее используемую схему автоматической установки. Также можно скрыть из списка дополнения, которые не предназначенный для работы в стране пользователя;
- Переход на использование многопоточного декодирования по умолчанию при использовании программных декодеров;
- Улучшена работа на платформе Android, добавлена поддержка новых чипсетов, в том числе Freescale i.MX6, обеспечена поддержка разрешения 4K для чипсета AMLogic s802;
- Реализована поддержка AirPlay для iOS 7;
- Для пользователей планшетных ПК по умолчанию задействована тема оформления Re-Touched, оптимизированная для управления с сенсорных экранов;
- На всех платформах проведена работа по улучшению воспроизведения звука;
- На платформе Windows улучшено воспроизведение видео в формате DXVA;
- На платформе Linux решены проблемы с прошивками Intel, приводившими к периодическим крахам приложения. Добавлена поддержка VAAPI для карт Intel, что позволило для устройств NUC и Chromebox задействовать средства аппаратного устранения чересстрочности для Live TV и чересстрочных форматов;
- Поддержка архитектуры Freescale i.MX6;
- Упрощена система навигации в интерфейсе PVR (просмотр Live TV, прослушивание интернет-радио, работа с электронным телегидом (EPG) и организация видеозаписи по расписанию). Переработана организация переключения между каналами. Добавлена поддержка субканалов, определённых в стандарте ATSC и используемых в США;
- Возможность прямого просмотра содержимого архивов (zip, bin и т.д.).
Установка Kodi 14.0 "Helix" в Ubuntu 14.10/14.04/12.04/Linux Mint 17.1/17/13
Для установки откройте терминал (Ctrl+Alt+T), скопируйте и выполните эту последовательность команд:
sudo add-apt-repository ppa:team-xbmc/ppa
sudo apt-get update
sudo apt-get install kodi kodi-pvr* kodi-audioencoder*
По окончании установки вы можете пользоваться Kodi Media Center. как отдельной программой из меню системы:
Либо как отдельным окружением, завершив текущий сеанс и в окне входа в систему Выбрать окружение -> Kodi.
October 31, 2015 — 1 Comment
The latest Kodi Media Center, formerly known as XBMC, now is available for Ubuntu 15.10 users through its official PPA repository .
The current version is Kodi 15.2 ‘Isengard’ which was released in the middle of this month. For those who want to install this release and receive future updates via Software Updater. follow below steps.
1. Add Kodi PPA
Open terminal from the Unity Dash, App Launcher, or via Ctrl+Alt+T shortcut key. When it opens, run below command to add PPA:
2. If you’ve installed an old release from Software Center. Run Software Updater to upgrade to Kodi 15.2.
Or run below commands one by one in terminal to install or upgrade the software:
Once installed, log with Kodi session at next login or launch it from the Unity Dash at next boot.
3. (Optional) To remove Kodi PPA, go to the Software & Updates -> Other Software tab or run below command in terminal:
To remove Kodi, do it via Software Center or run command:
Kodi® media center. formerly known as XBMC™ Media Center, is an award-winning free and open source cross-platform software media player and entertainment hub for digital media for HTPCs (Home theater PCs). It uses a 10-foot user interface designed to be a media player for the living-room, using a remote control as the primary input device. Its graphical user interface (GUI) allows the user to easily browse and view videos, photos, podcasts, and music from a harddrive, optical disc, local network, and the internet using only a few buttons.
Confluence is the standard skin and is designed to be fast and user friendly.
With the skin re-Touched. Kodi® has now been enhanced to better work with larger phones and tablets as well. Kodi is not currently recommended for use with smaller phones.
Disclaimer:
- Kodi does not supply or include any media or content.
- Users must provide their own content or install one of the third party plug-ins
- Kodi has no affiliation with any third-part plug-in or add-on provider what so ever.
- We do not endorse the streaming of copyright protected material without permission of the copyright holder.
- In order to upgrade from a previous version you must have installed an official released version by Team Kodi. Any other version may cause failure to upgrade.
License and development:
Kodi® is a trademark of the XBMC Foundation. For further details you can visit http://kodi.wiki/view/Official:Trademark_Policy
Kodi® is fully Open-Source and released under the GPLv2.0+ license. It includes many third-party libraries which use compatible licenses. Due to the inclusion of some GPLv3.0 libraries the entire application becomes GPLv3.0 as binary.
Should you wish to help on future development you can do so by visiting our forum for further questions.
Attribution of images or names shown in the used screenshots:
“Sintel” is licensed as Creative Commons Attribution 3.0.
© copyright Blender Foundation | durian.blender.org
Kodi® медиа-центра. ранее известный как XBMC Media Center ™, является наградами бесплатный и открытый источник кросс-платформенный программное обеспечение медиа-плеер и развлекательный центр для цифровых средств массовой информации для HTPCs (Home Theater ПК). Он использует пользовательский интерфейс 10-футовый разработан, чтобы быть медиа-плеер для гостиной, с помощью пульта дистанционного управления в качестве основного устройства ввода. Его графический пользовательский интерфейс (GUI) позволяет пользователю легко просматривать и просматривать видео, фотографии, подкасты и музыку с жесткого диска, оптического диска, локальная сеть, и интернет, используя только несколько кнопок.
Слияние является стандартным кожи и предназначена для быстрой и удобной.
С кожи повторно Прикосновение. Kodi® теперь расширена для лучшей работы с большими телефонов и планшетов, а также. Коди настоящее время не рекомендуется для использования с меньшими телефонов.
Отказ от ответственности:
- Коди не поставить или включить любые средства массовой информации или содержание.
- Люди должны обеспечить их собственное содержание или установить один из сторонних плагинов
- Коди не имеет связей с какой-либо третьей части плагина или добавить-на поставщика, что так когда-либо.
- Мы делаем не одобрить потокового защищены авторским материала без разрешения владельца авторских прав.
- Для того, чтобы обновить предыдущую версию необходимо установить официальное выпущенной версии командой Коди. Любая другая версия может вызвать отказ обновить.
Лицензия и развитие:
Kodi® является торговой маркой XBMC Foundation. Для получения более подробной информации вы можете посетить http://kodi.wiki/view/Official:Trademark_Policy
Kodi® полностью открытым исходным кодом и выпущен под лицензией GPLv2.0 +. Она включает в себя много сторонних библиотек, которые используют совместимые лицензии. В связи с включением некоторых GPLv3.0 библиотек всего приложения становится GPLv3.0 как двоичные.
Если вы хотите, чтобы помочь на будущее развитие можно сделать, посетив наш форум для дальнейших вопросов.
Атрибуция изображений или имен, показанных на б скриншотов:
"Синтел" лицензируется как Creative Commons Attribution 3.0.
© Авторские права Blender Foundation | durian.blender.org
Want to build one PC to rule all your living room media needs? Meet Kodi! In part one of this series we show you how to set up the media player software formerly known as XBMC.
Setting up your own media center PC is a highly personal, quite in-depth task. For this How To, we'll give a basic introduction to Kodi, and talk about how the software provides a simple solution for your media center PC's player needs.
Kodi (formerly known as XBMC) is media player software that can play most video and music file types and other digital media both saved locally and found on the Internet. It's a one-stop-shop for all your entertainment needs once you get it set up right. It takes a little tinkering to get it running, but once you do it'll be smarter than any smart TV on the market.
The software is highly customisable to suit your particular media center needs, and it works with Windows, Linux, OS X, Android . iOS, Raspberry Pi and more, making it flexible no matter what computer you're basing your media center on.
We'll be using the Windows version of the install in this article, although much of the advice is universal once the Kodi software itself is loaded.
Hardware ChoicesWhat's a media center without hardware? Kodi scales surprisingly well, and what you intend to do with it will greatly influence what hardware you'll need.
You're free to use pretty much any computer you choose, from an old, re-purposed beige tower to an off-the-shelf Mac Mini .
No matter what base you build up from, you should keep an eye out for the following:
Regardless of which path you choose, try to run your operating system off a Solid State Drive. It makes a world of difference in making your media center feel like a responsive appliance rather than a PC pretending to be something else.
Preparing your media center for powerMost remotes, mice and keyboards will start up a media center that's hibernated or suspended with a single keypress. If you want to start a PC that's in a completely off state though, that generally requires extra hardware. With this in mind, you may wish to set your PC to hibernate instead of shut down when you press the power button.
To do this in Windows 7. open the start menu, type Power Options and open the program of the same name. For Windows 8.1. right click on the Windows button at the bottom left and choose Power Options .
In the window that appears, under your current power plan click Change plan settings. then Change advanced power settings to bring up a new dialog box. Head to the Power buttons and lid option, expand it, expand Power button action and change it to hibernate or sleep.
Before you close the dialog, there's one other change you can make -- upon resuming from any form of suspension, Windows is set by default to show a lock screen, whether you have a password or not for the current account. To turn this off and maintain the illusion of a media appliance, we'll first need to activate the option by clicking on Change settings that are currently unavailable. then change Require a password on wake-up to no.
Installing and Configuring KodiTo the software itself! Download Kodi. install it and run it for the first time. First, we'll want to set up our hardware to make sure everything is running as it should.
The rest of the settings are highly dependent on your personal needs, and we recommend you spend quite some time exploring what's available.
Banishing WindowsYou can launch your machine directly into Kodi using the excellent KodiLauncher. Setting it as the Windows Shell ensures you never so much as hear the Windows startup sound, Explorer not loading until you exit Kodi.
Take in mind if you choose this path, you will have specify helper applications like AnyDVD HD or Virtual CloneDrive to load separately through the External applications settings in KodiLauncher, and select Start First/Second/Third Group Applications with KodiLauncher -- they will no longer autostart otherwise.
Controlling your media centerHere the options are legion, and much like the type of computer you're using, it comes down to preference and needs.
We'd suggest at least a good wireless, backlit keyboard (like the Logitech K810 ), for when you really need to troubleshoot or do Windows work.
You'll also want a wireless pointing device: A trackpad is fine if you only intend to be briefly in Windows to do maintenance tasks, but you'll need a mouse if you intend to game.
There are handheld devices that combine a keyboard and touchpad, like Rii's Mini N7 and N8 -- they're better than you'd expect, but the size means they're only intended for use in short bursts.
Remote Controls
For non tech-savvy users and ease of use, a regular remote goes a long way. For something new, simple and in the one box, about the last company standing is Hauppauge. Its Media Center Remote Control Kit includes both basic RC6 remote and receiver.
 Caption: The Hauppauge remote does well for an off-the-shelf option, although it's not backlit. Hauppauge
Otherwise you'll want an MCE (Media Center Edition) RC6 compatible remote and receiver, which you'll find mostly as old stock on eBay. As a general guide, HP receivers are generally well-received, while remote choice is entirely up to you. If you own a Logitech Harmony, it can emulate an RC6 remote, although be warned there's a noticeable delay in button response. If you do go the RC6 remote route, don't forget to check out the custom registry hack that gives you a lot more functionality.
Optional extras
For the gamer, the Xbox 360 controller is one of the strongest options, working out of the box with Kodi. To take it wireless, you'll need to purchase the Xbox 360 Wireless Gaming Receiver, which may be difficult to find these days outside of eBay. As a plus, the Xbox 360 controller can be used to control basic Kodi functions.
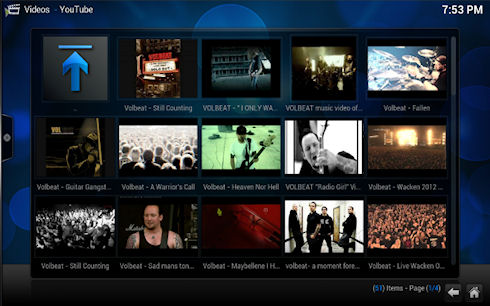
Kodi can also be controlled using your smartphone, although you will have to enable Kodi's webserver through the Services settings first. For Android users we'd suggest Yatse [Play Store link]. while on iOS the XBMC official remote [iTunes link] is the way to go.
The Xbox 360 controller can pull double duty as a remote for Kodi. Kodi
By now, your Kodi install should be up and running. Join us next time for the finer points of using Kodi, getting Blu-ray functionality down and starting to tap in to the myriad customisation options offered by the software.

It is almost time to upgrade XBMC to Kodi Media Center and this post will show you how to do that on Windows, Linux, Android, and OS X. Kodi entertainment center is already in Release Candidate stage. and the final release may be out anytime now. Kodi introduces several changes in this release, including name change from the famous XBMC to Kodi. As a matter of fact, the new official logo was just released. Sometimes upgrading from one release to another can be challenging. In this post, let us see how to upgrade XBMC to Kodi or technically 13.2 Gotham to 14.0 Helix on Windows, Linux, Android, and OS X. [Read: 10 of the Best XBMC Addons in 2015 ]
XBMC to Kodi Upgrade on WindowsUpgrading XBMC Kodi on Windows is extremely easy. As always, first backup your XBMC settings and library so you can go back to it in case something breaks. To do this, navigate to C:\Users\UserName\AppData\Roaming and copy the folder named XBMC and paste it to a backup location of your choice. To restore, copy this back back to the original location replacing any existing XBMC folder. [Read: 15 XBMC keyboard shortcuts you should know ]
Download Kodi Entertainment Center
Updating XBMC to Kodi on Linux works pretty much the same way as Windows. Once again backup your settings before upgrading, using the following command. [Read: 5 Best XBMC skins for Raspberry Pi ]
Next, you will need the Kodi repositories installed on Ubuntu and related Linux distros. To do that, run the following command:
Then refresh the packages cache and install Kodi using the following commands:
Your XBMC libraries and settings from /home/user/.xbmc should be automatically migrated to Kodi media center /home/user/.kodi. Open Kodi to ensure that everything works as expected. Then proceed to uninstall XBMC using the following command:
You may also choose to delete the settings folder /home/user/.xbmc. That’s it you are done upgrading Gotham to Helix.
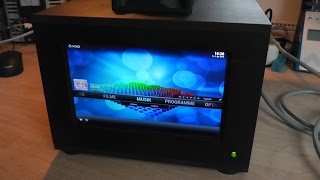
Build a Low-Cost Raspberry Pi Media Center
Kodi is designed to be the perfect companion for your HTPC (abbreviation: Home Theatre Personal Computer ), a personal computer, equipped with software and in some cases hardware, allowing to use it as a computer for home theater. Supporting an almost endless number of different remote controls and is equipped with a beautiful interface and powerful mechanism to change skins, Kodi very easy to manage from the couch and is the ideal solution for your home cinema. Install this program on your PC will turn it into a fully functional multimedia device.
- Kodi can play all your music including AAC, MP3, FLAC, OGG, WAV and WMA formats. It has cue sheet, tagging support, MusicBrainz integration, and smart playlists for ultimate control of your music collection.
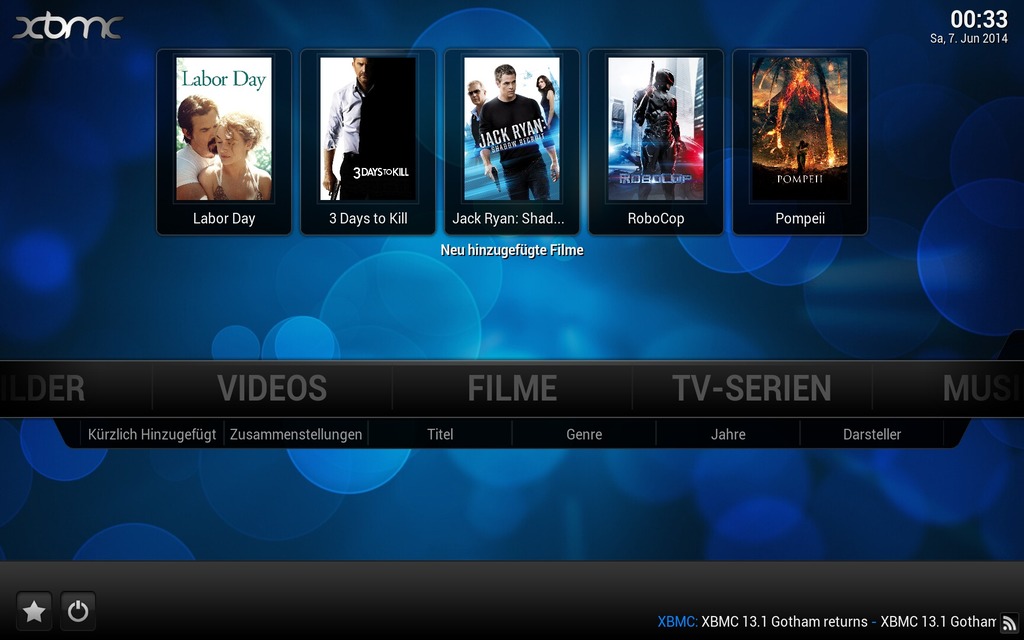
- Kodi can do movies too! Supporting all the main video formats and sources, including streamable online media, ISOs, 3D, H.264, HEVC, WEBM. Kodi can import these movies with full posters, fanart, disc-art, actor information, trailers, video extras, and more.
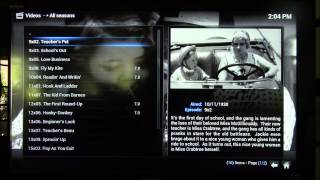
- The TV shows library supports episode and season views with posters or banners, watched tags, show descriptions and actors. Video nodes/tags and smart playlists can further organize your library for special interests, making specific screens for sci-fi, anime, etc.
- Import pictures into a library and browse the different views, start a slideshow, sort or filter them all using your remote control.
- Kodi allows you to watch and record live TV all from the GUI interface. It works with a number of popular backends including MediaPortal, MythTV, NextPVR, Tvheadend, VDR, Windows Media Center, and more.
- Take Kodi to a whole new level with the vast selection of community created add-ons that are available though our repositories. There are add-ons for videos, music, changing Kodi’s behavior, popular web services, adding more artwork, controlling your lights, and much much more. See which ones are currently available: Add-ons
- Kodi allows you to completely change the whole GUI. Thanks to the highly customizable skinning engine you are able to change every aspect of Kodi. Choose from dozens of community created skins, each with their own set of options, or create your own dream UI. See which ones are currently available: Skins
- With UPnP compatibility you can stream to and from any other Kodi instances and play to other UPnP compatible devices in your home with ease. Have one UPnP master device and use other Kodi instances as clients which automatic keeps you watched status and library up-to-date. You can also now import from uPnp sources to synchronize your data inside instances of Kodi.
- Interact with Kodi using its JSON-RPC based remote interface. This brings loads of possibilities for remote controls, web browsers and 3rd party tools to take Kodi to the next level.
- With support for hundreds of remote controls. CEC-compatible TVs, or one of the new Smartphone and Tablet Apps. Kodi allows you to control your media your way.
Installation into Linux Mint 17/17.1/17.2 :
Kodi (was XBMC) is an award-winning free and open-source (GPL) software media player and entertainment hub that can be installed on Linux, OS X, Windows, iOS, and Android, featuring a 10-foot user interface for use with televisions and remote controls. It allows users to play and view most videos, music, podcasts, and other digital media files from local and network storage media and the internet.
Kodi (was XBMC) is an award-winning free and open-source (GPL) software media player and entertainment hub that can be installed on Linux, OS X, Windows, iOS, and Android, featuring a 10-foot user interface for use with televisions and remote controls. It allows users to play and view most videos, music, podcasts, and other digital media files from local and network storage media and the internet.
Ugh. What a lousy interface. Typical of a "let's try to port it to Mac OS" mindset. Now I understand why; this was originally developed for the XBox. Figures.
I installed this on a NAS box and chose a couple different themes to see if one were better than the other. They all stunk. There is no sense of elegance, intuitiveness or naturalness in the presentation or navigation. I immediately uninstalled and prefer navigating via the Finder, which is horrible itself, but even so, infinitely preferable to XBMC.