


 Рейтинг: 4.8/5.0 (1831 проголосовавших)
Категория: Windows: Сканеры, сниферы
Wi-Fi, or IEEE 802.11, is the standard for wireless LANs, or WLANs. The abbreviation Wi-Fi stands for Wireless Fidelity, and resembles the Hi-Fi acronym. It represents a whole collection of protocols within the same family of Ethernet and Token Ring.
IEEE 802.11 sends network packets from the sending host to one (Unicast ) or more (Multicast /Broadcast ) receiving hosts.
The 802.11 protocols specify a wireless shared network, which means that the maximum bandwidth is only available to one user at a time.
 See the CaptureSetup/WLAN page for instructions how to capture from WLAN's (including monitor mode), and see the CaptureSetup page for general information on capturing on WLAN's and other media.
XXX - add a brief description of 802.11 history
802.11 vs. "fake Ethernet" captures When capturing with Wireshark (or other tools using libpcap/WinPcap, such as TcpDump / WinDump ) there are two ways in which 802.11 can be supplied by the system and stored in a capture file:One ICMP Ping Request and response session from Station(STA1 to station(STA2) via Access point(AP)
ICMP ECHO request
ICMP Echo request (802.11 data packet with source STA1, Destination STA2, To DS bit set) This packet is transmitted from STA1 and received by AP
ACK(802.11 control packet, dest STA1) This packet is transmitted by AP and recieved by STA1
ICMP Echo request (802.11 data packet with source STA1, Destination STA2, From DS bit set) This packet is transmitted by AP and received by STA2.
ICMP ECHO Response
ICMP Echo response(802.11 data packet with source STA2, Destination STA1, To DS bit set) This packet is transmitted from STA2 and received by AP
ACK(802.11 control packet, dest STA2) This packet is transmitted by AP and recieved by STA2
ICMP Echo response (802.11 data packet with source STA2, Destination STA1, From DS bit set) This packet is transmitted by AP and received by STA1.
XXX - Add example traffic here (as Wireshark screenshot).
The 802.11 dissector is fully functional. It supports WEP and WPA/WPA2 decryption (see HowToDecrypt802.11 for details) and 802.11n.
Capturing 802.11 traffic can be tricky, see CaptureSetup page for instructions how to capture from WLAN's (including monitor mode) and other media.
Preference Settings802.11 is a complex protocol and Wireshark has a variety of 802.11-related preferences as a result.
The reassembly and retransmission settings can affect the way that higher-layer information is dissected and displayed. The FCS and Protection bit settings can affect how frames are decrypted. For detailed information about the decryption settings, see HowToDecrypt802.11.
You can also add 802.11-specific information to the packet list.
Example capture file Display Filter A complete list of 802.11 display filter fields can be found in the wlan. wlan_mgt. and wlan_aggregate display filter references.See CaptureSetup/WLAN page for instructions on how to capture from WLANs (including monitor mode).


If you’re a regular internet user, then you’ve probably found yourself in the following situation a lot more often than you care to imagine: so you’re away from home and you’re waiting for an important E-mail from your boss or maybe a family member. However, you don’t have access to the internet and even though you are aware that there are Wi-Fi hotspots around you, they don’t show up on your phone. So what can you do to get connected to the internet? Well, you can use a wifi password sniffer of course.
How to get Wi-Fi sniffer
Wi-Fi sniffer is an online application that you can download if you have an Android phone and then begin to sniff nearby networks and connect to the internet right away. In order to be 100% sure the app will work on your device, it has to be rooted and you also need to have the SU command installed.
After you’ve installed wifi sniffer android, you can start using it right away. The layout is also very intuitive and makes using the app very simple, so even if you never used such apps before, it’s going to be easy to figure it out. You can easily hack into any open Wi-Fi network you want and all you have to do is run the app and let it do its magic. Remember that no matter how hard you may think connecting to a Wi-Fi hotspot is, Wi-Fi sniffer for Android makes this a very simple task. From now on, connecting to the internet is going to be as simple as making a few taps on your phone.
In general, when a company or an individual sets up a wireless local area network and uses a wireless router, they can choose whether they want to broadcast the SSID to those in the vicinity or not. By doing so, everybody else will be able to detect the network when using portable devices that are Wi-Fi capable.
While some WLAN owners decide to password protect their network, others leave it unsecured which means that everybody can connect to it. The thing is that there are also a lot of WLAN owners that won’t broadcast the network’s name, with some common examples including private companies, certain coffee shops, stores and so forth.
Therefore, if you need to connect to the internet, but don’t have the password to do that, then you don’t need to worry about it. By using a wifi sniffer windows, you can easily connect to just about any network you want in just a matter of minutes.
Wi-Fi is available for free on the Google Playstore
Wi-Fi sniffer is a free app, so you can just search it on the Google Playstore and then install it right away. According to the reviews posted online about it, connecting to the internet with is a lot faster and easier and it can be done in about 5 taps if you’re using it for the first time.
Часто для анализа и устранения конкретной проблемы нужно взглянуть на реальный SIP-трафик от 3CX Phone System 3CX или от VoIP-клиента.
Кроме того, Техническая Поддержка 3CX может попросить Вас дать информацию по SIP-трафику. чтобы проанализировать проблему более подробно.
Чтобы собрать SIP-трафик:
1. Загрузите и установите приложение для сбора. В данном примере мы используем Wireshark (распространяется бесплатно ), который можно загрузить с www.wireshark.org
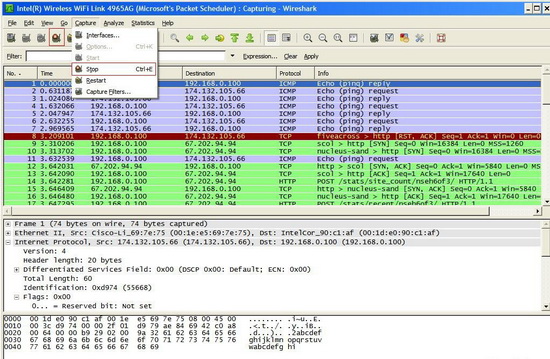
2. Включите интерфейсы в меню. Перейдите в Capture > Interface
Теперь выберите сетевой интерфейс, для которого будет отслеживаться трафик и нажмите на кнопку Start. после этого вы сможете видеть всю информацию и проходящих через этот интерфейс пакетах.
3. Для того чтобы отслеживать только SIP-трафик,ведите слово SIP в поле Filter и нажмите Apply .
4. Повторите действие, которое вы хотите проанализировать (например, регистрацию на VoIP-провайдере, или исходящий вызов).
В главном окне программы будут отображаться только SIP-пакеты. После завершения, вы можете сохранить данные через меню File .
by Chris Hoffman on October 14th, 2014
Wireshark, a network analysis tool formerly known as Ethereal, captures packets in real time and display them in human-readable format. Wireshark includes filters, color-coding and other features that let you dig deep into network traffic and inspect individual packets.
This tutorial will get you up to speed with the basics of capturing packets, filtering them, and inspecting them. You can use Wireshark to inspect a suspicious program’s network traffic, analyze the traffic flow on your network, or troubleshoot network problems.
Getting WiresharkYou can download Wireshark for Windows or Mac OS X from its official website. If you’re using Linux or another UNIX-like system, you’ll probably find Wireshark in its package repositories. For example, if you’re using Ubuntu, you’ll find Wireshark in the Ubuntu Software Center.
Just a quick warning: Many organizations don’t allow Wireshark and similar tools on their networks. Don’t use this tool at work unless you have permission.
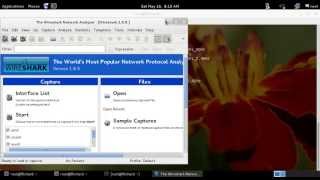
Capturing PacketsAfter downloading and installing Wireshark, you can launch it and click the name of an interface under Interface List to start capturing packets on that interface. For example, if you want to capture traffic on the wireless network, click your wireless interface. You can configure advanced features by clicking Capture Options, but this isn’t necessary for now.
As soon as you click the interface’s name, you’ll see the packets start to appear in real time. Wireshark captures each packet sent to or from your system. If you’re capturing on a wireless interface and have promiscuous mode enabled in your capture options, you’ll also see other the other packets on the network.
Click the stop capture button near the top left corner of the window when you want to stop capturing traffic.
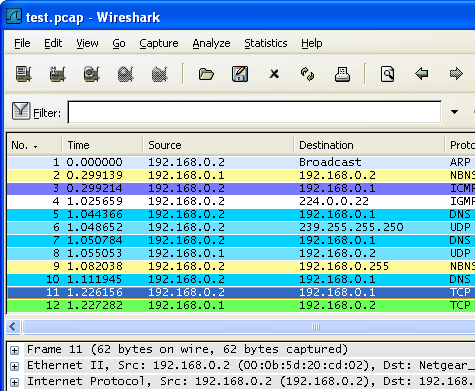
Color CodingYou’ll probably see packets highlighted in green, blue, and black. Wireshark uses colors to help you identify the types of traffic at a glance. By default, green is TCP traffic, dark blue is DNS traffic, light blue is UDP traffic, and black identifies TCP packets with problems — for example, they could have been delivered out-of-order.
Sample CapturesIf there’s nothing interesting on your own network to inspect, Wireshark’s wiki has you covered. The wiki contains a page of sample capture files that you can load and inspect.
Opening a capture file is easy; just click Open on the main screen and browse for a file. You can also save your own captures in Wireshark and open them later.
Filtering PacketsIf you’re trying to inspect something specific, such as the traffic a program sends when phoning home, it helps to close down all other applications using the network so you can narrow down the traffic. Still, you’ll likely have a large amount of packets to sift through. That’s where Wireshark’s filters come in.
The most basic way to apply a filter is by typing it into the filter box at the top of the window and clicking Apply (or pressing Enter). For example, type “dns” and you’ll see only DNS packets. When you start typing, Wireshark will help you autocomplete your filter.
You can also click the Analyze menu and select Display Filters to create a new filter.
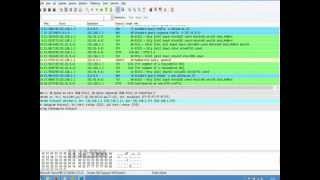
Another interesting thing you can do is right-click a packet and select Follow TCP Stream.
You’ll see the full conversation between the client and the server.
Close the window and you’ll find a filter has been applied automatically — Wireshark is showing you the packets that make up the conversation.
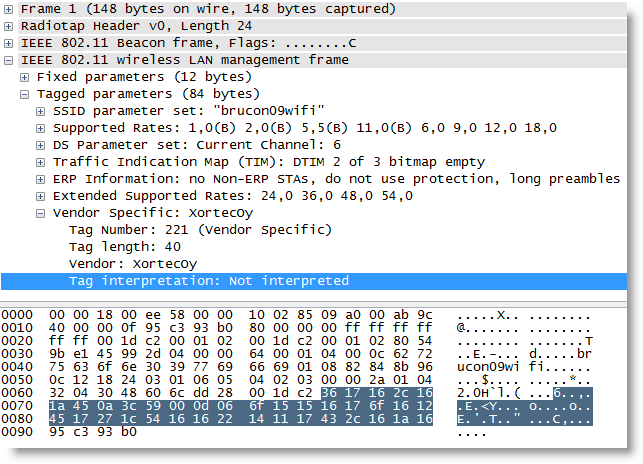
Inspecting PacketsClick a packet to select it and you can dig down to view its details.
You can also create filters from here — just right-click one of the details and use the Apply as Filter submenu to create a filter based on it.
Wireshark is an extremely powerful tool, and this tutorial is just scratching the surface of what you can do with it. Professionals use it to debug network protocol implementations, examine security problems and inspect network protocol internals.
Wireshark, взлом и защита в открытых wi-fi сетях — https://www.youtube.com/watch?v=Ge7M-FeSHA0
Описание протокола ARP — http://goo.gl/hnZN5M
Команды используемые в видео:
Включаем форвардинг ip-forwarding пакетов:
echo «1» (здесь знак «меньше’’) /proc/sys/net/ipv4/ip_forward
Настраиваем IPtables для перенаправления интернет трафика. С 80 порта на любой другой, у меня это 8080 порт :
iptables -t nat -A PREROUTING -p tcp —destination-port 80 -j REDIRECT —to-port 8080
netsh interface ipv4 add neighbors «Подключение по локальной сети» «192.168.1.1» «xx-x-xx-xx-xx-xx»
В этом видео я постарался подробно рассказать про так называемый ARP-спуфинг (arp-spoofing) и защиту от него. Это атака благодаря которой можно украсть пароль от сайта, перехватить cookie или сессии, скомпроментировать работу через защищенное подключение HTTPS и многое другое. В видео я использовал Kali Linux 1.0.6, ettercap-graphical, sslstrip, webspy и прочие инструменты. Вы также узнаете что такое ARP-протокол и MAC-адрес. Надеюсь что вам будет интересно!
Wireshark является программой-анализатором сетевых пакетов с исходным кодом. Без какого-либо специального оборудования или перенастройки эта программа может перехватывать входящие и исходящие данные на любом сетевом интерфейсе компьютера: Ethernet, WiFi, PPP, loopback и даже USB. Обычно Wireshark применяется для выявления проблем в сети, таких, как перегруженность, слишком долгое время ожидания или ошибки протоколов. Но для того, чтобы изучить Wireshark. совсем не нужно ждать, когда произойдет какая-либо поломка. Давайте приступим к обзору этой программы.
Wireshark написан на библиотеках GTK+ и имеет графический интерфейс (GUI). Но помимо GUI, есть консольная реализация программы по имени TShark. обладающая тем же функционалом, что и ее графический вариант. Так как программа очень популярна в качестве административного инструмента для анализа сетей, она имеется в репозиториях практически любого дистрибутива Linux. Есть версии программы под Windows и Mac OS X. Если по каким-либо причинам вы не смогли найти ее в своих репозиториях Linux, всегда можно скачать готовые сборки под различные дистрибутивы с официального сайта. Или же скачать, собрать и установить программу из исходников.
Сразу стоит обратить внимание, что запуск Wireshark необходимо производить с правами root. так как для перехвата трафика программе нужны привилегии суперпользователя для перехода в так называемый неразборчивый режим (" promiscuous mode "). Ядром Wireshark является библиотека libpcap. с помощью которой и производится перехват данных. Программа имеет встроенную поддержку очень большого количества сетевых устройств. Проверить. будет ли ваша сетевая карта работать под этой программой, можно на странице wiki проекта Wireshark. Но практически все современные Ethernet и Wifi карты не имеют каких-либо проблем с совместимостью в этой программе.
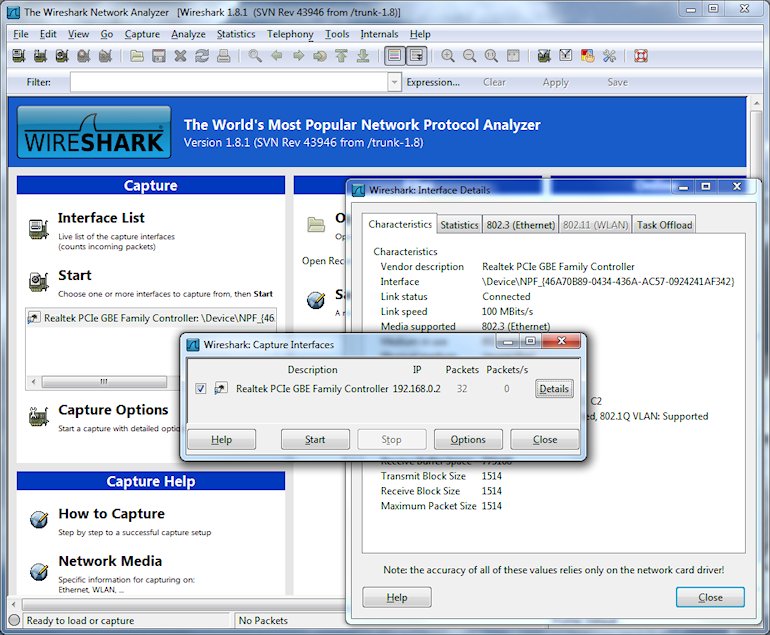
Перехват трафикаЗапуск новой сессии перехвата производится в окне программы из меню "Capture ". Чтобы увидеть весь список сетевых интерфейсов, которые смогла обнаружить Wireshark. перейдите по пути в меню "Capture > Interfaces ". Появится диалоговое окно, в котором, помимо физических устройств, будет присутствовать псевдо-устройство "any ", которое перехватывает данные со всех других устройств этого списка.
Перед началом можно задать некоторые опции, с которыми будет запускаться перехват. Перейдя по "Capture > Options ", достаточно выбрать:
- фильтры для выборочного анализа трафика (например, по определенному протоколу или диапазону адресов);
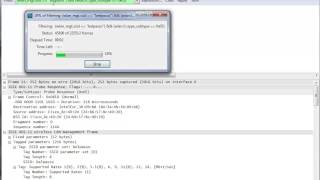
- автоматически остановить перехват по достижении указанного в настройках времени;
- отсортировать полученные данные по указанному размеру или дате.
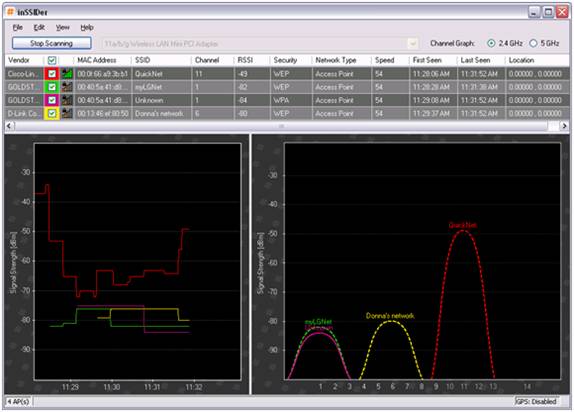
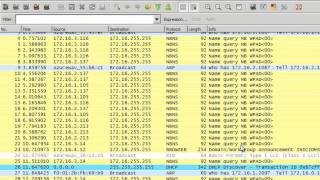
Первое, что вы увидите при запуске новой сессии - окно лога, где будет показываться основная информация о выполняемом программой процессе: источник, приемник, протокол, время и т.п. Вся информация организована в виде таблицы с заголовками. Для большей удобочитаемости Wireshark выполняет цветовое выделение фрагментов текста, изменение цвета фона или пометку наиболее "интересных" пакетов с помощью флагов.
Продолжительность перехвата зависит от того, какую информацию вы бы хотели получить в результате. Например, для анализа и решения трудноопределимых проблем, связанных с работой Интернет-сервисов, потребуется несколько часов. Зато для ознакомления с основными возможностями программы будет достаточно всего нескольких минут.
Для анализа любого полученного пакета достаточного выбрать его в окне логов. Однако, делать это целесообразно после остановки перехвата данных. Подробная деталировка интересующего пакета будет представлена в отдельном древовидном окне, в котором все его составляющие будут рассортированы по сетевым уровням. К примеру, если у вас есть проблемы с Ethernet, вам нужно анализировать Ethernet-фреймы; если же это протокол HTTP, то вам нужно "погружаться" в уровень протокола http.
Вы всегда можете сохранить перехваченные данные для их дальнейшего анализа. Wireshark сохраняет полученные данные в файл с расширением .pcap.
Однако, будьте внимательны, так как этот файл может быть достаточно большим. Поэтому, если вас интересует только определенная часть всего сетевого трафика, вы можете воспользоваться фильтрами Wireshark для урезания объема этого файла. Система фильтров располагается в том же окне, что и общая таблица перехватываемых данных. Используйте эти фильтры для уменьшения объема файла, перед тем, как сохранить его на диск.
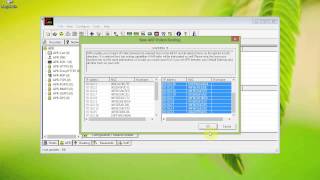
Анализ данныхСистема фильтров является основным способом преобразования полученных данных в нужный вам формат. Для того, чтобы выбрать нужный фильтр, щелкните на кнопке "Filter " в окне программы. Появится окно с опциями на выбор: только TCP; только UDP; все IP-адреса, кроме локальных; все, кроме DNS и ARP; и многие другие. При выборе любого фильтра из списка в окне синтаксиса Wireshark будет отображена полная команда, представляющая собой фильтр в его "развернутом" виде. Это полезно для изучения синтаксиса Wireshark при написании собственных фильтров.
Например, фильтр "Не получать данные по протоколу HTTP и SMTP с адреса 192.168.0.1 " будет выглядеть следующим образом:
not (tcp.port == 80) and not (tcp.port == 25) and ip.addr == 192.168.0.1
Щелкните кнопку "Применить " ("Apply ") и Wireshark отфильтрует в главном окне перехваченные им данные. Конечно, вы можете написать и затем сохранить свой собственный фильтр, нажав кнопку "Расширения " ("Expression "); Wireshark позволяет вручную выбрать логические операторы и известные поля, которые вы можете использовать при составлении своих собственных фильтров.
Меню "Анализ " ("Analyze ") содержит набор более сложных заранее предустановленных опций фильтрации.
1 ."Enable Protocols " предоставляет вам возможность включить или отключить протоколы;
2 ."Specified Decodes " позволяет декодировать определенные протоколы, что может быть полезным при диагностике конкретно выбранного приложения;
3 ."Follow TCP Stream " поможет выбрать отдельное соединение по TCP-протоколу и проследить его состояние от начала и до конца; подобные опции имеются для UDP и SSL-соединений;
4 ."Expert Infos " извлекает сообщения об ошибках и флаги предупреждения (такие, как потерянный или не в очереди сегмент) для быстрого обнаружения проблемы.
Меню "Статистика " ("Statistics ") предоставляет более общий обзор всего набора перехваченных данных. Это меню содержит предустановленные функции для анализа общих параметров сети и предоставляет их в удобном табличном виде. Если вы исследуете сетевой трафик вашей сети в первый раз, этот инструмент поможет вам понять основные принципы ее функционирования. Здесь вы можете проанализировать такие данные, как время ответа; размеры фрагментов, на которые разбиты пакеты; трафик на уровне ссылок и приложений.
Wireshark также может выводит полученную информацию в графическом режиме, что облегчает ее восприятие. Перейдя в "Graphs tool " в меню "Статистика " ("Statistics "), вы можете выбрать пять фильтров для сравнения файлов позаголовочно с помощью выделения различными цветами.
Начало анализаКак уже упоминалось в начале этой статьи, основной профиль для анализа трафика в Wireshark - всего лишь инструмент, с помощью которого вы можете выяснить причину странного поведения какого-либо оборудования и источник этого поведения. К сожалению, этот способ не является таким уж легким при выявлении корня проблемы, например, в случае слишком большого времени ожидания или низкой пропускной способности.
Конечно, если в вашей сети имеется зомби-машина, зараженная трояном, вы легко можете обнаружить его, например, как спам-бот, если видите тысячи SMTP-соединений, запущенных в течение одного часа. Обнаружение вирусов и вредоносных программ является важной задачей анализа. Но определение причины, почему один из ваших файловых серверов работает чуть медленнее, чем остальные, может потребовать от вас более глубоких исследований.
Обучающие материалы по этой программе на сайте проекта Wireshark являются незаменимым подспорьем. Wiki имеет несколько страниц, посвященных основным проблемам сети. а также ссылки на другие источники с подобной информацией. Представлена информация по другим программам сетевого анализа и анализа безопасности, таким как Nagios. EtherApe. NMap и tcpdump. Большинство исследований проблем в сети требуют понимания сути стеков протокола TCP/IP, поэтому одна или две хорошие книги по этой тематике потребуются наверняка.
В Wireshark включено множество возможностей по анализу вашей сети, когда вы исследуете ее в поисках источника проблем. Например, вы можете запустить статистическое сравнение между двумя сохраненными файлами перехвата трафика; это позволяет вам выполнить захват, когда вы только изучаете проблему, а затем сравнить их снова.
Другими словами, вы можете собрать и сравнить файлы захватов с разных машин, например, в различных сегментах сети или с различными конфигурациями. Это тем более полезно, так как имеются сборки Wireshark для проприетарных операционных систем: при выяснении проблем с производительностью вам может потребоваться собрать информацию с различных источников.
Экстра возможности: визуализация, альтернативные перехватыНесмотря на то, что инструменты анализа и фильтрации, заложенные в графическом интерфейсе Wireshark. предоставляют большие возможности для перехвата трафика, возможности GUI этим не ограничиваются.
Имеется множество примеров того, что представление отчетов в графическом режиме выдает информацию в таком виде, который никогда не смогут представить таблицы. Имеются множество инструментов, расширяющих возможности Wireshark в качестве визуализации, написанных для этой программы. Но все (или почти все) они являются платными. Но хочу успокоить вас - они вам не потребуются.
Wireshark может экспортировать захваченные данные в файл формата CSV, который в дальнейшем вы можете открыть в любом другом приложении, например, в обыкновенной электронной таблице, наподобие Gnumeric или OpenOffice. или в таком статистическом пакете, как R или gnuplot. Хорошие приложения для анализа вы можете найти на forensicswiki.org. Список этих приложений постоянно меняется. К примеру, популярный движок анализа Freebase Gridworks был преобразован в проект Google Refine. который может визуализировать сетевой трафик значительно более удобным способом.
И последнее, но не менее важное. Хотя Wireshark почти всегда позиционируется как сетевой инструмент для анализа, правда заключается в том, что он может анализировать и другие устройства, такие как USB -трафик и даже Unix-сокеты между приложениями.
Подводя итог вышесказанному, можно отметить, что после прочтения этой статьи у вас есть знания и возможности по экспериментированию с Wireshark.
Today was the 2nd day in the CWAP (Certified Wireless Analysis Professional) beta course. Today’s material was a lot more hand-on / lab type exercise in capturing and analyzing traffic. From what I could tell, there were three main tools used by the course attendees:
They all seem to have their pros and cons, and they all seem to cost about the same amount of money (especially if you want to do multichannel packet capture on
3 channels). Which tool do you prefer? Why?
The course contains an enormous amount of detail, such as the exact length (in microseconds) for slot times for each PHY type as well as a discussion on the application of that detail (i.e. how do the different slot times affect WLAN performance with and without QoS enabled).
Again, I thought one of the most valuable things were the networking opportunities with the other attendees and the sidebar conversations. A colleague (and good friend) of mine, Ken Hall. was even inspired to sign up for a Twitter account (@wifiscubaguy ) to continue the interaction outside of this course / classroom. His account will definitely be on my next list of #WirelessWednesday mentions.
Tomorrow is the last day of the course. From what I know, we are covering a lot of 802.11n concepts, as well as spectrum analysis, which should be a blast.
Laura Chappell Webinars on Wireshark CertificationIf you haven’t heard, there is now a Wireshark certification. From the Wireshark University website :
The Wireshark Certification Program strives to test a candidate’s knowledge and ability to troubleshoot, optimize and secure a network based on evidence found by analyzing traffic captured with the world’s most popular and widely-deployed analyzer, Wireshark.
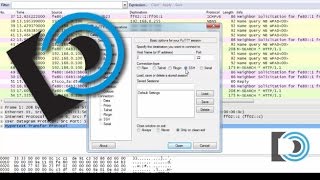
To that end, Laura Chappell is hosting a series of FREE Webinars over the next 3 days to discuss the exam. Again, taken from the Wireshark University website :
These free events cover the process of preparing and registering for the Wireshark Certified Network Analyst Exam. What should you study? How should you study? What are the hot areas on the Exam? What are the Exam question formats? What should you watch for? What if you need to reschedule the Exam? What can you bring with you?
Live question and answer will follow a 20-minute presentation hosted by Laura Chappell.
All the information you need should be available on the following website:
Sharkfest ’09I admit it, I am getting jealous with all my colleagues Twittering about the RSA Conference this week at the Moscone Center in San Fransisco. While the idea of heading to RSA hit me too late to make the logistics work, something that I am planning ahead for is Sharkfest 2009. What is Sharkfest. you ask?
Sharkfest is a conference dedicated to the optimization of the Wireshark Protocol Analyzer. which is now owned and managed by CACE Technologies. It is a 3 day conference being held near San Fransisco at Stanford University. The official dates for the conference are June 15th – 18th, 2009.
The conference has three tracks – one for basic users, one for advanced users, and one for developers. I am pretty sure that you can mix and match sessions from all three tracks. The cost of the conference is only $695 per person. and each paid attendee gets a free AirPcap Classic adapter ($198 value), which lets you do 802.11 b/g packet capture in Windows, directly through Wireshark. Groups of 3 or more are also eligible for a 10% discount.
If you have been following my blog. you know that I am a wireless packet junkie. I am attending Sharkfest with a couple other Principal Technologists from Xirrus. It looks like they have a great speaker lineup with Mike Kershaw (Kismet creator), Fyodor, Laura Chapell, etc. Of course, they will have Wireshark engineers and developers on-hand as well.
If you are interested in registering for Sharkfest. I would suggest doing it soon. This is the second year for the conference and the conference organizers told me that they are limiting the number of attendees so that it doesn’t grow out of hand too quickly. As someone who attended the first several Shmoocon conferences. I can tell you that you want to get in on the ground floor.
Related Posts:
Packet Analysis 2.0It seems like I am going to bring my wireless packet analysis to a whole other level – “Packet Analysis 2.0”, if you will. Two of my favorite wireless capture and analysis tools have recently been updated – OmniPeek Professional and Wireshark .
I have been at meetings at our company HQ (Xirrus) most of this week, so I haven’t had a lot of hands-on time with either updated tool.
OmniPeek Professional has just been updated to version 6.0.1, as of April 3rd. It seems to offer much more flexibility of viewing multiple data windows through mechanisms similar to tabbed browsing.
I also downloaded a few plug-ins for OmniPeek Professional. including the multichannel aggregator – once I acquire one more USB 802.11n dual-band adapters, I will try to write a blog post documenting my experiences with the aggregation feature.
The new version of Wireshark seems to focus on a lot of bug fixes, although it includes an experimental package for Mac OS X 10.5.5 and above. Version 1.0.7 of Wireshark was announced April 8th. On the Wireshark front, I am attending Sharkfest this June. which I am pretty excited about.
Now that I am thinking about wireless product upgrades, I realized that AirMagnet also came out with an updated version to their Site Surveyo r product about six weeks ago (version 6.1_13206)
So many product updates, so little time…
Related Posts:
Adventures in Capturing Wireless PacketsJust a quick FYI for those *true* WiFi packet analysis junkies out there – I installed OmniPeek Professional 5.1.4 on my HP 6910 laptop. The software “works” with embedded Intel wireless NIC, but reports invalid data rates for 802.11n traffic.
The work around that I came too was to purchase a 3rd party, dual-band 802.11n USB adapter that has a supported API within the OmniPeek software.
I also have an AirPcap Nx device from CACE Technologies that I like *very* much – USB form factor that allows for wireless packet capture in Windows. AirPcap integrates directly into Wireshark. which is nice since I “grew up” taking wireless captures in Lib PCAP format under Linux and looking at them in Ethereal.
 Did you knew every time you fill in your username and password on a website and press ENTER, you are sending your password. Well, of course you know that. How else you’re going to authenticate yourself to the website. But, (yes, there’s a small BUT here). when a website allows you to authenticate using HTTP (PlainText), it is very simple to capture that traffic and later analyze that from any machine over LAN (and even Internet). That bring us to this website password hacking guide that works on any site that is using HTTP protocol for authentication. Well, to do it over Internet, you need to be able to sit on a Gateway or central HUB (BGP routers would do – if you go access and the traffic is routed via that).
But to do it from a LAN is easy and at the same time makes you wonder, how insecure HTTP really is. You could be doing to to your roommate, Work Network or even School, College, University network assuming the network allows broadcast traffic and your LAN card can be set to promiscuous mode.
So lets try this on a simple website. I will hide part of the website name (just for the fact that they are nice people and I respect their privacy.). For the sake of this guide, I will just show everything done on a single machine. As for you, try it between two VirtualBox/VMWare/Physical machines.
p.s. Note that some routers doesn’t broadcast traffic, so it might fail for those particular ones.
Step 1: Start Wireshark and capture trafficIn Kali Linux you can start Wireshark by going to
Application > Kali Linux > Top 10 Security Tools > Wireshark
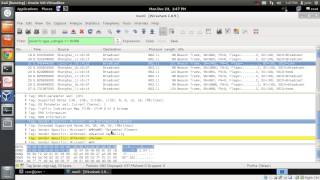
In Wireshark go to Capture > Interface and tick the interface that applies to you. In my case, I am using a Wireless USB card, so I’ve selected wlan0 .
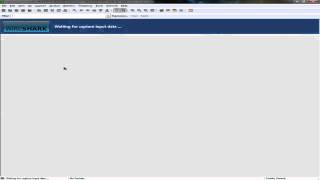
Ideally you could just press Start button here and Wireshark will start capturing traffic. In case you missed this, you can always capture traffic by going back to Capture > Interface > Start
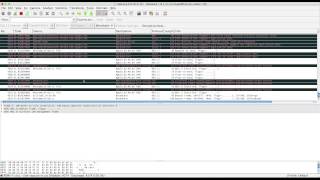
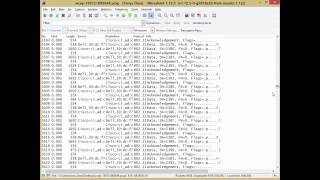
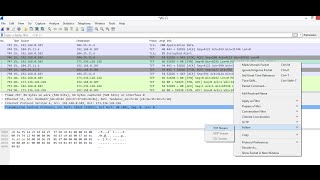
Step 2: Filter captured traffic for POST dataAt this point Wireshark is listening to all network traffic and capturing them. I opened a browser and signed in a website using my username and password. When the authentication process was complete and I was logged in, I went back and stopped the capture in Wireshark.
Usually you see a lot of data in Wireshark. However are are only interested on POST data.
Why POST only?Because when you type in your username. password and press the Login button, it generates a a POST method (in short – you’re sending data to the remote server).
To filter all traffic and locate POST data, type in the following in the filter section
http.request.method == “POST”